- Home
- Knit Basics
- Decrease a Stitch
How to Decrease a Stitch in Knitting
Use for Shaping and Lace
Decrease a Stitch was Revised by Janice Jones on 12-11-2022
Stitches are used to create patterns in knitted fabric. Decreasing stitches means fewer stitches will remain after the pattern has been completed. There are several ways to reduce the number of stitches on your needles. Each has its pros and cons.
Different techniques of decreasing allow you either to make decreases hardly visible or, on the contrary, make them clearly visible in the knitted fabrics. This way they will create additional decorative effect to your design.
When used in shaping such as when making an armhole for a sweater, it is important that the decreases slant in the way you want them to.
For this reason, we will call them left-slanting or right-slanting decreases and they are normally made on both sides of a row. If done properly, the left- slanting and right-slanting decreases will mirror each other, which means that they must slant in opposite directions, be the same size, and should be in the same position in relation to each other. In other words, you want the decreases to match. The human eye loves to see symmetry.
Decreases are also used when creating lace and I will touch on this later in the article.
Slipping a Stitch
Many of the techniques on this page require you to slip a stitch. Slipping a stitch is simply passing a stitch from the left needle to the right needle without knitting or purling it.
To slip a stitch knitwise, insert the right needle into the next stitch to be knitted but do not knit. Pull the stitch off of the left needle and place it on the right needle. The unworked stitch is now on the right needle.
To slip a stitch purlwise, insert the right needle into the next stitch to be purled, but do not work it. Pull the stitch off the left needle and place it on the right needle. The unworked stitch is now on the right needle.
Decrease a Stitch: Index
There are dozens of ways to make increases which designers use for the decorative purposes. In this tutorial I will be discussing these different methods:
Right-Leaning Decreases
- K2tog Decrease (Knit 2 Together)
- KSP Decrease (Knit, slip, pass decrease)
- P2tog Decrease (Purl 2 Together decrease)
Left-Leaning Decreases
- SSK Decrease (Slip, Slip Knit)
- SKP Decrease (Slip, Knit, Pass Decrease)
- SSP Decrease (Slip, Slip Purl)
Ways to Improve Your Decreases
Decrease a Stitch: Right-Slanting
Method One: K2tog and P2tog
You can make decreasing either in the knit row ( K2tog = knit 2 stitches together) or in the purl row (p2tog = purl 2 stitches together ).
- (k2tog) produces a right
hand slant on the knit side of the fabric. (p2tog) makes a
left slanting slope on the purl side.
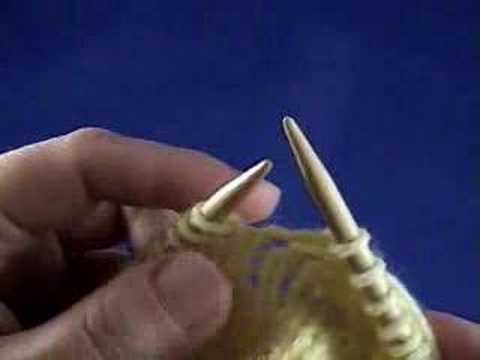
- To knit two stitches together in the knit row, insert your right needle tip thought two
stitches at once on the left-hand needle, then knit them as if they are a single
stitch.
- To knit two stitches together in the purl row, insert the tip of your right-hand needle thought two stitches at once, then purl them as if they are a single stitch.
I would like to remind you , that all knitting stitches and technique are EXACTLY the same for both CONTINENTAL and English style of knitting.
K2tog
P2tog

Method 2: KSP (Knit, Slip, Pass)
KSP stands for Knit, slip, pass and it is another form of a right-slanted decrease.
To make the KSP:
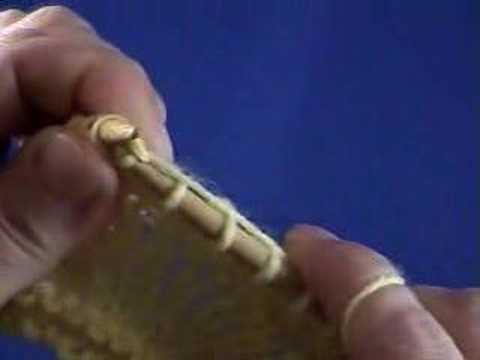
- Knit one stitch and return it to the left needle
- Pass the stitch to the left of the one you just knitted over the knit stitch
- Return the stitch to the right needle
Decrease a Stitch: Left-slanting
Method 1: SSK (Slip, slip, knit)
When shaping a garment, you will need a left-slanting decrease to mirror the right-slanting decrease. The SSK works well with the K2tog.
It can be done either in the knit row: ssk= slip, slip, knit 2 stitches together. Decreasing a stitch in the purl row has abbreviation ssp= slip, slip, purl 2 together.
SSK will produce left-slanting decrease in the knit row. SSP will look as a right-slanting decrease in the purl row.
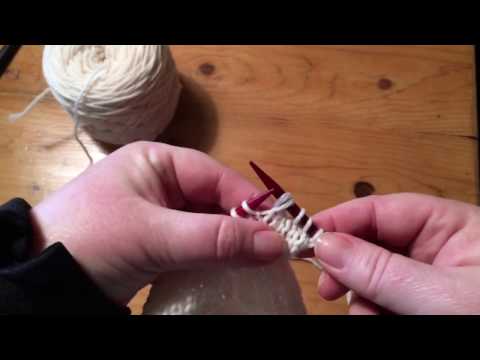
To Make a SSK:
- Slip two stitches from the left-hand needle onto the right-hand needle, one at a time.
- Insert the left needle into the front of the two slipped stitches and knit them together.
TIP: The SSK decrease is not as easy to make as the K2tog and therefore, these decreases often show up as larger stitches on the fabric. Use your needle tips to work the decrease and try to manipulate as little as possible otherwise they become stretched and look larger.
Slip, Slip Knit (SSK)
Slip, Slip Purl (SSP)

Method 2: SKP (Slip, Knit, Pass)
For this method, you will do the following:
- Slip the next stitch to be knitted and place on the right needle.
- Knit the next stitch.
- Pass the slipped stitch over the knit stitch and off the needle.
- You have just decreased one stitch.
This is a more common decrease in British or Japanese publications, but not as common in the U.S.
Decrease a Stitch: Double Decreases
Double decreases are often used when you are knitting lace. You could do a K3tog (knit 3 together) or a P3tog (purl 3 stitches together) but you won't see this method used very frequently. There are two commonly made double decreases:
- S2K1P (Slip 2, Knit 1, Pass)
- S1K2P (Slip 1, Knit 2, Pass)
How to Pair Double Decreases
Sometimes double decreases will be paired so that one will slant in one direction and the other will slant in the opposite direction. This is done for the same reason I mentioned above, for symmetry.
There are also a couple of ways to make a double decrease if you don't want the decrease to point to the left or right.
Double Decreases in Knitting: S2K1P: Slip 2, Knit 1, Pass
This type of decrease is used for making lace, but it is also used when you might be making a V-neck sweater or vest. It is the type of decrease that is created in the center of a ribbed band and creates the V for the V-neck sweater.
To Make the S2K1P:
- Slip two stitches together from the left-hand needle to the right-hand needle
- Knit the next stitch on the left needle
- Pass the two stitches that you slipped over the knit stitch and off the needle.
You can see that the center stitch is on the top.
Double Decreases in Knitting: S1K2P: Slip 1, K2, Pass
The difference between the S1K2P is where the center stitch appears. In the S1K2P, the center stitch is on the bottom.
To make the S1K2P:
- Slip one stitch knitwise
- Knit the next two stitches together
- Pass the slipped stitch over the stitches that you knit together.

Ways to Improve Your Decreases in Knitting
Disclosure: This post contains affiliate links, which means if you make a purchase from one of these links I will get a small commission.

Hi, there, I'm Janice, the voice behind this website and avid knitter and crochet enthusiast. I want to share my passion with you and help you learn how to knit or crochet, smarter.


Most Popular Pages
How to Crochet the Second Row

Dog Sweater Patterns

Working with Alpaca Yarn

Free eBooks, Just for You
Get my beginner eBook guides to Knitting and Crocheting, just for signing up for my monthly newsletter.
Choose one or both when you sign up.


Thank you for visiting Smart-Knit-Crocheting. I hope this and all of my tutorials will give you the inspiration to continue your knit or crochet journey. For a complete list of all the pages on my site, please visit my table of contents.
I participant in the Amazon Services LLC Associates Program, an affiliate advertising program designed to provide a means for sites to earn advertising fees by advertising and linking to Amazon.com. “As an Amazon Associate I earn from qualifying purchases.” These earnings go towards supporting my website.

Home | Contact | About | Privacy Policy | Disclaimer
I DO NOT SELL ANY PERSONAL INFORMATION FROM THIS WEBSITE. PLEASE SEE MY PRIVACY POLICY FOR MORE DETAILS.
Copyright © 2006-2024 Smart Knit Crocheting. All Rights Reserved
Please Share
Remember, Sharing is Caring