- Home
- Make a Knit or Crochet Garment
- Crochet Slipper Pattern
Crochet Slipper Pattern: Easy Granny Squares That are Beginner-Friendly
Crochet Slipper Pattern Re-written by Janice Jones
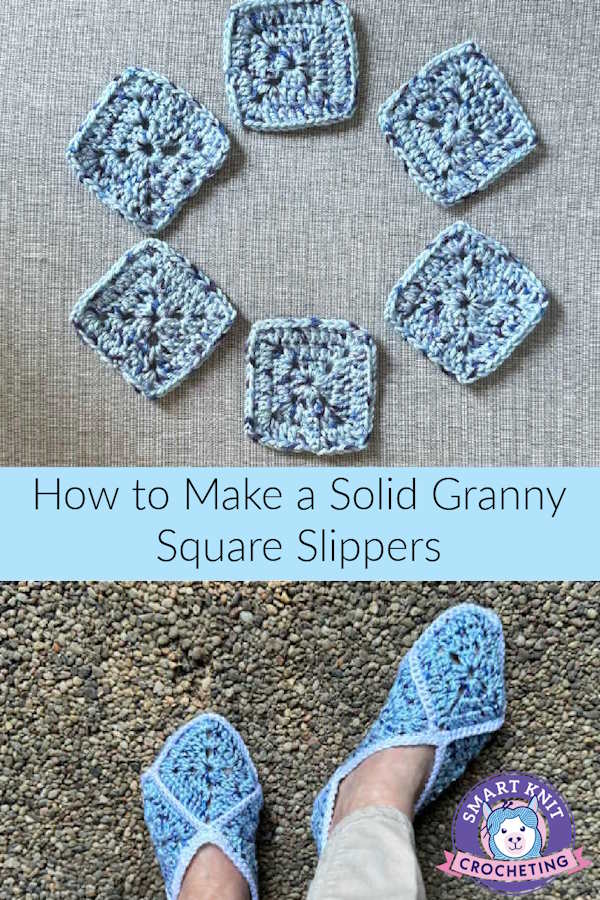
Granny Squares are super easy to learn and perhaps one of the first type of motif that a beginner learns, memorizes and masters. The following pattern walks you through the process of making a solid granny square, followed by how to sew them together to create a pair of crocheted slippers.
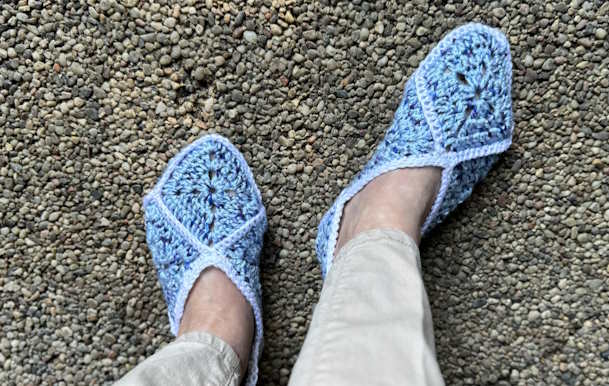
I remember these slippers from my childhood. My grandma crocheted them for the whole family. There is nothing special in this pattern, but like any handmade item, it brings you some warm feelings and lots of comfort. Those that love vintage or retro, this is the perfect project.
How to Make the Crochet Slipper Pattern
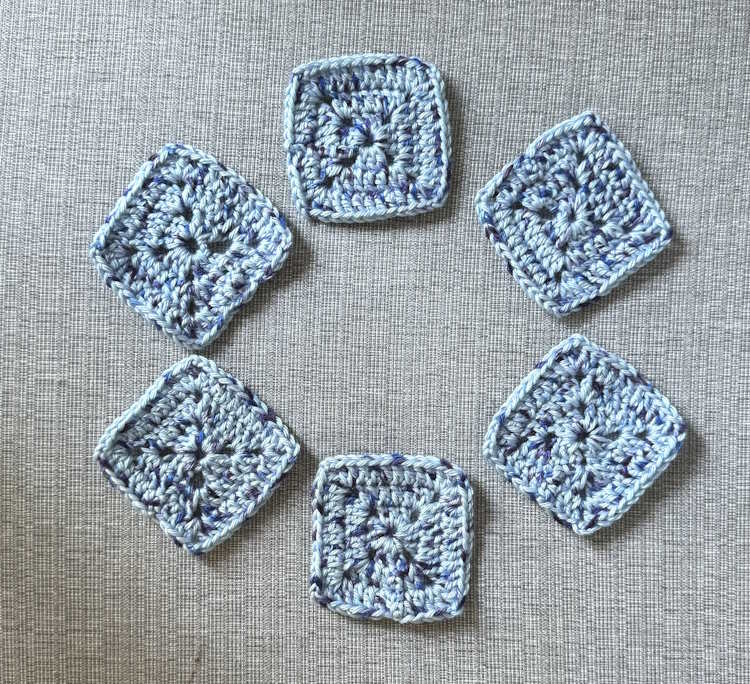
To make a slipper you will need 6 Solid Granny Squares.
These slippers work up so fast that even an intermediate or advanced crocheter will love this tight design.
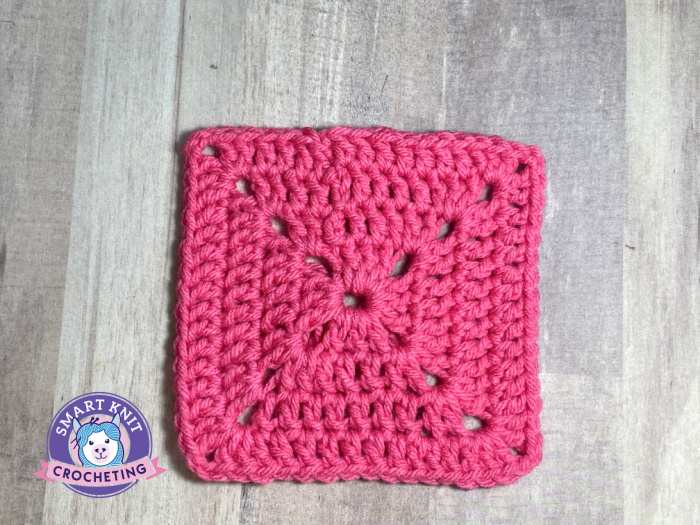 Solid Granny Square Used in the Crochet Slipper Pattern
Directions for Making the Solid Granny Square
Skill Level

Easy
Skills Needed to Complete this Project
Blocking (Optional but recommended)
Sewing Seams: See below
Materials Needed for the Crochet Slipper Pattern
- Worsted weight (CYC #4 Acrylic yarn) or yarn of your choice (I used Yarnspirations CARON Simply Soft Speckle in colorway Galaxy) The trim was worked with white yarn.
- Crochet Hook (I used a US 7 & or 4.5mm)
- Scissors
- Tapestry Needle for weaving in ends
Abbreviations
sc: single crochet
dc: double crochet
ch st: chain stitch
sl st: slip stitch
ch: chain
rnd: round
Notes
This pattern uses US Terms.
If you are in the UK, US dc = UK tr
Sizes:
Ladies: You will work 6 squares with 3 rounds each.
Men: Or larger sizes, work 6 sqares with 4 rounds each.
Finished Size
One finished solid granny square measures 3 inches square or 8 cm.
Directions for Making a Solid Granny Square
TIP: To avoid weaving in too many tails, After creating your circle of four chains, hold the tail and work over it as you make your double crochet stitches. That should secure the initial tail so there will only be one tail to weave in per granny square
Ch 4. Join to make a circle with a slip knot. Chain 5.
Round 1: Ch 5 (counts as dc plus 2 for corner). *Work 3 dc into center of circle, ch2 for corner.* Repeat from * twice more. Ch 2, Make 2 dc and slip stitch into 3rd ch.
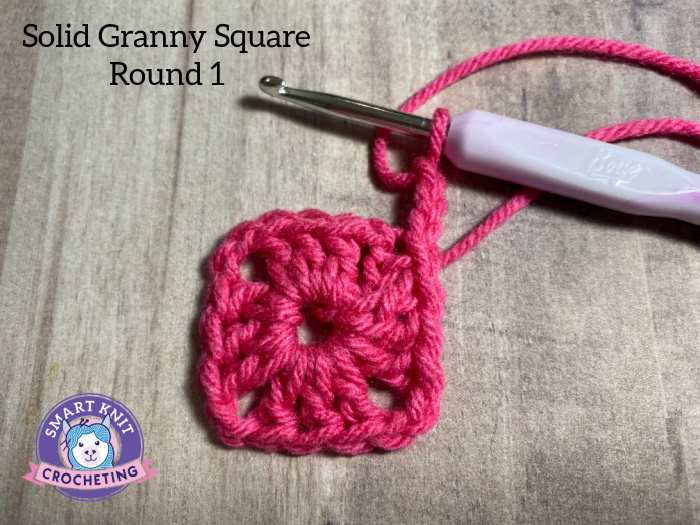 Solid Granny Square Round One Completed
Round 2: Ch3. *In corner space, 2 dc, ch2, 2 dc. Work 3dc into the top of the three stitches from previous round.* Repeat from * twice more. In corner space, 2dc, ch2, 2 dc. Make 2 dc and join with slip stitch to top of ch3.
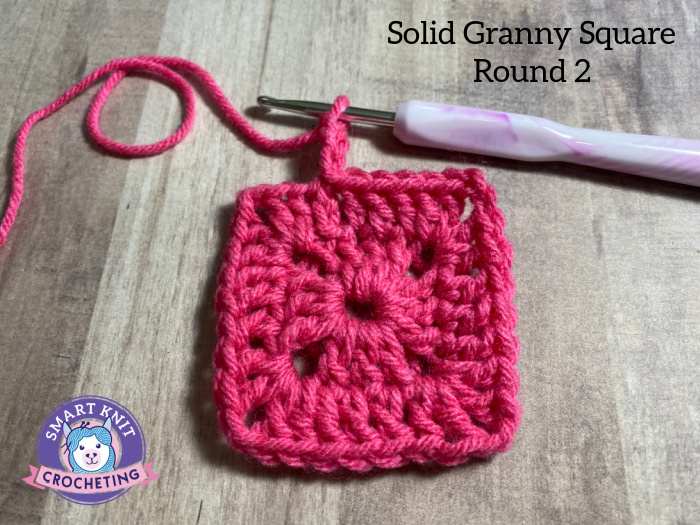 Two Rounds were completed in this solid granny square motif
TIP: Sometimes it's a little difficult to get your hook into that first stitch from the corner. Pull on your work, to open up the stitch.
Round 3: Ch 3, make 2dc and then *make a corner (2dc, ch2, 2dc), then work 7 dc*. Repeat from * twice more. Make a corner (2dc, ch2, 2dc) and then 4dc, join with a slip stitch to ch3 from previous row.
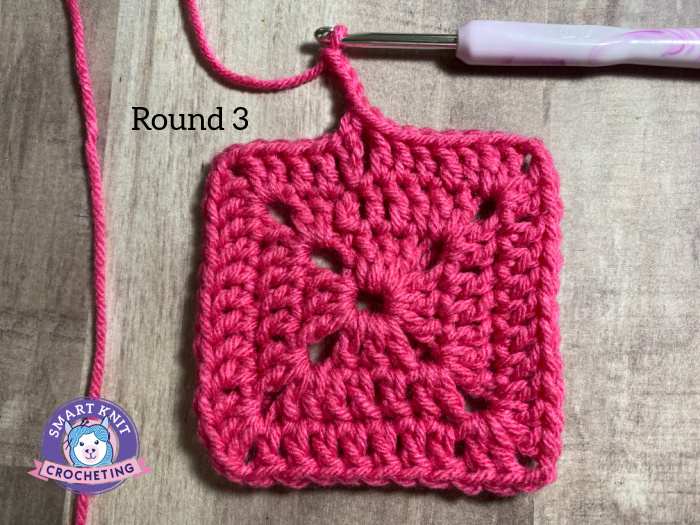 Three rounds completed
Round 4: Ch 3 Make 4 dc, then *make a corner (2 dc, ch2, 2dc), work 11 dc in the tops of the previous row's dc sts. * Repeat twice more. Make a corner (2 dc, ch 2, 2 dc), then 6 dc. Join with a sl st to Ch-3. Fasten off. Weave in ends.
Each round increases by 4 stitches.
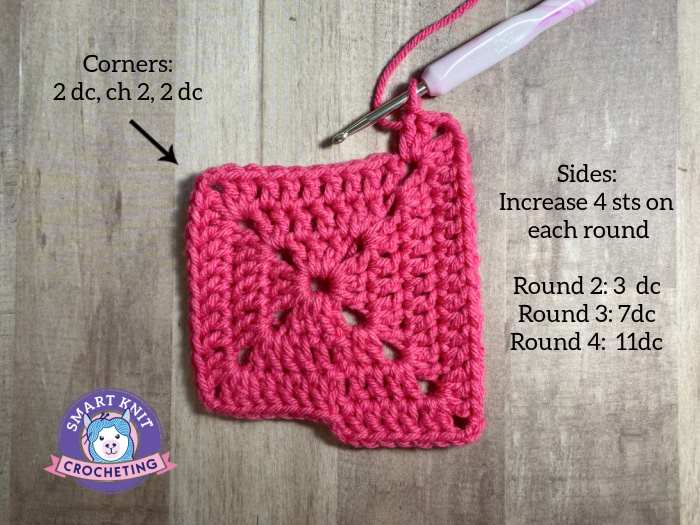 The fourth and final round of the solid granny square
Make 12 solid granny squares total for slippers. (6 for each slipper).
You may decide to block your squares for a more professional look and weave in ends before begining assembly
Arranging the Squares for Sewing
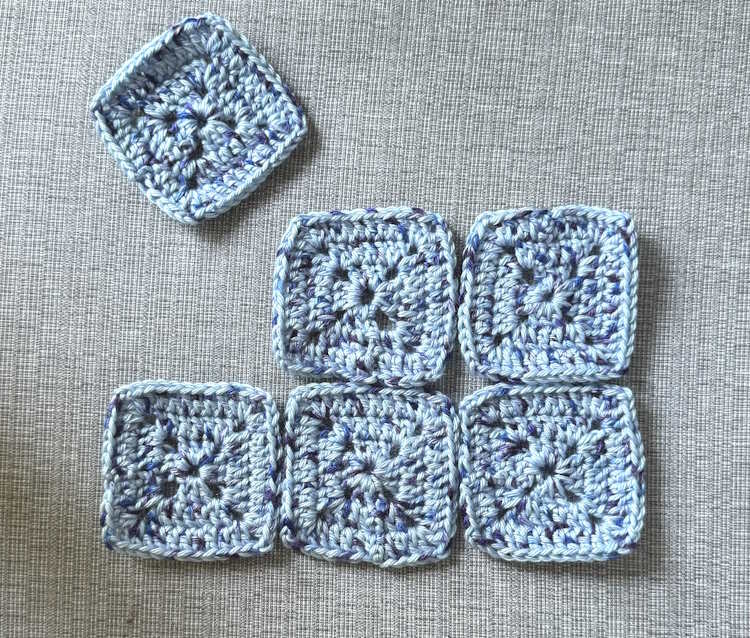
How to Sew the Squares Together into the Crochet Slipper
There are more than these two ways to sew your squares together. I will provide directions for the slip stitch and the single crochet method.
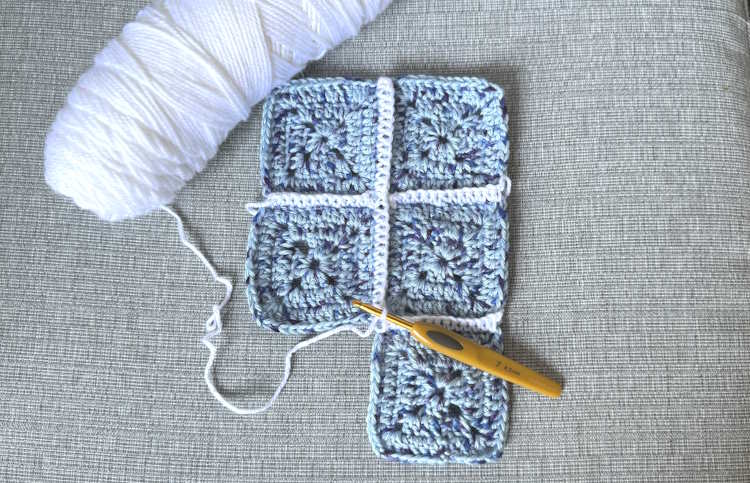
1. Slip Stitch Method for Attaching Squares
With right sides facing, align the side to be crocheted. You may want to place a stitch marker at each end and one in the middle to keep the sides from falling apart.
Working into the back loops only, insert your hook first into one square and then into the corresponding stitch on the second square. Yarn over and pull through both loops. Do the same across the row.
2. Single Crochet Method for Attaching Squares
With wrong sides facing, align the edge you are going to sew.
Begin with a slip knot in the yarn you will be using for sewing.
Insert the hook into the center of the corner space, first though one square and then through the corresponding center of the corner space on the other square.
Yarn over and pull through both loops on each square. There are two loops on the hook. Yarn over and pull through both loops. (One single crochet hook).
Continue in this manner.
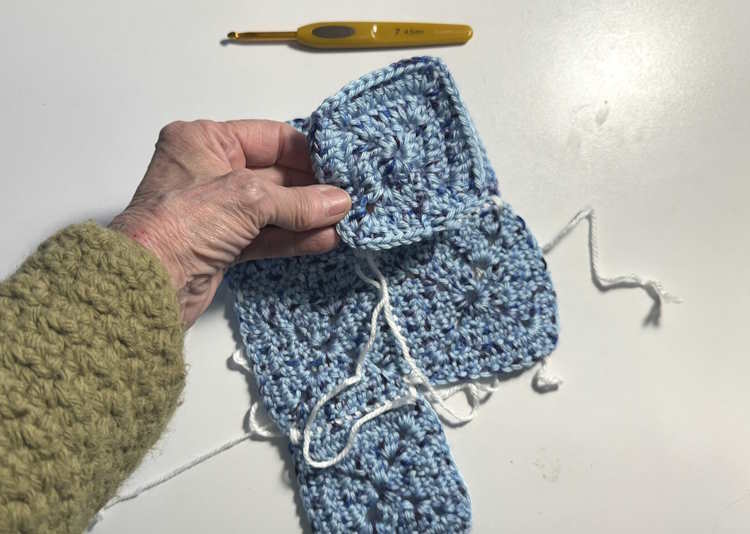
Assembling the Squares
Choose your favorite way to sew the granny squares together. First, sew five of the squares as shown below. The wavy lines show where the seams should be placed.
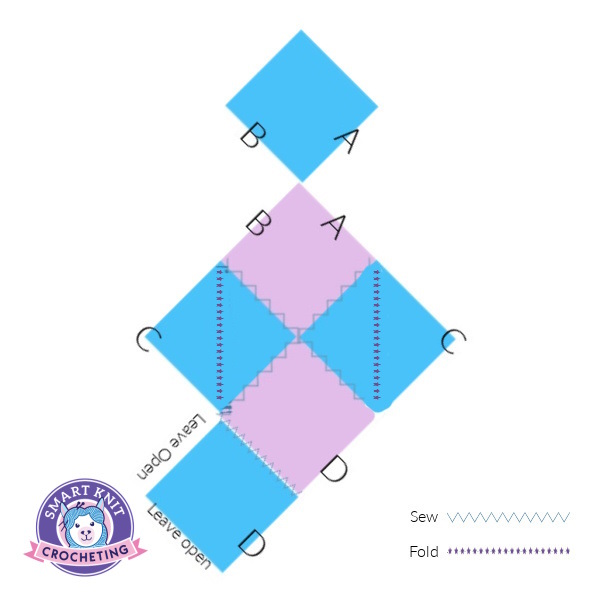
Place the last square (top blue) on top of the top purple square. This is the one that will cover the toes. Sew side A to the other side A. Sew side b to the other side B. The other two sides of the top blue square will be left open and will become the opening where the foot is inserted.
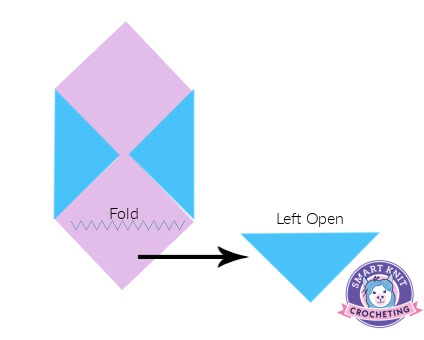
Once you have sewn the top toe area to the bottom sole area, the slipper should look like the one shown above.
Sew the top toe square to the sides.
Sew the last side (heel). Leave the other two sides of this square open.
Tips for Finishing the Slippers
To make slippers look finished, crochet an edging around the opened edges. There are several ways to do this.
Simple Single Crochet Around the Edges
Work a single crochet stitch in each stitch around the top of the slipper. Easiest.
Modified Single Crochet Stitch
Alternate 1 single crochet and 5 chain stitches along the whole length of the top part. Or, alternate 5 single crochets and one chain stitch around the top.
Create a Picot Edge
Create a picot stitch edging for a more decorate look. Learn how to do the picot stitch.
Crochet Slipper Pattern
Pin For Future Reference
Conclusion
This is an easy project that even a beginner can master with some practice. These slippers make a great gift or gift them to yourself. If you need something lightweight for warmer weather consider a cotton or cotton-blend yarn. Have fun and get creative.
