- Home
- How to Crochet
- Weaving in Ends Crochet
Weaving in Ends Crochet: Methods and Tutorials
A Crocheter's Finishing Touch
Weaving in Ends Crochet by Janice Jones
An intrinsic part of crochet is the process of creating beautiful designs with colorful yarns. However, behind every crochet masterpiece is an equally significant final stage—the act of weaving in ends.
Do you like to weave in ends? To be honest, many people hate this last step, but it is critical if you want your handmade piece to stay in one piece.
 How to Weave in Ends Crochet Fabric
Why Must we Weave in Ends?
Weaving in ends in crochet is essentially a technique used to secure the loose ends of yarn left over after finishing a crochet project. It is important because you don’t want the ends to unravel after washing or wearing. Who wants that to happen, especially after you have taken so long to finish the project?
Why Not Just Tie a Knot?
This may seem like the perfect solution, but it’s not recommended. Knots, no matter how tight, will come loose over time. If you are making a wearable such as a sweater or hat, the knots will feel like hard bumps, and that is not comfortable.
But how does one perfect the art of weaving in ends crochet? Let's walk through this meticulous process and discover helpful tips to make it a breeze.
Supplies You Will Need:
- Tapestry needle or crochet hook.
- The 6-inch tail end from your project
- Scissors
When you finish your crochet piece, fasten it off and leave a 6-inch tail. You won’t be weaving the entire six inches, but you need that much to thread the needle and secure the ends.
 Supplies Needed for Weaving in Ends Crochet
What is a Tapestry Needle?
Tapestry needles, also known as darning needles or yarn needles, come in different sizes, shapes, and materials.
Size: The size you choose depends on the thickness of the yarn. Bulky yarns are going to require you to use a needle with a large enough eye so that you can thread the yarn through easily. Thinner yarns need smaller needles.
Tapestry needles do come in sizes the the exact size is not as important in knitting and crocheting as it is in needlepoint and cross stitch or embroidery.
Shape: Tapestry needles come with either a straight or bent tip. Some people find that bent needles pick up the yarn easier than straight needles, but it is really a matter of personal preference.
My advice to you is to buy an assortment and try them out to see which one feels right to you.
Material: Tapestry needles are made from plastic or steel. There again, this is a personal choice. Many yarn needles used for super bulky weight yarn are made of plastic, so you may not have a choice with these, but smaller needles are either plastic or steel. Plastic needles are great for kids, but most adults prefer ones made of steel. Again, it is a personal choice.
Alternatively, you could weave in the ends using a crochet hook. If you prefer a hook, I recommend going down a size or two.
Methods of Weaving in Ends
The weaving end process entails hiding the yarn's loose end within the finished piece. Before jumping right into the weaving process, consider the fabric. If possible, you want to work on the wrong side so the weaving does not show on the right side.
If both sides show, you will want to work into the woven stitches to make them as invisible as possible.
The Method You Choose Depends on the Stitches, Fabric and Color
Tall Stitches
 Weaving in ends Crochet: Double Crochet Stitches
If your fabric consists of tall stitches such as double or treble crochet stitches, you may be able to weave the ends through the posts of the stitches, hiding the tails inside the posts.
Small Stitches
 Weaving in ends crochet (Single Crochet Stitches)
If our fabric is made by single or half double crochet stitches, you may be able to work the ends horizontally through the stitches.
In either case, you will want to change the direction of your weaving at least 3 times in a zigzag manner. (More about that below). There are several ways to weave in ends crocheting.
Weave in the Yarn Tails as you Work

One preferred method is working in the ends as you crochet. Incorporate the loose end with your stitches as you progress. This saves time and makes your final product look seamless and clean.
Simply lay the yarn end on top of the row you're working on and crochet over it. The only problem with this method is that you are only weaving in one direction, and you will still need to go back and weave in a couple more directions to make it secure
Invisible Finish Weaving with a Tapestry Needle

A technique for weaving in ends is the invisible finish, where you weave the loose end in a path that mirrors the path of a yarn strand from a stitch.
Doing so conceals the end within the fabric, ensuring it blends seamlessly with the design. If you use this method, you may want to split the yarn with your tapestry needle and go inside the stitch so the end is encased in the stitch. Work about one inch, change direction, work one more inch, then change directions again.
This method works well for open-work crochet such as filet or lace. It’s also useful if the fabric you are creating will be seen on both sides such as a blanket, shawl, or washcloth.
Zigzag Weaving in Ends with a Tapestry Needle
Another common technique is zigzag weaving. It involves threading the yarn end onto a darning needle and weaving it in and out of the stitches, creating a zigzag pattern.
This not only hides the end but also fastens it securely onto the fabric. Weaving in three different directions is recommended for a secure finish.
Using a Crochet Hook to Weave in Ends

If you prefer, you can also weave in ends with a crochet hook. To do this, weave your crochet hook through the crochet fabric and then grab the tail end of the yarn and pull the yarn through.
You will still need to change directions several times working through the posts or bases of the stitches. The only difference is that you are pulling the yarn through with a hook instead of inserting a yarn needle.
Weaving in Ends of a Multi-colored Project

When working on a project with more than one color, you will need to ensure that you are only weaving in the ends for each individual color. For example, you would weave in the ends of Color A into the Color A fabric and weave in the ends of Color B into the Color B fabric.
Again, splitting the yarn a little helps make the ends nearly invisible.
Weaving in Ends in Multi-Ply Yarns

This does not work if your yarn is only a single ply, but if you have two or four plies, you can split the plies in half and weave in the plies separately by working in different directions.
This method works well for super bulky yarns where you don’t want to use a super big tapestry needle.
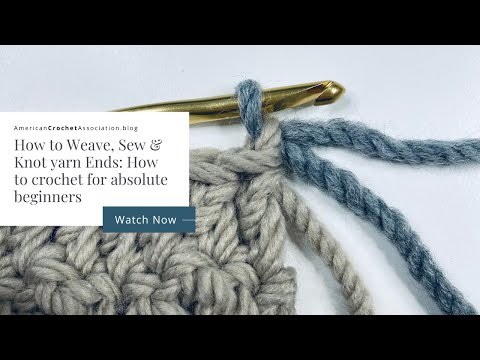
Weave in Ends Crochet Video
I found this video created by the American Crochet Association. I hope this helps.
Tips for a Perfect Finish
- Avoid pulling the end too tight, as this may distort the shape of your crochet
fabric and cause it to pucker.
- Always weave in ends in several different directions. Weaving in one direction will likely cause the ends to unravel.
- Beware of garment stress points such as the corners of a blanket or the underarms of a sweater. These points experience more movement, so it's crucial to weave in ends securely in these areas.
Conclusion
Weaving in ends in crochet may seem like an auxiliary part of crocheting, but it is undeniably a crucial part that can make or break the masterpiece you have invested significant time and effort in creating. After all, the final touches reflects the overall craftsmanship of a piece.
Novice or veteran, we hope these weaving-in-ends crochet techniques and tips will enhance your crochet creativity. Remember, at the heart of every crochet masterpiece is not just the vibrant patterns and cozy warmth but also the hidden art of weaving-in-ends that truly ties everything together.
Happy weaving and happy crocheting!
Weaving in Ends Crochet: Pin for Future Reference

Disclosure: This post contains affiliate links, which means if you make a purchase from one of these links I will get a small commission.

Hi, there, I'm Janice, the voice behind this website and avid knitter and crochet enthusiast. I want to share my passion with you and help you learn how to knit or crochet, smarter.
Most Popular Pages
All Types of Crochet Stitches

36 Reversible Knit Stitch Glossary

How to Crochet the Second Row

Dog Sweater Patterns

Working with Alpaca Yarn

Free eBooks, Just for You
Get my beginner eBook guides to Knitting and Crocheting, just for signing up for my monthly newsletter.
Choose one or both when you sign up.


About the Author: Please allow me to Introduce myself

I'm Janice, the voice and writer behind Smart-Knit-Crocheting. I'm passionate about crocheting and knitting, and I love sharing my passion with my readers. I've been knitting and crocheting daily for about five years, but I first learned from my grandmother as a child, many years ago.
I'm a certified knitting and crochet instructor from the Craft Yarn Council, and my goal is to present instructions and patterns in a way that's easy to understand for the absolute beginner. Always feel free to contact me if you have any questions or want to say hello.
Thank you for visiting Smart-Knit-Crocheting. I hope this and all of my tutorials will give you the inspiration to continue your knit or crochet journey. For a complete list of all the pages on my site, please visit my table of contents.
I participant in the Amazon Services LLC Associates Program, an affiliate advertising program designed to provide a means for sites to earn advertising fees by advertising and linking to Amazon.com. “As an Amazon Associate I earn from qualifying purchases.” These earnings go towards supporting my website.

Home | Contact | About | Privacy Policy | Disclaimer
I DO NOT SELL ANY PERSONAL INFORMATION FROM THIS WEBSITE. PLEASE SEE MY PRIVACY POLICY FOR MORE DETAILS.
Copyright © 2006-2026 Smart Knit Crocheting. All Rights Reserved
Please Share
Remember, Sharing is Caring