- Home
- How to Knit: Basics
- Mosaic Knitting
Mosaic Knitting
Most knitters love color, don't you? But if you are a beginner, you may be hesitant to go beyond your comfort level and investigate one of the many types of colorwork. Let's face it: Colorwork knitting usually is considered an intermediate skill level and for good reasons.
Colorwork techniques such as stranded and Intarsia can be intimidating, and when we get intimidated by a new technique, we may give up, which is never good.
Mosaic knitting may be the exception. Knitting has a long history, but mosaic knitting is new, well, less than 60 years old. It came to the knitting scene in the 1960s when Barbara Walker published her book Mosaic Knitting.
If you have been knitting for a while, you've likely stumbled across one of Barbara G. Walker's books. It may not be as familiar as Fair Isle, but I can tell you it is much easier to master because you will only be working with one strand of yarn at a time.


What is Mosaic Knitting?
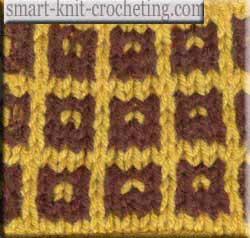
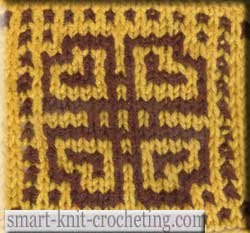
Mosaic knitting is a knitting technique that uses slipped stitches to create geometric patterns. The best part of this technique is that you only work with one color per row, so you don't need to master holding two or more yarns at a time while still trying to knit.
Mosaic knitting can be worked entirely with knit stitches (garter stitch pattern), knits and purls (stockinette stitch), or a combination. So, if you can make a knit stitch, a purl stitch, and a slip stitch, you can create some fantastic geometric designs using the mosaic knitting technique.
Mosaic fabric is not reversible because you will have some small floats on the back side when you slip your stitches. The floats are not as long as in Stranded or Fair Isle, so you won’t need to worry about catching them.
Getting Started: Materials You'll Need
- Yarn: Choose two highly contrasting colors of the same-weight yarn
- Knitting needles: Use the size recommended for your chosen yarn.
- Tapestry needle: For weaving in ends when you're finished.
- Scissors
- A simple mosaic knitting chart
Yes, most mosaic patterns are in the form of a chart, so knowing how to read a chart is necessary. Don’t worry; I’ll walk you through reading a chart and provide a pattern to make a swatch in written instructions. You can then try both and decide which one you like best.
Basic Techniques for Mosaic Knitting
To get started with mosaic knitting, you'll need to be comfortable with these basic techniques:
1. Knit stitch (K)
2. Purl stitch (P)
3. Slip stitch (Slst)
4. Reading a knitting chart
The Fundamentals of Mosaic Knitting
- You will need to remember a few “rules” when doing mosaic knitting.
- You will work with only one color per row and carry the colors up the side of the work.
- Slip stitches are used in this technique.
- Stitches are slipped purlwise, with yarn held in the back on the right side and in the front of the work on the wrong side of the fabric.
- Each row is worked twice, once with each color.
Reading a Mosaic Knitting Chart
Mosaic knitting patterns are presented in chart form. They are a little different from the ones I’ve written about here.
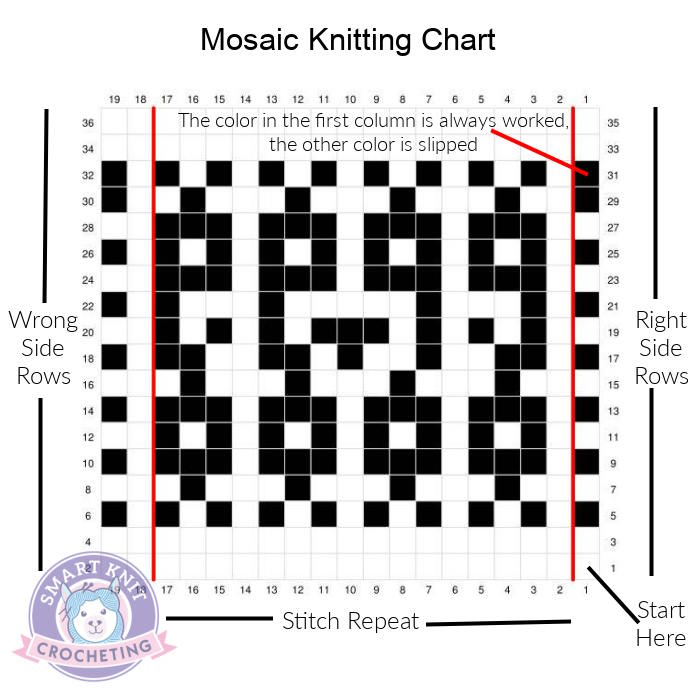
- Charts are created in two colors often printed in black and white. The black squares represent the darker color, and the white squares represent the lighter color.
- Each square represents one stitch.
- Read right-side rows from right to left.
- Read wrong-side rows from left to right.
- Begin at the bottom right-hand column. Read to the left for the right side and then read the same row from left to right for the wrong side.
- The first block of a right-side row will tell you whether to knit (or purl) or slip.
- If the first block is colored black, you will knit the stitches marked as dark yarn and slip the stitches marked as a white block.
- If the first block is white, you will knit the light-colored stitches and slip the stitches marked as black squares.
- When slipping stitches on the right-side rows, hold the yarn in the back.
- When slipping stitches on the wrong side rows, hold the yarn in the front.
- The numbers on the side of the chart count the rows. Numbers below the chart count the stitches.

Reading Mosaic Patterns in Written Form
Charts are great, but if you encounter a pattern written out, you should know how that might look.
Here are the abbreviations you will see:
- RS: Right side
- WS: Wrong Side
- Color A: The background color is usually used to cast on and knit the first row.
- Color B: The contrasting color
- K: Knit
- P: Purl
- Sl one wyib: Slip one stitch with the yarn held in front. (remember the slipped stitches are slipped purlwise)
- Sl 1 wyif: Slip one stitch with the yarn in the front.
- * * Work the instruction within the asterisks the number of times indicated
- Rep: repeat
Here is just an example of how it might look in a pattern:
Row 1 and 2: With color A, knit
Row 3: With B, K3, *sl 1 wyib, K3; rep from * across row.
Row 4: With B, K3, *sl 1 wyif, K3; rep from * across row.
Pros and Cons of Mosaic Knitting
Pros:
- Beginners find this method more manageable than other types of colorwork.
- Good for geometric designs.
- You only work with one color at a time.
- atching floats and twisting yarn, methods used in Stranded knitting and Intarsia are not needed.
- The fabric is less dense than stranded knitting, so it is not as warm. (Can also be a con)
- It can be worked flat or in the round.
Cons:
- It is not reversible, so it may not be a good choice when both sides of the fabric show
- Puckering can be a problem, so you may need to pay attention to your tension.
- Can be a bit slower to knit
- Blocking is essential after you finish your project.
- Typically limited to two colors.
Tips and Advice
- Always slip stitches purlwise: This keeps the stitches
facing in the correct direction. If you are working on the right
side of the fabric, hold your yarn in the back. (Sl 1 wyib). Keep your yarn in the front if you are working
on the wrong side (Sl 1 wyif).
- For best results, use two highly contrasting colors. Even
though the floats are short in this colorwork technique, tension can be a
problem. Keep your tension loose.
- You can use any method you like to keep track of your
progress. I use sticky notes for small charts and then make a pencil note
when I put them down for the evening. I also like to print out and enlarge the
chart, then check off each row as I finish using tally marks. You can also replicate the chart using Stitch
Fiddle and then download, print, or use their app to keep track of your work.
- For Mosaic and stranded knitting, I like to keep my working
yarn wrapped in balls placed in separate yarn bowls. That way, the yarn does
not get tangled as you work.
- If you get frustrated and want to give up, please don’t. Put it down and come back to it tomorrow with fresh eyes.
Conclusion
Mosaic knitting is a great way to get into colorwork. The fabric created with this technique is beautiful, and you will never run out of designs to try. Like everything else, it does take practice and focus to keep track of where you are in the chart.
References and Further Reading
- Vogue Knitting: The Ultimate Knitting Book
- Walker, Barbara G. A Fourth Treasury of Knitting Patterns
- Walker, Barbara G. A Second Treasury of Knitting Patterns
- Walker, Barbara G. Mosaic Knitting


