- Home
- Types of Knit Stitches
- Knit and Purl Stitches
- Garter Stitch
Knitting Garter Stitch - How to for the Absolute Beginner
By Janice Jones, Certified Knitting Instructor (CYC) Last updated December 2025
The Garter stitch is one of the first stitches a beginner knitter learns and also one of the most popular. Even if you never learn anything else, you can still make many beautiful projects simply with this stitch pattern.
This is such a versatile stitch, and it is the foundation of so many others. It can also be called the knit stitch because you use only one type of stitch.
In a pattern, you will see the knit stitch abbreviated k or K.
The Garter Stitch Characteristics
The garter stitch is the simplest of all the stich patterns used in knitting and is accomplished by knitting every stitch in the row then every row.
Use this stitch when you want something to stretch, when you want to create something which is reversible - both the wrong side and the front side look identical, and when you need the item to lay flat.
- It lies flat and doesn't curl like the stockinette.
- It's stretchy.
- It makes a good border stitch.
- It's reversible.
- It's the first stitch beginning knitters learn.
- Fabric made by the garter stitch is textured and thick.
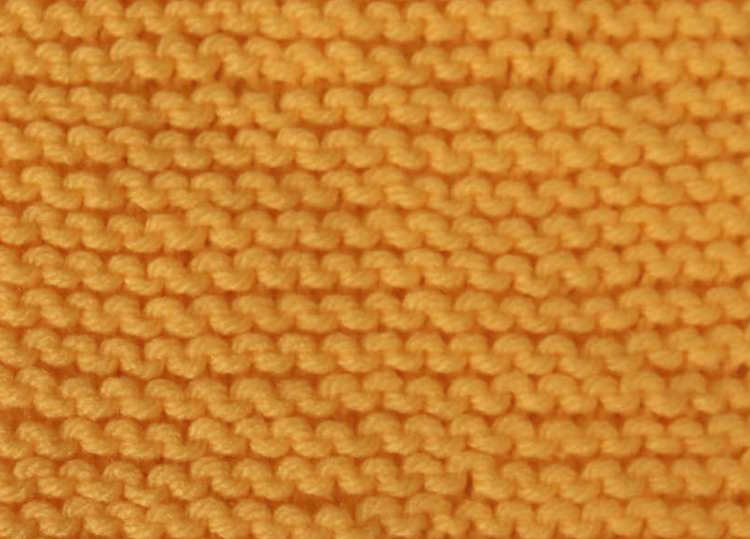 The Garter Stitch
Garter Stitch Directions
Let's get started. Before you can begin to make the garter stitch, you will need to know how to cast on, how to hold your yarn, and eventually how to bind off. I've got you covered for these skills.
How to hold yarn while knitting
For the purposes of this tutorial, I will be walking you through the steps of making a small garter stitch swatch, beginning with the knit stitch.
Supplies Needed for this Tutorial
- Yarn, preferably in a light color and a worsted weight (Craft Yarn Council Number 4). If you haven't read my tutorial on yarn labels, you might want to start there.
- Knitting Needles that correspond to the type of yarn you are using. For example if you have chosen a light colored worsted weight yarn, I would recommend a size US 7 (4.5 mm) or US 8 (5.0 mm) knitting needles.
- A pair of scissors for cutting yarn
- A tapestry needle for weaving in ends (more about that later)
Step 1: (Working on Straight Needles)
There are several ways to make the knit stitch.
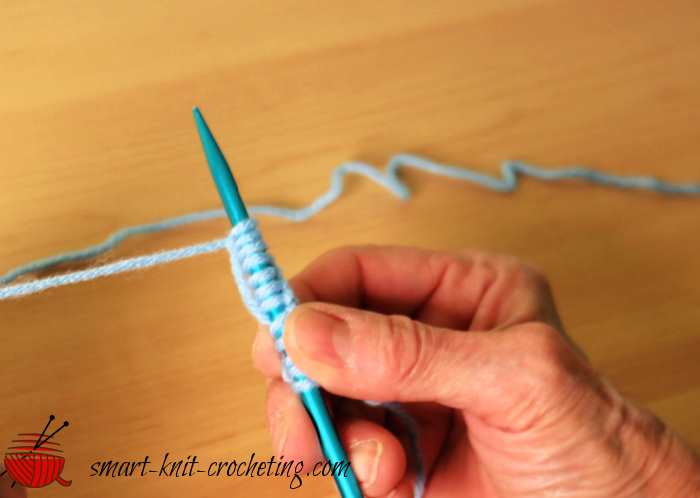 Casting on or the process of placing stitches on the needle is always the first step for any knitting project.
Start by casting on 16 stitches. Hold the needle with the cast on stitches in your left hand and the empty needle where you will do your work in your right hand.
Place the piece of yarn under and to the back of the stitch you will make.
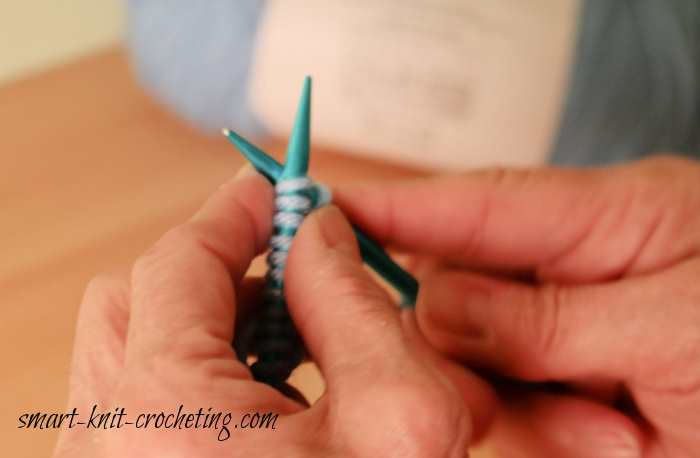
Step Two
Hold the yarn in the back of your needles.
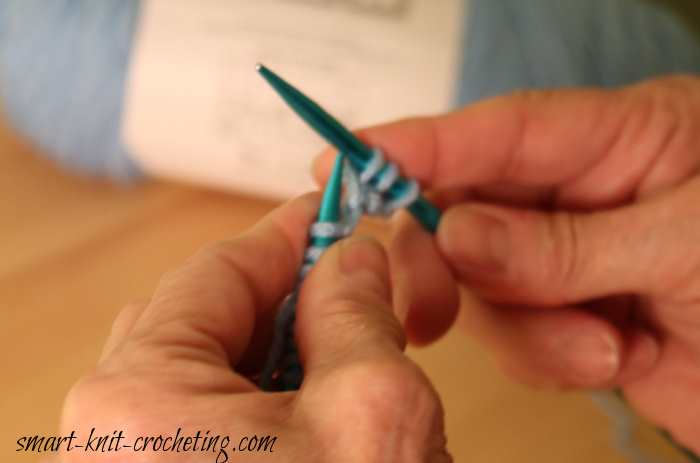
Insert the tip of the right needle into the top loop or the leg of the stitch facing you on the left needle. The two tips will form an "x."
Bring the yarn from behind forward and wrap the yarn from right to left over the left needle.
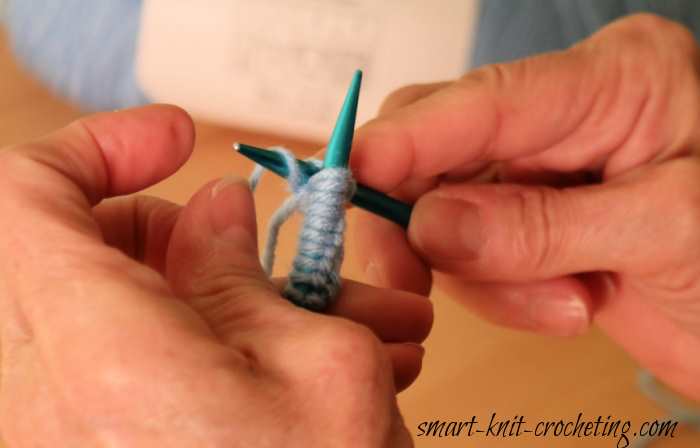
Step Three
While holding the yarn with your left finger, carefully pull back slightly on the right needle and pick up the loop onto the right needle.
Bring the tip of the right needle forward and over the left needle.
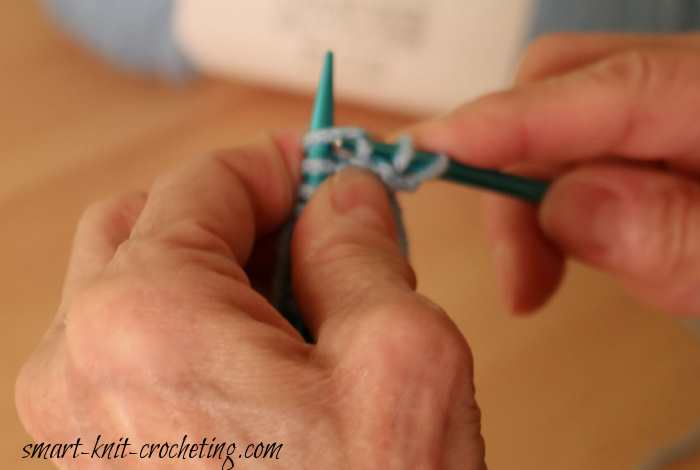
Step Four
Slip the "original" stitch off the tip of the left hand needle. The new stitch will be on the right hand needle. This is one stitch.
Continue to do this until the last stitch is on the right hand needle. Switch hands so that all of the stitches are now on the left hand needle again. Turn and Repeat, knitting each stitch until you reach the end of the row.
Making the Garter Stitch When Working in the Round
If you are learning to make the garter stitch in the round, either on circular needles or double pointed needles, you will need to make it slightly different from the way you make it on straight needles.
When working in the round, you are always working on the right side (RS) so the pattern to create the garter stitch requires you know how to knit and purl.
Round One: Knit all stitches
Round Two: Purl all stitches
These two rows are repeated until you reach your desired length, then bind off.
If you try knitting all the rounds, like with flat knitting, you’ll end up with stockinette stitch – not garter stitch.
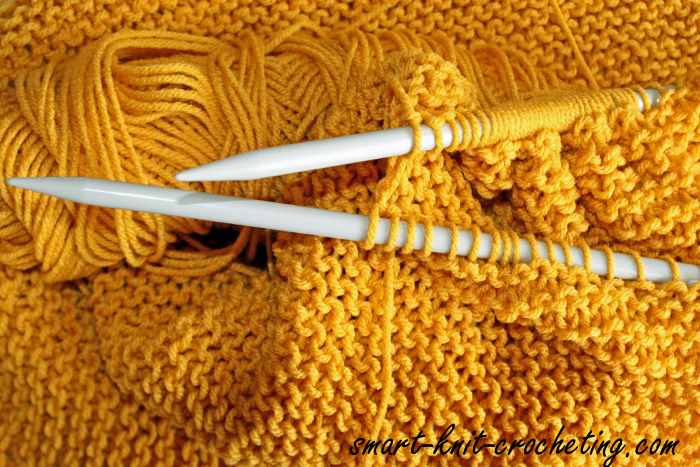
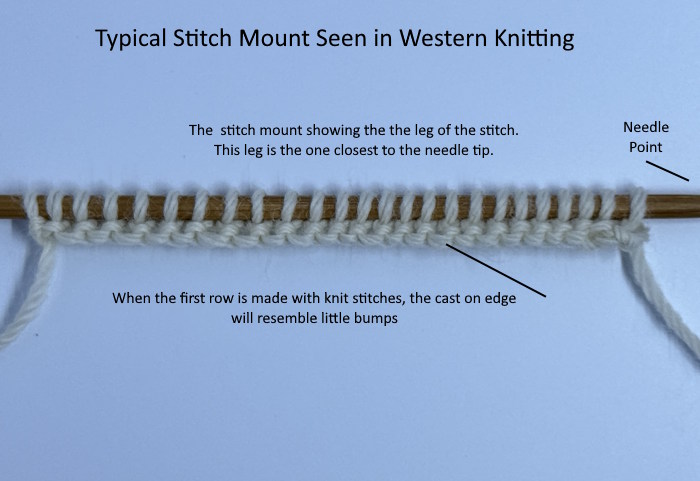
Appearance of Knit Stitches on Needles
Take a look at the photo below.
Notice that when the first row of stitches are knit stitches, the edge is going to look bumpy. This is always the case so you can determine which row is the right side.
Also take a look at the stitches on the needles. The side facing you also shows the legs of the stitches closest to you are closest to the needle tips, while the legs of the stitches you can't see on the left side are slightly be hind.
This is the normal stitch mount seen in western knitting. It is not the only way people knit around the world.
Counting Stitches and Rows in the Garter Stitch
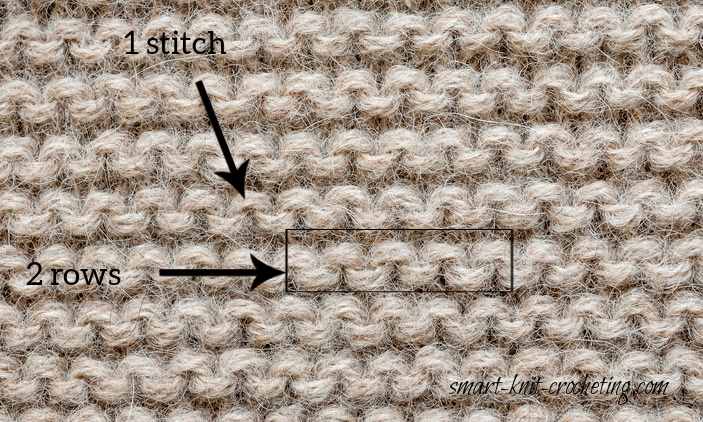
If you are working with a light, solid colored yarn it should be easy to see your stitches.
To count rows, you will count the "ridges" you see. Each ridge is made up of two rows.
To count individual stitches you will count either the "frowns" or the "smiles." Each little frown represents one stitch. Don't count both frowns and smiles.
What Does the Garter Stitch Look Like on a Knit Chart?
Beginning knitters learn how to make stitches first, then progress to written patterns which describe in words and abbreviations how to make a project.
Simple patterns such as how to make the garter stitch do not require elaborate charts, but it's important to know that charts are available and even beginners can start to understand how to read them.
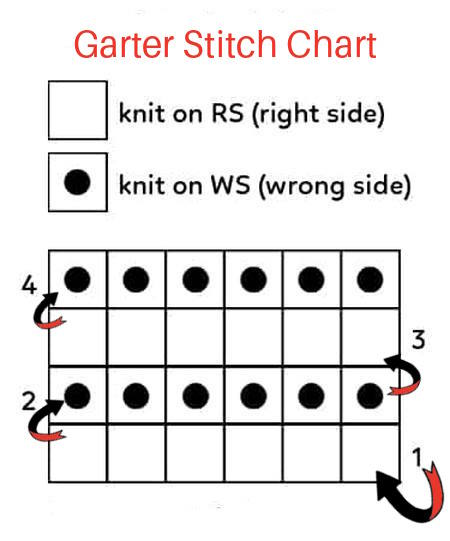 The Garter Stitch in Chart Form
Learn more about reading and understanding knitted charts.
Projects Using Garter Stitch
You can make practically anything using the garter stitch. Blankets, Pillow covers, Table Runners, Dishcloths and Coasters are just a few of the items you can knit using the garter stitch. Easy sweater patterns incorporating the garter stitch make for a beginner friendly project that new knitters find challenging but doable.
Here are a few free patterns on this website that use the garter stitch.
Frequently Asked Questions About the Garter Stitch
What is the difference between a knit stitch and a garter stitch?
What is the difference between a knit stitch and a garter stitch?
Knit stitches are the stitches themselves and may or may not be combined with other stitches. The Garter stitch refers to the stitch pattern that is created by making the knit stitch, row after row.
What uses more yarn, garter or stockinette?
What uses more yarn, garter or stockinette?
The garter stitch uses more yarn than the stockinette (knit one row, purl one row). Garter stitch also uses more yarn than lace stitches but requires less yarn than cables.
What is the right and wrong side of garter stitch?
What is the right and wrong side of garter stitch?
It is difficult to determine which side is right and wrong because it looks the same on both sides. The only way to know is to mark the first row you knit after your cast on. That will be your right side.
Is the garter stitch stretchy?
Is the garter stitch stretchy?
Yes, this is a very stretch stitch that can be used in projects requiring a certain amount of stretch. To prevent any problems, to not cast on or bind off tightly. It will cause the fabric to curl and the elasticity will be lost.
Is there more than one way to make the garter stitch?
Is there more than one way to make the garter stitch?
Yes, you can knit through the front loop or the back loop. For a complete tutorial, visit my page on the knit stitch for more information.
Takeaway
The garter knit stitch is likely the first stitch you will learn when you begin your knitting journey. It's not difficult but it does require you to build up some muscle memory so creating the stitches become easier over time.
In the meantime, there are many projects you can make with just this one row repeat pattern.
Pin for Future Reference
