- Home
- How to Knit
- Finishing Techniques
- Knitting Cast On Methods
Knitting Cast On Methods
 This is an example of a cast-on method called the German Twisted Cast On
Knitting Cast-on Methods by Janice Jones
Before you can begin that first project, you need to know how to get some stitches on your needles, also called casting on.
There are numerous ways to cast on, and an entire book has been written to describe some of them. Leslie Ann Bestor, in her book, Cast On, Bind Off, has provided tutorials on more cast-on methods than you'll likely need in a lifetime. In another of my favorite books, Cast on, Bind Off by Cap Sease, there are 211 ways to begin and end your knitting. Feel free to jump directly to the cast-on methods if you prefer, or keep reading for a deeper dive into cast-on methods.
Casting on is one of the first steps. For the full process, see our complete guide on how to knit.
Why so Many Cast-on Methods?
As knitters, we like to make many different things, so we need different types of cast on methods to accomodate all our creative urges. There are practical, easy, stretchy, provisional and even decorative ones.
In this article, I am going to introduce some of the most basic ones. Each one has a link to a tutorial page that will teach you how to do the method. Please bookmark this page as it is a work-in-progress. As I add more tutorials, I will include them on this page.
How to Choose a Cast-On Method
Most beginners learn the knitted cast-on method or the long-tail cast-on because they are easy, quick, and practical for a wide range of projects. But according to Sease, function is likely the most essential consideration.
By function, we mean the reason for the edge. Does it need to be elastic and stretchy, such as in projects such as the neck edge of a pullover sweater or the cuff of a sock? Maybe it needs to be sturdy and firm so it doesn't stretch, such as the edge of a blanket or scarf. Some lace patterns would benefit from finding a cast-on method that is both sturdy and flexible.
Beyond function, the appearance can play an important role. Do you want the cast-on edge to match the bind-off edge? If the cast-on edge will be buried in a seam, it really doesn't matter.
How to Cast-On in Knitting
- Backwards Loop Cast-On
- Long-Tail Cast-On, Sling Shot Method
- Knitted-On
- Cable Cast-On
- German Twisted Cast-On
- Italian Tubular Cast-On
- Crochet Cast-On
1. Backward Loop Cast On
This is the easiest, but not necessarily the best cast on for a foundation row, as it creates a less-than-sturdy beginning row.
This method involves creating a series of loops on the needle by wrapping the yarn around your thumb or finger and sliding it onto the needle. Each stitch is made individually.
Why Use the Backward Loop Cast On Method?
This is the easiest method for getting stitches onto a needle and is often the first one taught to children. But it does have some disadvantages. The primary reason we might use this method is to secure stitches onto the needle at a midpoint or near the end of a row while working on a project.
2. Long-Tail Cast-on or Sling Shot Method
This is an easy cast-on method for beginners. It uses one needle and a double strand of yarn. You might see this method referred to as the slingshot method because it looks like you are holding the yarn like a slingshot.
It's also called the long-tail method because you need to pull out a length of yarn before you begin.
Why Use the Long-Tail Cast On Method?

This is likely the most popular, most used cast-on method in knitting. It is easy to learn and creates a firm, elastic edge, making it perfect for a wide variety of projects. It looks great on both sides and also creates the first row of knitting. In many cases, it starts with a slip knot.
Learn how to make the Long-Tail Cast on Method.
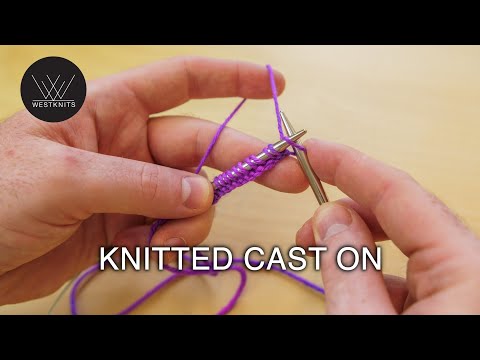
3. Knitted Cast-On
The knit-on method uses both needles and one length of yarn. There is no need to measure a long tail of yarn, but still begin with about a five to six-inch tail. This is another beginner method because it uses the basic knit stitch.
A variation of the knitted cast-on is the purl cast on. Some people find the purled cast-on to be a little easier and fasters.
Why Use the Knitted or Purled Cast On Methods?
The knitted cast-on in particular is often used to teach beginners how to start their knitting projects. By working this method, the beginner also learns how to create the knit stitch (purl stitch). People who use the purled version like the appearance of a smooth edge without the knit bumps that appear on the edge with the knitted method. It is easy to learn, and it is also helpful if you need to add a few stitches at the end of rows while working on a project.
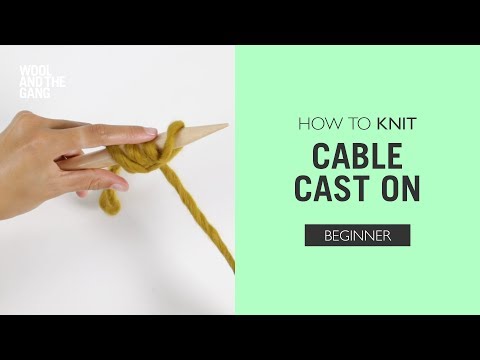
4. Cable Cast-On

This is another beginner-friendly cast-on and is very similar to the Knitting Cast-on. This method is also used when additional stitches are needed at the end of a row or when making buttonholes.
Notice that the first four steps are similar to the knit-on method, but once you have two stitches on your left-hand needle, the technique changes slightly.
How to Do the Cable Cast-On Method
Why Use the Cable Cast On Method?
This is typically the preferred method for adding stitches when creating buttonholes. It is also a good choice if you need to add stitches at the ends of a row. Finally, if you need a firm edge, the cable cast on might be a good choice.
5. German Twisted Cast-On

You might love this cast on method because it is stretchy, attractive, and just as easy to do as the long tail cast on. It is perfect for cuffs of socks and mittens, and the brim of hats. If you love the long tail cast on method, you will also be amazed by the German Twisted Cast On.
Learn how to make the German Twisted Cast On.
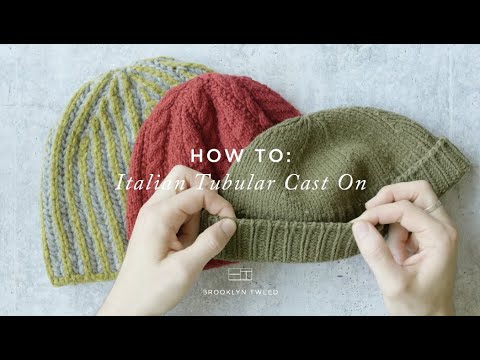
6. Italian Tubular CastOn
The Tubular cast-on is a beautiful, elastic edge often used for 1×1 ribbing. It creates a neat, rounded edge that looks like the stitches “flow” right from the cast-on, making it ideal for cuffs on mittens and socks. It's also a good choice for neckbands and hems. With the Italian tubular cast-on, you don't need waste yarn.
There is also an Italian bind-off that you can use with this cast-on to create a matching finishing edge, providing symmetry for cuffs and collars.
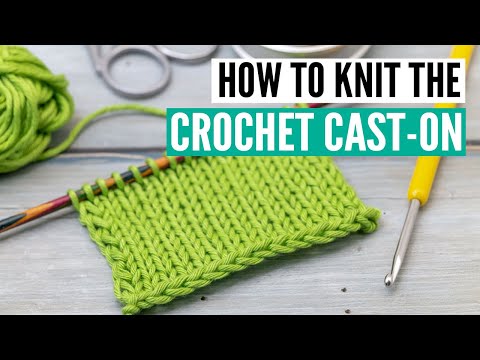
7. Crochet Cast-On Method
This is one of my favorite cast-on methods when I want the cast-on edge to look like the standard bind-off method. You will need a crochet hook approximately the same size as the knitting needles you are using.
Frequently Asked Questions
What does “cast on” mean in knitting?
What does “cast on” mean in knitting?
In knitting, “cast on” refers to the method of gettin stitches (loops) on your needle. It’s how you begin every knitting project. Different cast-on methods provide different edges and stretch.
Which cast-on method is best for beginners?
Which cast-on method is best for beginners?
The long-tail cast-on and knitted cast-on are often recommended for beginners. They are relatively simple to learn and work well for most projects, offering a good balance of stretch and stability.
What’s the stretchiest cast-on method?
What’s the stretchiest cast-on method?
If you need a stretchy edge—for hats, cuffs, or necklines—try the German Twisted Cast-On or the Tubular Cast-On. These techniques are ideal for projects that need elasticity without puckering.
How do I know which cast-on method to use?
How do I know which cast-on method to use?
Choose a cast-on method based on:
- The type of project (e.g., lace, ribbing, colorwork)
- The required stretch
- Whether you’re working flat or in the round
- Aesthetic preference (some cast-ons are decorative)
- When in doubt, the long-tail cast-on is a solid all-purpose choice.
Can I switch cast-on methods in the middle of a project?
Can I switch cast-on methods in the middle of a project?
That is not recommended. You typically cast on at the beginning of your project. However, if you need to add stitches mid-row, you can use methods like the knitted-on cast-on or cable cast-on, which work well within a project.
How much yarn do I need for a long-tail cast-on?
How much yarn do I need for a long-tail cast-on?
A common rule is to allow about 1 inch of yarn per stitch, or use the “wrap-around-your-needle” method to estimate. It’s always a good idea to leave extra tail to avoid running out partway through your cast-on.
Once your stitches are on the needle, and you have knit your project, you’ll eventually finish with binding off.
Knitting Cast-on Methods: Pin for Future Reference

Last Words
There are other ways to cast on, but these seem to be the easiest for beginners to master quickly. You can use these methods on just about any easy project you choose.
Disclosure:
This post contains affiliate links. If you buy through them, I may earn a small commission at no extra cost to you.

Janice Jones is a Certified Knitting and Crochet Instructor who creates beginner-friendly patterns and tutorials, backed by a 389-page library of practical knitting and crochet content.
Most Popular Pages
All Types of Crochet Stitches

36 Reversible Knit Stitch Glossary

How to Crochet the Second Row

Dog Sweater Patterns

Working with Alpaca Yarn

Free eBooks, Just for You
Get my beginner eBook guides to Knitting and Crocheting, just for signing up for my monthly newsletter.
Choose one or both when you sign up.


About the Author: Please allow me to Introduce myself

Janice Jones is a Certified Knitting Instructor and Certified Crochet Instructor through the Craft Yarn Council who focuses on beginner-friendly patterns, stitch guides, and technique tutorials. She has built a library of 389 pages on her website, sharing practical instructions and patterns, and has completed projects ranging from crochet blankets to knit sweaters. You can explore her work on her website. She makes items for Warm Up America and often knits and crochets sweaters for her small dogs.
Thank you for visiting Smart-Knit-Crocheting. I hope this and all of my tutorials will give you the inspiration to continue your knit or crochet journey. For a complete list of all the pages on my site, please visit my table of contents.
I participant in the Amazon Services LLC Associates Program, an affiliate advertising program designed to provide a means for sites to earn advertising fees by advertising and linking to Amazon.com. “As an Amazon Associate I earn from qualifying purchases.” These earnings go towards supporting my website.

Home | Contact | About | Privacy Policy | Disclaimer
I DO NOT SELL ANY PERSONAL INFORMATION FROM THIS WEBSITE. PLEASE SEE MY PRIVACY POLICY FOR MORE DETAILS.
Copyright © 2006-2026 Smart Knit Crocheting. All Rights Reserved
Please Share
Remember, Sharing is Caring