- Home
- How to Crochet
- How to Join Crochet Motifs
Crochet Motifs: Beginner-Friendly Tips/Tutorials for Making and Joining
Crochet Motifs: Rewritten by Janice Jones
Once you've mastered crocheting in rows, you might have your sights on squares or other shapes you can make and then join to create a larger project.
What are Crochet Motifs?
Any little crochet shapes that are joined to create something bigger are crochet motifs. Probably the most common example of a crochet motif is the granny square.
How Do You Create a Crochet Motif?
Unlike crocheting in rows, a motif is worked from the center outward. It can begin as a small number of chains joined with a slip stitch to create a ring or loop.
Or, a magic circle is made and used as the center. From there stitches are made into the loop or magic circle and all additional rounds are worked from these initial stitches.
Why Create Crochet Motifs?
That's easy. Crochet motifs can be used to make almost anything you can imagine. Blankets of all sizes, and other household items such as pillow covers and placemats can be created with crochet motifs. Table runners, wall hangings, rugs are just a few projects that depend on crochet motifs.
Wearables such as sweaters, shawls, cowls, tops, headbands, hats and scarfs and even bags and purses. There's litterly little you can't make with motifs.
What Shapes Can You Create with Crochet Motifs
I'm not sure I can list all shapes you can create, but here's my short list:
- Squares
- Triangles
- Circles
- Hexagons
- Diamonds
- Pentagons
- Octagons
- Ovals
- Hearts
- Stars
- Flowers
- Pineapples
- Free Form
- Irish Lace
Why do Crocheters Love Making Crochet Motifs
Motifs are the perfect little project within a larger item. Each works up fast and the repetitve nature of many provides a very relaxing, mindful experience.
They are small which are perfect for summertime crocheting. They are also extremely portable so you don't need to tote around a large, heavy project if you plan to crochet on the go. All you really need is a project bag, your yarn and hook, and a small pouch to hold notions.
I also think that the new crocheter can pick up these projects and gain confidence quickly. I wonder how many of us learned to crochet by making granny squares?
How to Read Crochet Motif Directions
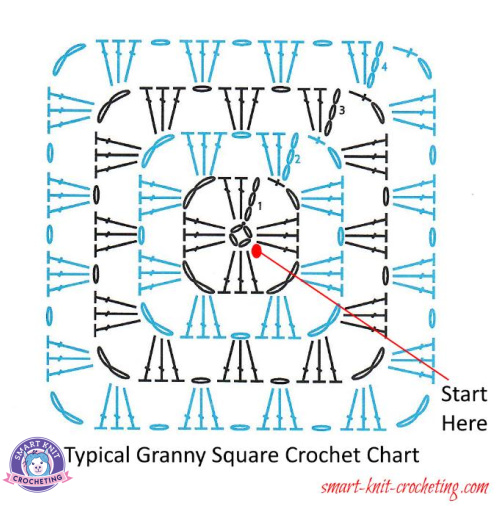
Crochet motifs use all the same crochet stitches that you might use if you work in rows, so understanding the abbreviations and how to read crochet directions is an important skill to develop.
More often than not, however many crochet motif directions are presented in diagram form. Many crocheters prefer these diagrams to written directions because they help the crochet picture how the motif should look.
How to Join Crochet Motifs
Crochet motifs (such as granny squares) can be joined to each other in one of the classical ways, shown below. There are no "correct" or "incorrect" ways for joining motifs together. It is only matter of your preferences. Try them all and choose the one you are comfortable with the most.
If you are following a written pattern, you will want to use the method suggested by the designer. Not all patterns though, will provide detailed instructions for connecting the parts.
Three Methods for Joining Crochet Motifs
In this beginner-friendly tutorial, I will describe three methods that you can use to join or connect your crochet squares. They are by means not the only ways to do this.
For these methods, you will either need a tapestry needle or a crochet hook.
1. Use a Yarn Needle to Sew Them Together
2. Use a Crochet Hook to Connect Them
1. Use a Yarn or Tapestry Needle to Sew Them Together
This is the easiest method of joining motifs. For this method, you will need a yarn needle and length of yarn. You can either use the same color you used to crochet the motif for an invisible join or if you prefer, use a contrasting color.
Method One
Hold two motifs together (right sides facing each other). Using a yarn needle yarn sew motifs together through the back loops only.
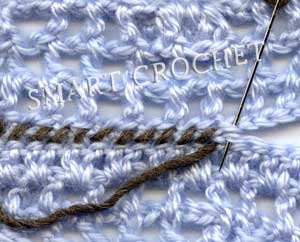 Wrong side of the joined crochet motifs. A contrast color thread was used for the better visibility.
2. Use a Crochet Hook to Connect Them
Motifs can be joined by a crochet hook. This method has more technological flexibility and decoration features than joining motifs with a yarn needle. You can use slip stitch, single crochet or chains, to join elements to each other. Two motifs can be placed right side-to-right side or back side-to-back side. The decorative effect will be different.
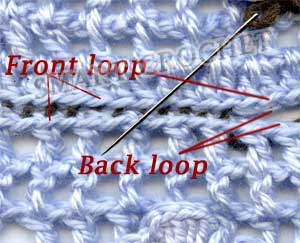 Right side of the joined crochet motifs. It looks very neat despite a darker color of the thread, which was used for sewing.
Holding Motifs With Backs Facing
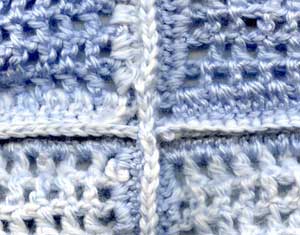 The motifs are held with back sides facing each other. Insert the hook through the front loops of both motifs, yarn over, and pull through all stitches on hook. A neat, decorative ridge on the right side is created.
Holding Motifs With Front Sides Facing
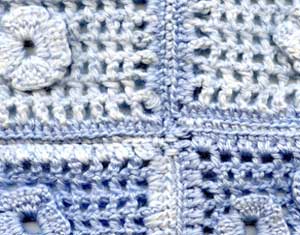 The motifs are held with the right sides facing. Insert hook through the back loops of both motifs. Yarn over and pull through.
3."Join-as-you-go" method
Connect motifs while crocheting their last row. This method works the best if motifs have arches on the outside edges. This way connection will look the most decorative and the least noticeable.
This is also a handy method that can save you time. Here is a good example where this method to join crochet motifs (or squares) will work perfect. I used it for crocheting a lacy crochet shawl many years ago.
Some Special Cases for Joining Motifs
All methods of joining crocheted elements, mentioned above, will work if the motifs create a regular repeating pattern. When won't they work for joining motifs? Two cases at least can be mentioned here.
- Motifs are large or have a complicated shape. If you join them using any one of the methods above, a final pattern will have the big openings between elements.
- Motifs are parts of a larger composition or consist of different shaped elements such as in Irish crochet.
Crochet Motifs are Large
Let's consider joining of motifs #2 from Irish Crochet page. 8 petals allow to join 4 more motifs around each motif.
We will sew 4 motifs together(or better use "join-as-you-go" method).
As a result, in center we have a pretty large empty space. To fill it, we usually use an additional small motif-insert. It looks more natural if the inserting element is a fragment of a major motif.
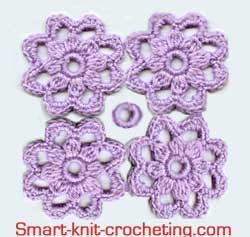 Insert: Chain 6, join them in a ring. Crochet 16 single crochets into ring, 1 slip stitch. Pin insert in the middle of the opening.
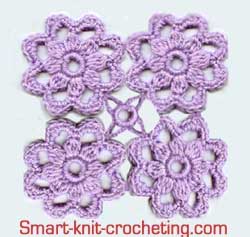 Use chains to join inserts: from insert to the 1st motif, back to insert, to the 2nd motif, back to insert, and so on.
Motifs are parts of a larger composition
Sometimes motifs, which have to be joined to each other are the elements of the pretty complicated composition (like in Irish crochet laces).
None of the methods presented above will work. The joining requires some special techniques. Usually motifs are inserted in some background. In most cases, this kind of joining crocheted elements looks almost like a "rocket science" even for the pretty experienced crocheters.
There is a very good saying :"Our eyes are afraid, but hands just do it!"
You can try one of these methods on your own together with me. I have never tried to do it before.
Here is a link for more information: Motif Pattern page.


