- Home
- How to Crochet (Start Here)
- Crochet Slip Knot Chain Stitch
How to Make the Crochet Slip Knot & Chain Stitch
Crochet Slip Knot Chain Stitch by Janice Jones Last Updated December 31, 2025
So, you're ready to begin that first crochet project, but don't know where to start. Relax. We've all been there before, but the good news is that making a slip knot and chain stitch is not difficult.
 Crochet Slip Knot Chain Stitch Tutorial
Tutorial for Making a Crochet Slip Knot Chain Stitch
How to Make a Slip Knot
Before you can crochet, you need a starting stitch on your hook, and that is where the slip knot comes into play.
The first time I saw this explained, I was perplexed. The picture diagrams showed hands and fingers wrapped in thread. The directions sounded more like mumbo jumbo than anything helpful.
So hopefully, I can make the process sound a little more down to earth. Have your hook ready, but you don't need the hook to make the knot. You will need your ball of yarn.
Step One: Slip Knot
If you are working with a skein of yarn, the first thing to do is find the end. The end will be in the center of the skein, and sometimes you'll see the short end poking out, but not always. Do resist the temptation to remove the label and find the other end, which will be easier to see.
Poke around the middle of one end of the skein until you find the end, and then pull out a length to get started. It's best to start with an end that's about six inches long.
 Not all yarn skeins have center pull-out yarns. If yours doesn't you will need to find the end of the yarn and either work it from the skein as is or roll it into a ball.
Step Two: Slip Knot

To make a slip knot, form a circle with the yarn leaving about a six inch tail of yarn. You can do this by wrapping it around your thumb or finger or simply making a circle, as I have done with the yarn's end.
Step Three: Slip Knot

Pick up the end of the yarn connected to the skein and slip it through the center of the circle from back to front. Hold the circle loop in one hand as you pull the two ends towards you to make the loop.
Step Four: Slip Knot

Place the circle loop on your hook and tighten slightly by pulling on the two yarn ends. Pull until it feels snug on the hook but don't tighten it.
Now you are ready to make a chain of stitches. For this, we will be making a straight chain of 13 stitches. This is also called a foundation chain. All projects start with a series of chain stitches. This is equivalent to the "cast on" in knitting.
How to make the foundation chain stitch: Chain: (ch=abbreviation)
You already have the first stitch on your hook (the slip knot you just made).
Step One: Chain Stitch
For right-handed crochet, hold the yarn in your left hand and the hook in your right hand. At first, it is challenging to keep an even tension on the yarn, but you will find it comes easier as you practice.
This is the way I hold my yarn and hook. Wrapping the yarn around my finger helps to hold the yarn and provide an even tension.
 Everyone holds their yarn a bit differently. Experiment until you find the way that feels most comfortable to you.
 Once I wrap the yarn around my "pinkie" finger I bring it towards my index finger and hold it fairly close to the hook. Remember, everyone holds their yarn a little differently.
 Once the yarn is placed in my left hand (I'm a right-handed crocheter) I pinch the yarn closest to the hook with my thumb and middle finter.
Step Two: Chain Stitch
Be sure you are working with the yarn supply from the skein (also known as the working yarn) and not the short tail. We'll worry about what to do with that tail later. Hold that first slip knot stitch with the thumb of your left hand.
Once the slip knot is on the hook, start by wrapping the yarn around the hook from back to front. Pull the working yarn through the slip knot, retaining the new loop on your hook. You have just made your first chain stitch.
Continue doing this until you have the correct number of chains. Don't worry, I will show you how to count the chains you made shortly.

Step Three: Chain Stitch
After a few chain stitches, adjust your fingers , so your thumb stays close to the hook and still holding all of your chain stitches.
 Move your thumb and middle finger holding the chain towards the hook to control the chain. If you are making a large number of chains, keep moving your fingers close to the hook.
Now let's count chains
I know you were probably counting as you made each chain stitch, but it is always a good idea to go back and check. In this part of the tutorial, I will show you how you can count each stitch. It is also a good habit to get into, as you will be counting more intricate designs as you progress.
The front of the chain

The front of the row of chains looks like a series of little v shapes. Each V is a chain loop. The first chain you made at the beginning is the slip knot. Count each small v as one stitch.
The back of the chain

The reverse side of the chain has a row of bumps created by the yarn. These bumps are located behind the little "v" that you saw on the front side. They run in a vertical direction from the beginning up to where you left off on your hook.
When counting your chain stitches, do not count the stitch that is on the hook. If you are working on a very long chain, such as what you might do if you are making a long scarf, it is good to count a certain number of chains, say 10 or 20, and place a stitch marker. Counting is easier if you need to count the stitch markers instead of every stitch.
Beginner's Tip: Learning the Crochet Slip Knot Chain Stitch
When making a chain of stitches, be sure to move the stitch beyond the hook to the hook's thicker portion before starting the next one.
If you work your stitches on the thinner part of the hook, they become too tight, and then you will struggle to place your hook into them on the next row.
The Turning Chain following the Crochet Slip Knot and Chain Stitch
Once you make the required number of chain stitches, the pattern will call for you to make a certain number of turning stitches. This part gets into the next section, but I wanted to mention it here because it is an important concept.
When working a flat piece of crochet (as opposed to working a circle or in the round), the stitches worked at the end of the row are called turning chains.
Each crochet stitch has a suggested number of turning chains that will take the row to the required height. I say "suggested" because if you find that your work is creating a loop at the end of the row or if the end appears too tight, you may need to adjust the number of stitches.
Number of Turning Chains Suggested for Basic Crochet Stitches
Patterns are written in the US or UK format. Be sure you understand the design you are using and whether the terminology is US or UK.
Recommended Number of Turning Chains
US
Single Crochet: 1 chain
Half Double Crochet: 2 chains
Double Crochet: 3 chains
Treble Crochet: 4 chains
UK
Double Crochet: 1 chain
Half Treble Crochet: 2 chains
Treble Crochet: 3 chains
Double Treble Crochet: 4 chains
Troubleshooting the Foundation Chain
Is your chain of stitches too tight? Too loose? Or, just right? Since the foundation row of chains the beginning of a project, it is so important to get it right. If it is too tight, your project is going to look rather strange.
Too Tight Foundation Chain
If your foundation chain is too tight, it will be difficult to get the hook into the chain to make the first set of stitches. Your fabric will flare out on both sides.

To fix a too tight foundation chain, there are a couple of things you can try. First, you could rip it out and start over. You may also want to try creating your foundation chain row with a hook that is one or two sizes larger than the one you use for future rows.
Another option is to use a variation method make the foundation chain.
Loose Foundation Chain
If your chain is too loose, well, you'll find that edge of your fabric to be sloppy. You will notice holes in the fabric. If this is your intent, then a loose foundation chain is fine, but if you want the fabric to be tighter and more uniform, then a loose chain row can be a problem.
If this is a problem for you, consider using a hook that is one size smaller than the size called for in your pattern. Getting the tension just right takes time and patience so don't get frustrated with your first attempts.

If it is just right, your foundation chain is going to match the last row of crochet stitches, both in appearance and in size. But what exactly is "just right?"
- It should be stretchy
- The chains should be large enough so that you can get your hook into each chain comfortably without having to push and struggle
- The chain should not be so tight as to create a fabric that flares out on either side
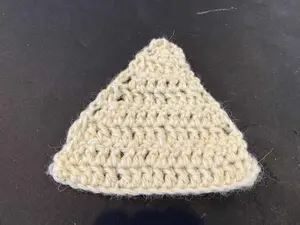
 This foundation chain is just about right for the double crochet stitches that follow.
The next steps
Once you have mastered the slip knot and chain stitch, the next step is to learn some of the more basic crochet stitches. All of these stitches are worked similarly but differ in their size. As mentioned, crochet stitches' names are somewhat different, whether you are reading the UK or US pattern.
Here are some of the basic stitches we will cover, along with their abbreviations
Common Abbreviations for Basic Stitches
USSingle Crochet (sc) |
UKDouble Crochet (dc) |
|
Double Crochet (dc) |
Treble Crochet (tr) |
|
Half Double Crochet (hdc) Treble or Triple (tr) |
Half Treble Crochet (htr) Double Treble Crochet (dtr) |
|
Double Treble (dtr) |
Triple Treble (ttr) |
|
Triple Triple (trtr) |
Quadruple Treble (quad tr) |
|
Slip Stitch (ss) |
Slip stitch (ss) |
Crochet Slip Knot Chain Stitch: Pin for Future Reference

Did you find this Crochet Slip Knot Chain Stitch Tutorial Helpful? May we suggest...
How to Make a Double Crochet Decrease Stitch: Complete Tutorial
The double crochet decrease stitch is similar to other crochet decrease stitches but has some unique traits. Learn how to make decrease stitches in crochet.
Double Crochet Increase Stitch: Tutorial
The double crochet increase stitch is a basic skill for all crochet beginners and is very easy to do. It's needed anytime when increases are required.
How To Make the Double Crochet Post Stitch: Front and Back Posts
This tutorial walks you through making the double crochet post stitch, both the front post and the back post stitches in double and treble crochet
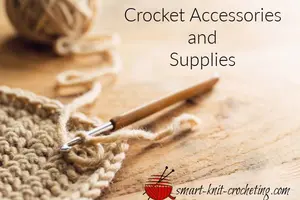
Crochet Accessories: What You Need to Get Started
New to crochet? Crochet Accessories include the simple tools that help beginners stitch with confidence, stay organized, and enjoy every project.
Blocking Crochet Projects: Everything You Need to Know
Your guide to blocking crochet projects including when and how to do it, and FAQ troubleshooting for perfect results.
Best Ergonomic Crochet Hooks: Comfortable, Pain-Reducing Options
Looking for the best ergonomic crochet hooks? Discover top-rated brands for comfort, reduced fatigue, and pain-free crocheting — perfect for all skill levels
Disclosure:
This post contains affiliate links. If you buy through them, I may earn a small commission at no extra cost to you.

Janice Jones is a Certified Knitting and Crochet Instructor who creates beginner-friendly patterns and tutorials, backed by a 389-page library of practical knitting and crochet content.
Most Popular Pages
All Types of Crochet Stitches

36 Reversible Knit Stitch Glossary

How to Crochet the Second Row

Dog Sweater Patterns

Working with Alpaca Yarn

Free eBooks, Just for You
Get my beginner eBook guides to Knitting and Crocheting, just for signing up for my monthly newsletter.
Choose one or both when you sign up.


About the Author: Please allow me to Introduce myself

Janice Jones is a Certified Knitting Instructor and Certified Crochet Instructor through the Craft Yarn Council who focuses on beginner-friendly patterns, stitch guides, and technique tutorials. She has built a library of 389 pages on her website, sharing practical instructions and patterns, and has completed projects ranging from crochet blankets to knit sweaters. You can explore her work on her website. She makes items for Warm Up America and often knits and crochets sweaters for her small dogs.
Thank you for visiting Smart-Knit-Crocheting. I hope this and all of my tutorials will give you the inspiration to continue your knit or crochet journey. For a complete list of all the pages on my site, please visit my table of contents.
I participant in the Amazon Services LLC Associates Program, an affiliate advertising program designed to provide a means for sites to earn advertising fees by advertising and linking to Amazon.com. “As an Amazon Associate I earn from qualifying purchases.” These earnings go towards supporting my website.

Home | Contact | About | Privacy Policy | Disclaimer
I DO NOT SELL ANY PERSONAL INFORMATION FROM THIS WEBSITE. PLEASE SEE MY PRIVACY POLICY FOR MORE DETAILS.
Copyright © 2006-2026 Smart Knit Crocheting. All Rights Reserved
Please Share
Remember, Sharing is Caring