- Home
- Crochet Stitches
- Crochet the Parquet Stitch
How to Crochet the Parquet Stitch and Free Beginner Pattern
Crochet the Parquet Stitch by Janice Jones, Certified Crochet Instructor (CKC)
Published July 2023, Updated October 2025
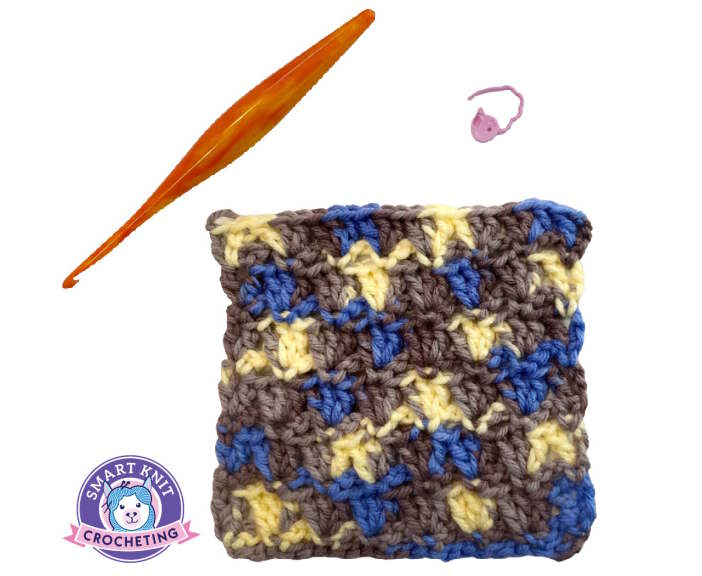
In this tutorial, you’ll learn how to crochet the parquet stitch, a stunning geometric pattern inspired by a parquet floor.
The lovely fabric you create with this stitch is open, drapey, yet relatively sturdy. It is also reversible, so it's perfect for projects where you see both sides, such as scarves and cowls. Best of all, it produces a gorgeous texture that looks very elegant.
Benefits of Learning How to Crochet the Parquet Stitch
The crochet parquet stitch can be adapted to suit various styles and preferences, allowing you to customize your projects to reflect your unique taste. For example, you can create the crochet parquet stitch in a solid color, different colors, or use a variegated yarn for yet a third look. I'll discuss those customizations shortly.
The good news is that it is very beginner-friendly, employs a 2-row repeat stitch pattern, and only uses the basic crochet stitches of double and single crochet.
- Very adaptable
- Easy to learn and memorize
- Can create a drapy fabric or a tight crochet
- Perfect for beginners, this stitch uses a simple repeat of single and double crochet stitches and a two-row repeat.
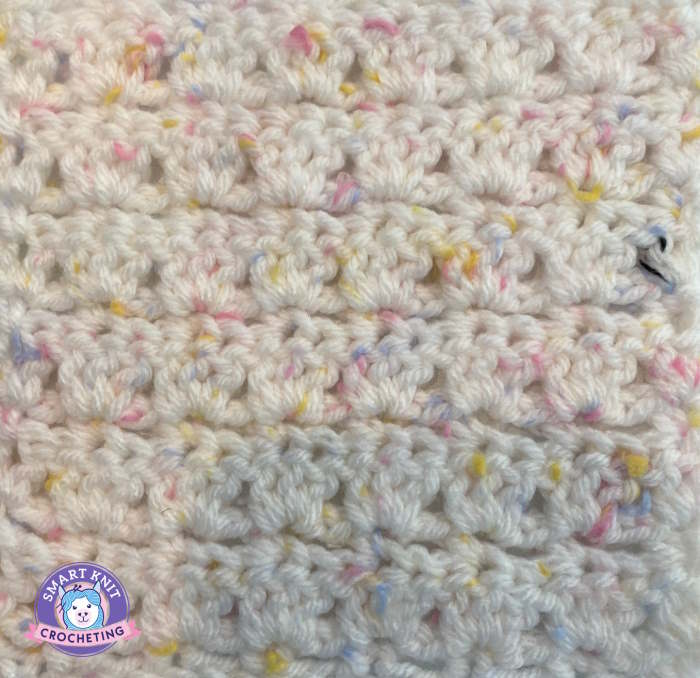
Crochet the Parquet Stitch Practice Swatch
We’ll cover materials, step-by-step instructions, and a free dishcloth pattern to help you practice.
Materials Needed for the Crochet Parquet Stitch
Supplies
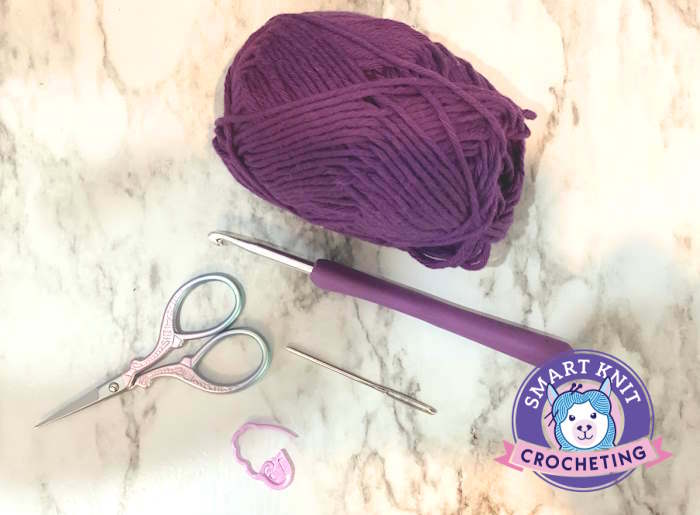
Here is a list of items you will need to make a practice swatch.
- Crochet hook: Choose a hook size that complements the weight of your yarn. A size G (4mm) or H (5mm) hook is commonly used for medium-weight yarn. You may use any size yarn with the corresponding appropriately sized hook.
- Yarn: Choose a yarn suitable for your project. Worsted-weight yarn is a popular choice for the crochet parquet stitch due to its versatility and availability in various colors.
- Scissors: A sharp pair of scissors will help cut yarn and trim loose ends.
- Yarn needle: A yarn needle with a large eye is necessary for weaving in ends and finishing touches.
- Stitch Marker: optional but helpful for keeping your place.
NOTE: If you need a little more help choosing yarn and hooks, I have created a tutorial to help you understand crochet hooks and match them with different yarn weights.
Abbreviations You Will Encounter
Ch: Chain
SC: Single Crochet
DC: Double Crochet
St/Sts: Stitch or Stitches
Sk: Skip
Sp: Space
Rep, * * Repeat
Skill Level

Project Notes
- All Directions are written in US Terms.
- This stitch is worked on a multiple of 3 plus 2 ( meaning you will cast on a multiple of 3 stitches, then add two more)
Skills You Will Need to Know
- How to make a slip knot and chain stitch
- How to make the single crochet stitch
- How to make the double crochet stitch
- How to weave in your ends.
Crochet Parquet Stitch Tutorial - Step-by-Step Instructions
You have a choice between learning the crochet parquet stitch by first making a swatch or jumping into a dishcloth pattern. Keep reading for the swatch tutorial or jump to the pattern. Also, if you prefer to read the instructions in plain English, I've written them out for the pattern instructions.
Swatch Tutorial
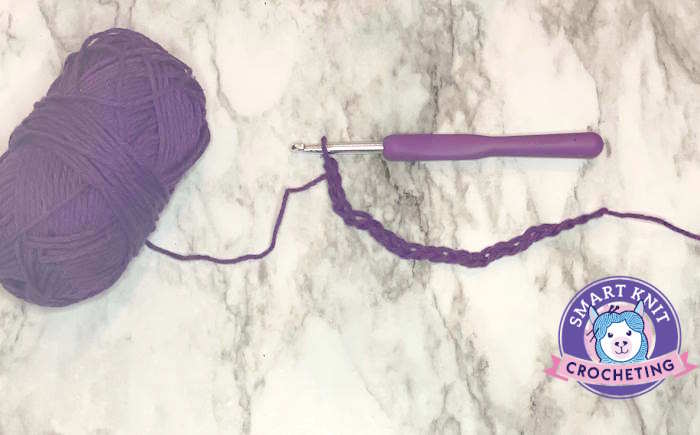
For this swatch tutorial, I will chain 23. (7 x 3) = 21 plus 2 = 23
Chain 23.
Row 1: 1 sc in 2nd ch from hook, *ch2, sk2, 1 sc in next ch, rep from * to end of row. Turn. (Count 7 ch-2 spaces)
Row 2: (Right Side): Ch 3 (counts as a dc here and throughout), 1 dc in same st, *sk next ch-2 sp, 3 dc in top of next st,* to last ch-2 sp, sk ch-2, 2dc in last sc st. Turn. (count 6 sets of 3 dc clusters plus 4 dc, 2 on either end of row)
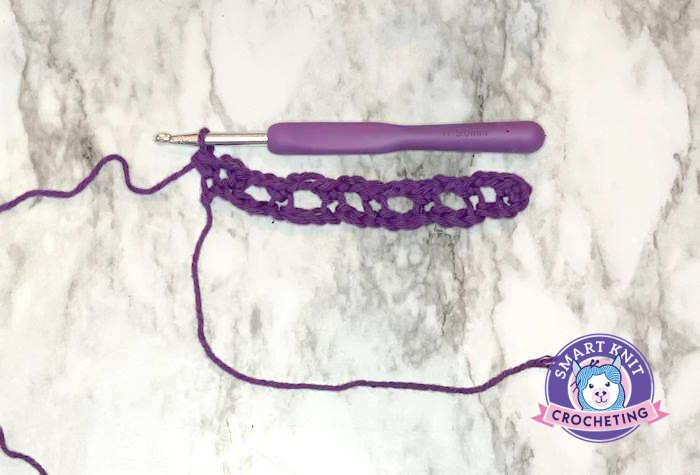
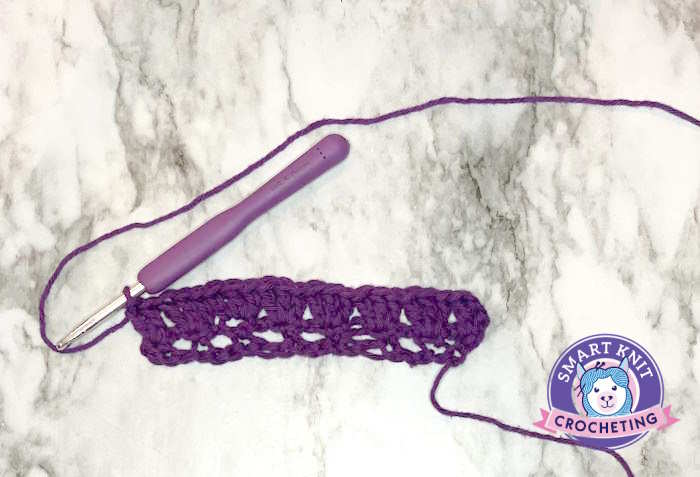
Row 3: Ch 1, 1sc in same st, *ch 2, sk next sts, 1 sc in next dc* rep from * to end. 1sc in the top of ch3. Turn.
Note: the single crochet stitches in Row 3 are made in the center of the 3 double crochet clusters.
The second and third row is repeated for the pattern.
Work rows 2 and 3 to obtain your desired length.
Fasten off, weave in ends.
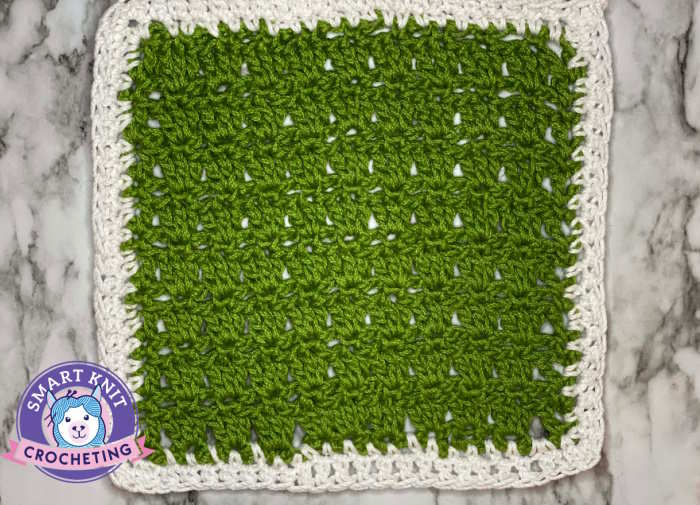
Beginner Friendly Free Crochet Project: Crochet Parquet Stitch Dishcloth Pattern
 Crochet the Parquet Stitch
I may receive a small commission from purchases made from links on this page.
Materials
- 100 % Cotton Yarn, worsted weight, number 4 yarn. I used Lion Brand 24/7 100% Cotton in two colors.
- Hook: H (5 mm). I used Clover 3672 Amour Crochet Hook
- Scissors
- Tapestry Needle (for weaving in ends)
Final Measurements
7.5 by 7.5 inches square without added border. (about 19 x 19 cm)
Gauge
Not crucial for this project
Instructions
For this tutorial, I have written out all words rather than using abbreviations so you can see the difference. Please feel free to transition to using standard abbreviations (above) if you prefer.
Chain 32.
Row 1: Single crochet in 2nd chain from hook,*Chain 2, skip next two chains, single crochet in next chain*, repeat from *to* across, turn.
Row 2: Chain 3 (counts as first double crochet), double crochet in same beginning single crochet * skip next two chains, three double crochet in next single crochet *, repeat from *to* across to within last three stitches, skip next two single crochet, two double crochet in last single crochet, turn.
Row 3: Chain 1, single crochet in beginning double crochet * chain 2, skip next two double crochet, single crochet in next double crochet*, repeat from *to* across row, ending by working last single crochet in top of ending chain 3, turn.
Repeat Rows 2 and 3 for the pattern.
Edging: (Optional) 2 rows of single crochet around the project in a similar or contrasting color.
Tips for Mastering the Crochet Parquet Stitch
- Maintaining consistent tension throughout your work is crucial for achieving neat and uniform stitches. Practice keeping your yarn tension neither too loose nor too tight.
- Counting your stitches at the end of each row will help you identify any mistakes early on. This habit will save you from having to unravel your work
- Color experimentation is perfect for the crochet parquet stitch Try using contrasting colors or different shades within the same color family to create striking effects. You can change colors in every row, but keep in mind that many ends need to be woven in. One option is to carry your yarn up the sides and create a border with two rows of single-stitch crochet stitches.
- Hand Fatigue is not exclusive to this crochet stitch; it can be stated for crochet in general. Experiment with different types of crochet hooks. If you find your hands aching, consider looking into an ergonomic crochet hook.
- Taking Breaks will improve your crochet. Although crocheting can be a relaxing activity, it is essential to take breaks to prevent hand and wrist fatigue. Stretch your hands and fingers regularly to avoid strain. If you start to feel achy, take a break.
Troubleshooting Common Issues with the Crochet Parquet Stitch
Uneven Edges
If you find that your edges are uneven, make sure to count your stitches at the end of each row. Skipping or adding stitches is common, which can result in accidentally uneven edges.
Tangled Yarn
To prevent your yarn from tangling, wind it into a ball and keep it in a yarn bowl.
Crochet Too Tightly
If your stitches are too tight, try using a larger hook size or relaxing your tension. Tight stitches can make it challenging to work into the stitches of the previous row. Crochet should not be that hard.
Crochet Too Loosely
If your stitches are too loose, try using a smaller hook size or adjust your tension. Loose stitches can result in a project that lacks structure and shape.
Tension Issues
Crocheting too tightly or too loosely is part of a tension problem. Try looking at your work every couple of rows to see if your stitches are all about the same size. Keeping consistent tension comes with practice.
How to Crochet the Parquet Stitch:
Pin for Future Reference
Conclusion
The crochet parquet stitch is a versatile and visually appealing stitch that can elevate crocheting projects. By following this step-by-step guide, you are well on your way to mastering this beautiful stitch.
Remember to gather the necessary materials, practice tension control, and explore different patterns and variations to make the crochet parquet stitch your own.
Now that you have learned the art of the crochet parquet stitch, it's time to put your skills to the test.
Begin with a simple project, like a scarf or cushion cover, using the stitch. Share your creations with fellow crochet enthusiasts and inspire others to explore the beauty of the crochet parquet stitch.
Happy crocheting!
