- Home
- How to Knit
- Finishing Techniques
How to Finish Knitting Projects for Beginners: Common Finishing Techniques
by Janice Jones, last updated May 27, 2026
As a beginner, if you are wondering what "finishing" means in knitting, you are not alone. When I first started knitting, I ignored these terms because I thought they had something to do with completing a sweater or vest. While I was partially correct, there is a broader meaning to this term that even beginners need to know.
Finishing just means everything you need to do after knitting to create a "finished" project. It can mean joining pieces together, such as when you are creating a garment, but it can also mean weaving in yarn ends, blocking, even sewing on buttons, and adding borders.
Why Finishing Techniques Matter
Poor finishing can ruin otherwise beautiful knitting.
Good seams affect how garments hang on the body.
Blocking affects measurements and drape.
Properly woven ends prevent unraveling after washing.
Different seams change stretch and structure.
What Order Should You Finish a Knitting Project?
Finishing techniques are often what separate a project that looks homemade from one that looks polished, professional, and handmade. While beginners sometimes focus only on learning knit and purl stitches, skills like blocking, weaving in ends, and seaming are just as important to the final result.
The good news is that you do not need to master every finishing method at once. Start with the basics, practice one technique at a time, and remember that even experienced knitters continue refining their finishing skills over time.
As you gain confidence, you will begin to see how the right finishing method can improve the fit, appearance, durability, and overall success of your knitting projects.
Suggested flow:
- Check measurements
- Block pieces
- Seam pieces
- Pick up stitches
- Add borders/button bands
- Weave in ends
- Final light blocking if needed
The Most Common Knitting Finishing Techniques
The most common knitting finishing techniques include seaming, picking up stitches, weaving in ends, and blocking. Others can include adding beads, buttonhole bands, picking up stitches, and fringes/tassels.
| Technique | What It Does | Best For | Beginner Difficulty |
|---|---|---|---|
| Seaming | Joins knitted pieces together | Sweaters, blankets, garments | Moderate |
| Weaving in Ends | Secures yarn tails to prevent unraveling | All knitting projects | Easy |
| Blocking | Shapes and smooths finished knitting | Lace, garments, blankets | Easy |
| Picking Up Stitches | Adds borders, collars, and button bands | Necklines, sleeves, cardigans | Moderate |
| Three-Needle Bind Off | Creates a sturdy joined seam while binding off | Shoulders and structured seams | Moderate |
| Kitchener Stitch | Grafts live stitches together invisibly | Sock toes and seamless joins | Advanced Beginner |
Seaming and Joining Knitted Pieces Together
Seaming, or sewing, is a common way to join two pieces of knit fabric, but not all seaming techniques are the same, and some are better for specific jobs. Learning one method may work, but not in all situations.
For example, certain seams are more appropriate in different situations. Here are a few of the more common seaming techniques.
Mattress stitch is often used when you want a nearly invisible seam in stockinette stitch, while whip stitch is simpler and works well for quick joins or decorative seams.
Crochet seams can add structure and are often easier for knitters who also crochet. Some seams create stretch, while others create stability. A shoulder seam, for example, often needs more structure than a side seam on a sweater.
- mattress stitch
- back stitch
- slip stitch with crochet hook
- Kitchener's seam
- Three-needle bind off
Mattress Stitch
- invisible seam
- good for stockinette
- stretchy
Back Stitch
- sturdy
- structured garments
- less stretchy
Crochet Slip Stitch Seam
- fast
- decorative ridge
- helpful for crocheters transitioning to knitting
Kitchener Stitch
- grafts live stitches invisibly
- ideal for sock toes
Three-Needle Bind Off
- strong shoulder seams
- decorative ridge possible
Do All Knitting Projects Need Finishing?
All knitted projects require some finishing, though the amount of finishing varies by project.
Why Blocking Can Transform Your Knitting
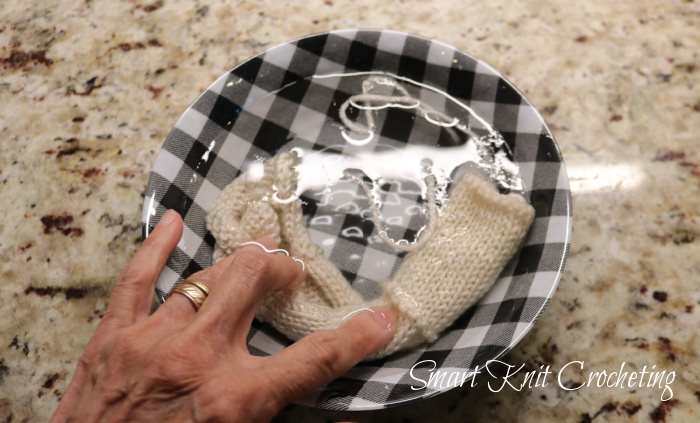
If you are a beginner, you have likely encountered the term "blocking". Blocking is the process of wetting or steaming a knitted swatch/project, then shaping and drying it. It uses moisture and heat to relax the yarn fibers, allowing the stitches to even out, smooth the fabric, and set the item to its final dimensions.
While not always necessary, blocking can transform your project/swatch into a finished, professional-looking project. It is also the critical final step before sewing pieces together, ensuring that each project conforms to the correct dimensions.
Different Blocking Methods for Different Fibers
There are many ways to block knitted projects, and different types of fibers demand different methods. Beginners soon realize that methods used to block projects worked in 100% Wool will not work as well with Acrylic.
Blocking Different Stitch Patterns
Some stitch patterns naturally lie flat, making blocking optional, especially for projects like scarves or blankets. Beginners often get confused because they may try to block a basketweave knit stitch and a stockinette stitch and find one blocks so much easier than the other.
Lace patterns almost always need to be stretched and blocked.
Should You Block First, then Seam? Block First, then Weave in Ends?
Beginners often struggle with this dilemma: What to do first? In my opinion, blocking always helps relax fibers and helps shape a knitted fabric before weaving in ends or seaming. But others might find the order of blocking, weaving, and seaming different.
Learn how to Block Your Knitting
How to Weave in Ends Neatly
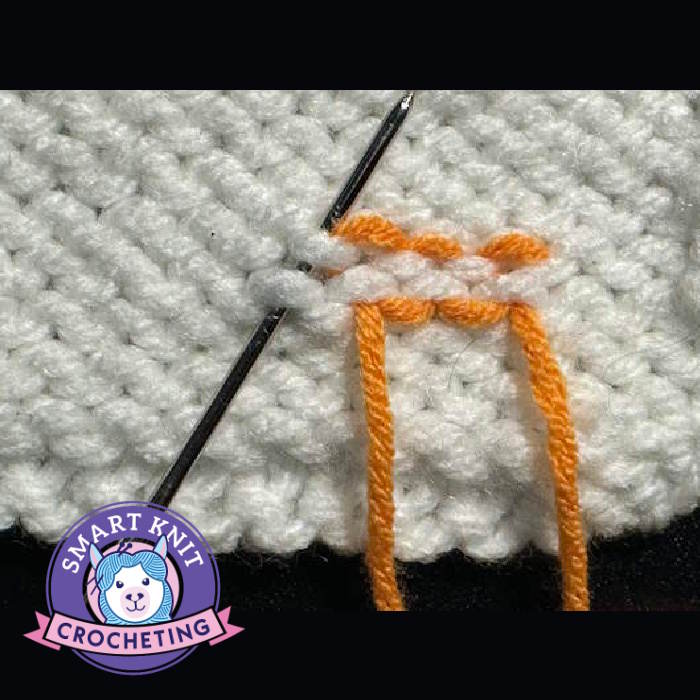
Weaving in ends is essential, no matter the project. If the ends are not woven in properly, they will eventually unravel, and all your hard work will result in a pool of yarn.
There is some debate about how to weave in ends, but I recommend the duplicate stitch method as recommended by TKGA (The Knitting Guild Association). I have never had any problems with ends unraveling using this technique.
Learn more about how to weave in ends.
Common Knitting Finishing Mistakes
Just like any knitting technique, mistakes can occur, normally without even being aware of them. Here are a few that knitters make, and what to do about them.
Skipping blocking
OK, so I will admit I am guilty of this one. I made a sweater out of 100% Acrylic yarn and then tried to block it without much success, so instead of doing more research, I just finished it without completing the blocking process. What happened?
- The seams didn't match up, making my mattress stitch distorted and untidy.
- One of the front sections of the cardigan was longer than the other, so picking up stitches for the button band was off.
Pulling seams too tight
Pulling the seams tight may seem like a good idea and a way to avoid unraveling, but the result is mostly a puckered seam where the two sides of the fabric don't lie flat and look less than professional.
Visible Yarn Tails
If you weave in your yarn tails correctly, they should not show on the front or public side of your fabric. That may be easier said than done, and while unaided eyes might not notice, you will likely be able to see those pesky tails.
One way to avoid this is to split your yarn when you weave in the ends. Splitting yarn is strongly discouraged when knitting, but when weaving in ends, it is both an accepted practice and a way to avoid any yarn showing up on the right side of your work.
Tools That Make Finishing Easier
This post contains affiliate links. This means that when you purchase through one of these links I will receive a small commission at no additional cost to you. Thank you for supporting smart-knit-crocheting.com
Some tools are very helpful in the finishing process:
- Tapestry Needles: Tapestry needles are essential for weaving in ends and sewing seams. Blunt-tip needles are usually easier for beginners because they slide between stitches without splitting yarn.
- Blocking Mats: Blocking mats help hold projects in shape as they dry. Foam mats with grid lines are especially helpful when blocking sweaters or lace.
- Rust-proof Pins: Rust-proof pins prevent staining during wet blocking and help hold edges evenly in place.
Last Words
Finishing techniques are often what separate a project that looks homemade from one that looks polished and professional. While beginners sometimes focus only on learning knit and purl stitches, skills like blocking, weaving in ends, and seaming are just as important to the final result.
The good news is that you do not need to master every finishing method at once. Start with the basics, practice one technique at a time, and remember that even experienced knitters continue refining their finishing skills over time.
As you gain confidence, you will begin to see how the right finishing method can improve the fit, appearance, durability, and overall success of your knitting projects.
Disclosure:
This post contains affiliate links. If you buy through them, I may earn a small commission at no extra cost to you.

Janice Jones is a Certified Knitting and Crochet Instructor who creates beginner-friendly patterns and tutorials, backed by a 389-page library of practical knitting and crochet content.
Most Popular Pages
Comprehensive Guide to Yarn

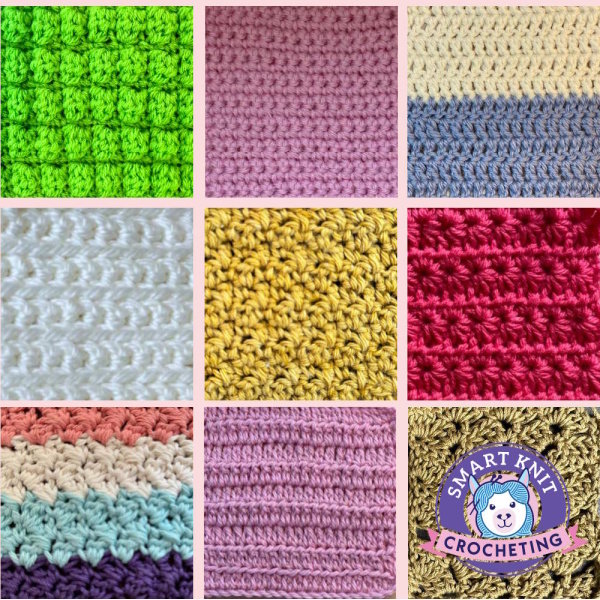
All Types of Crochet Stitches
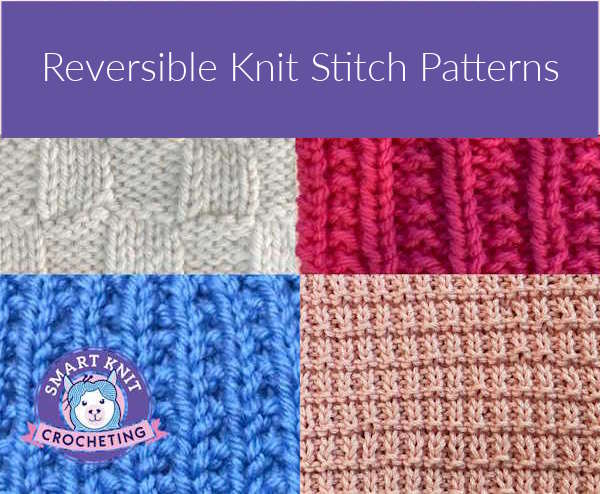
36 Reversible Knit Stitch Glossary
How to Crochet the Second Row
Dog Sweater Patterns

Working with Alpaca Yarn
Free eBooks, Just for You
Get my beginner eBook guides to Knitting and Crocheting, just for signing up for my monthly newsletter.
Choose one or both when you sign up.
About the Author: Please allow me to introduce myself
Janice Jones is a Certified Knitting Instructor and Certified Crochet Instructor through the Craft Yarn Council who focuses on beginner-friendly patterns, stitch guides, and technique tutorials. She has built a library of 389 pages on her website, sharing practical instructions and patterns, and has completed projects ranging from crochet blankets to knit sweaters. You can explore her work on her website. She makes items for Warm Up America and often knits and crochets sweaters for her small dogs.
Thank you for visiting Smart-Knit-Crocheting. I hope this and all of my tutorials will give you the inspiration to continue your knit or crochet journey. For a complete list of all the pages on my site, please visit my table of contents.
I participant in the Amazon Services LLC Associates Program, an affiliate advertising program designed to provide a means for sites to earn advertising fees by advertising and linking to Amazon.com. “As an Amazon Associate I earn from qualifying purchases.” These earnings go towards supporting my website.
Home | Contact | About | Privacy Policy | Disclaimer
I DO NOT SELL ANY PERSONAL INFORMATION FROM THIS WEBSITE. PLEASE SEE MY PRIVACY POLICY FOR MORE DETAILS.
Copyright © 2006-2026 Smart Knit Crocheting. All Rights Reserved
Please Share
Remember, Sharing is Caring