- Home
- How to Knit
- Knitting Mistakes Beginners Make
18 Knitting Mistakes Beginners Make: How to Fix Them
Knitting Mistakes for Beginners
By Janice Jones, Certified Knitting Instructor
Last updated: July 26, 2026
So you decided to take up knitting, perhaps because your friend offered to teach you, or you thought it might add a new craft to your repertoire, or maybe you heard it was a healthy, mindful, and productive way to fill your free time.
Knitting is an excellent craft that lets you create beautiful, functional items with just two needles and yarn.
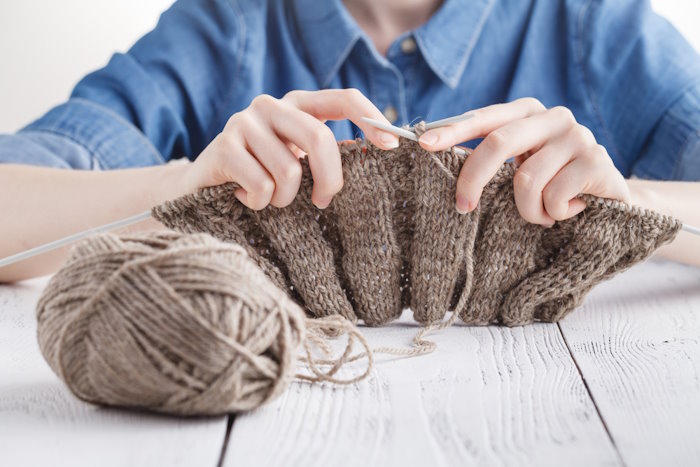
What Kind of Issues are You Dealing With?
If you are a beginner or have some experience, knowing that you are not alone is essential. We all started just where you are now. As beginners, we all have one thing in common: we all make mistakes. I can personally attest that I have made my fair share of mistakes over the years.
Troubleshooting
My knitting has holes in it: See Solutions 1, 6
My knitting keeps getting wider: 2
My knitting keeps getting narrower 2
My knitting just looks messy and uneven 4, 5, 7
My knitting looks nothing like the picture 12, 15
My knitting is curling 3
My knitting is too tight - I can't get the stitches off the needle 4
My knitting has big stitches at the beginning and end of the rows 4
My stitches keep falling off the needle 8
My project just raveled out: 9
Why doesn't this sweater fit: 13
What's the right side and what's the wrong side 15
I just don't understand these instructions 10
Should I just start over?
Common Mistakes to Avoid as a New Beginner Knitter
Luckily, all mistakes are fixable or avoidable, so check out these 16 mistakes. (Remember, we all make mistakes.)
1. Avoid Dropped Stitches
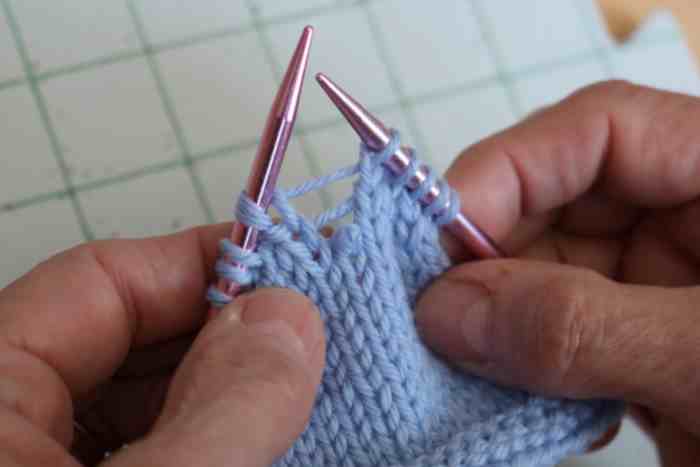 Avoid Dropped Stitches
The Problem: A hole appears in your fabric, and your stitch count is off.
Why It Happens: Needle slips off a stitch unnoticed, especially in loose knitting.
Quick Fix: Use a crochet hook to ladder the stitch back up. Place stitch markers to help track sections. Count stitches at the end of every row.
Key Takeaway: Catch dropped stitches early; they’re easy to fix when spotted quickly.
This is likely the most common knitting mistake that occurs when new knitters start making fabric. Dropped stitches are a common knitting mishap that can be easily avoided with a bit of attention to detail.
A dropped stitch occurs when a stitch slips off the needle and unravels down the work, often without being conscious of dropping the stitch.
To prevent this, periodically count the stitches on your needle. If you cast on 25 stitches and now only have 23 stitches, you most likely lost some stitches somewhere.
Examine the fabric you created to identify where you lost these two stitches. Look for loose stitches or holes. Look for places where a stitch may have been dropped.
They resemble little ladders that begin at the needle and extend down into the fabric. Learn how to pick up dropped stitches using a crochet hook when you notice them.
Learn how to fix dropped stitches.
2. Knitting in the Wrong Direction
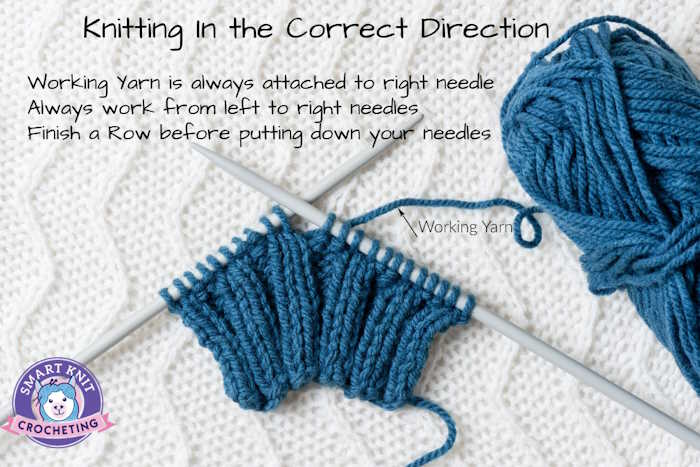 Other knitting mistakes beginners make include getting confused about which direction to work.
The Problem: Row Counts and Fabric Uneven
Why It Happens: Picking up knitting after a recess and beginning to knit in the wrong direction
Quick Fix: Always check that the working yarn is attached to the stitches on the right needle.
Key Takeaway: Finish knitting to the end of the row before taking a break, or ensure that your working yarn is attached to the right needle.
This may seem silly, but it is far too common among new knitters just starting. This mistake is easier to avoid but not impossible to correct.
To avoid this mistake:
Always finish the row before you put your needles down. In other words, do not stop in the middle of the row.
If you must stop in the middle of the row, look at your needles when you begin again. The working yarn should be attached to the right-hand needle.
To correct this mistake:
You must rip out the rows that you knit in the wrong direction. Place the ripped stitches back on your needle and continue.
3. The Fabric just keeps Curling
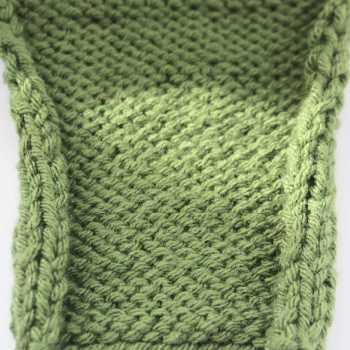 Some stitch patterns, like the stockinette stitch, will automatically curl.
It may not be you. It is like due to the type of stitch you are trying to make. One stitch pattern will curl no matter what you do: The stockinette pattern (knit one row, purl the next row). Some stitch patterns that have a substantial amount of stockinette in them will also curl. There are a couple of things you can do if you want the fabric to lie flat.
- Create a garter or seed stitch border around the stockinette pattern of 4 or so stitches. This is important if you are making something that should lay flat like a scarf or a dishcloth.
- Blocking the finished project helps a little (see blocking below).
- Choose a different stitch pattern that doesn't have so much stockinette in it.
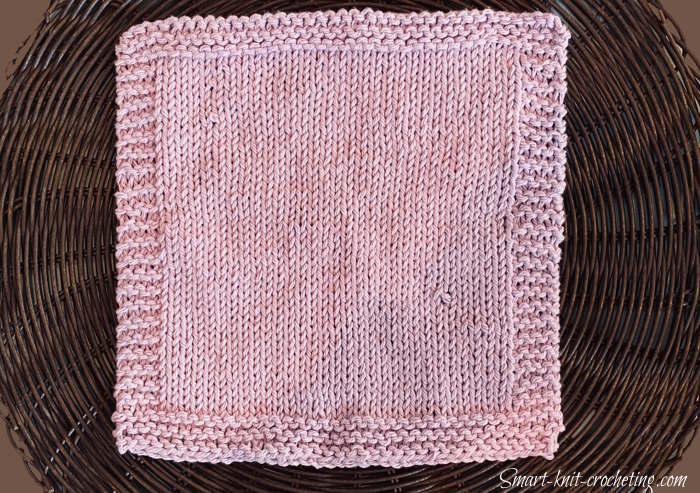 Stockinette stitch with garter border
 Blocking stockinette stitch fabric helps some.
4. Uneven Stitches: Tension Problems
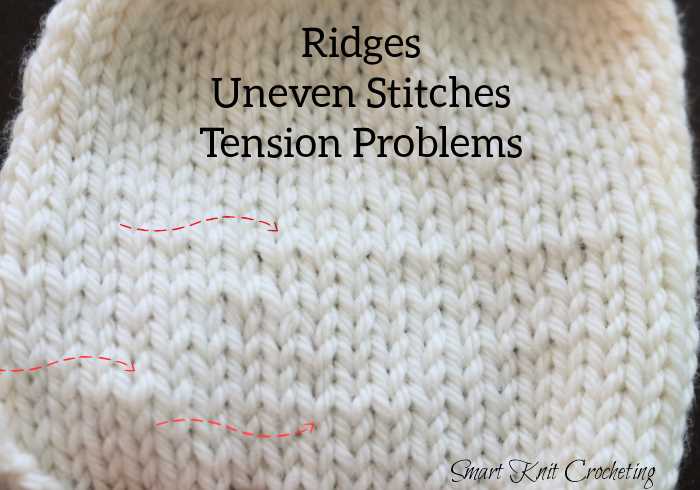
This is one of those common beginning knitting errors that can only be fixed with practice. The overall effect is not pleasing when some stitches are more prominent than others. This happens because we haven't mastered tension.
Some knitters will hide this problem by using variegated or specialty yarns that make it difficult to see individual stitches. That doesn't solve the problem, though.
Uneven stitches can occur anywhere, but are most noticeable in several places.
- Edge (selvage) stitches are often uneven if the tension is not quite right.
- You may also notice this problem between knit and purl stitches when knitting ribbing or cables.
- Another place where uneven stitches occur is between knit and purl rows. This is due to the tension difference between knitting purls and knits. For example, your knit stitches may be tighter than your purl stitches.
- Sometimes it just happens within a row as the photo above demonstrates.
This takes practice, but I recommend reading my article about tension and how to fix this mistake.
5. Twisted Stitches
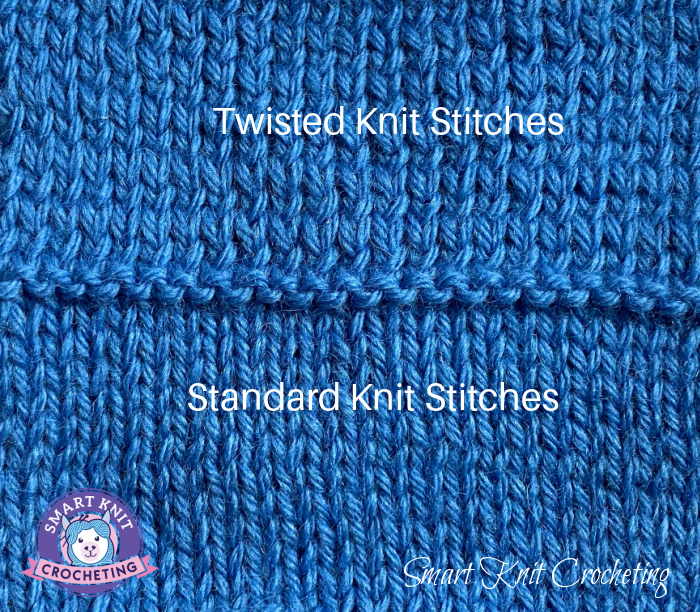 Some knitting mistakes beginners make involve how stitches rest on the needles.
If you cast on all your stitches using standard cast-on methods, your stitches will face the correct direction.
When viewing the stitches on the needles, there are two legs; one is on the far side of the needle, and the other is on the side closest to you.
If you look closely, you will see that one leg is closest to the needle point, and the other is not. If they are placed correctly, the leg closest to you should also be closest to the needle tips. This is how the stitches should rest on the needle if they are accidentally dropped.
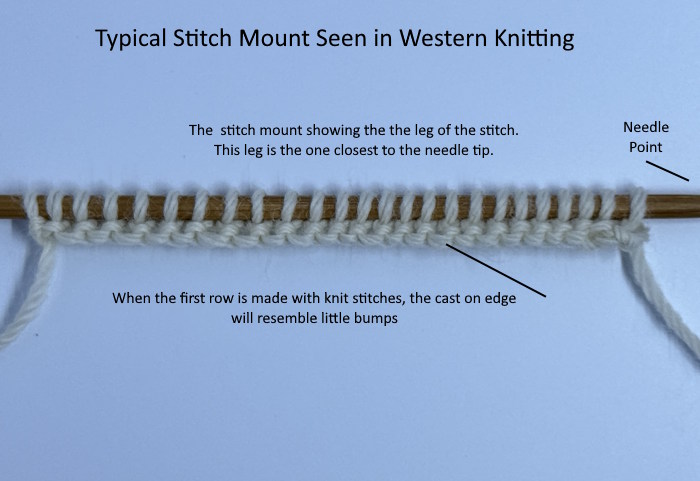 The leg of the stitch closest to you should be mounted so that it is closer to the needle tip than the one in the back.
Unless you deliberately try to create twisted stitches, you will want to avoid them so the fabric you create will be uniform and beautiful. Twisted stitches commonly occur because you are doing one of two things:
1. The stitches on your needles are not placed correctly. This often happens if you must ripe out some stitches and put the stitches back on the needle incorrectly.
2. You knit the stitches incorrectly.
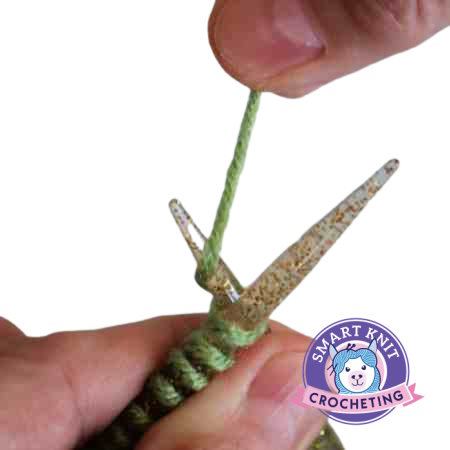 Wrapping your yarn properly, as shown here, will help prevent twisted stitches.
Learn more about Twisted Stitches
6. Finding Holes in Your Work
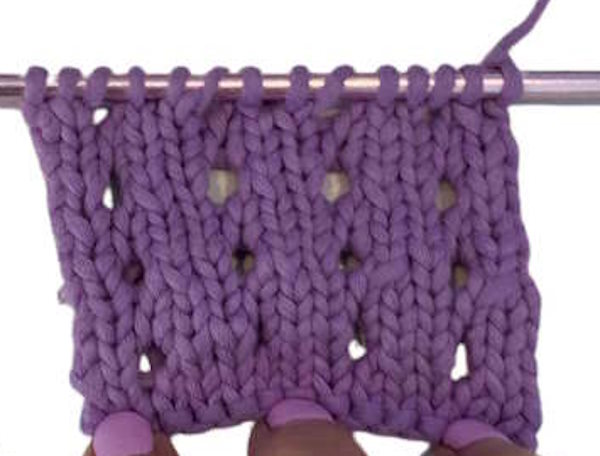
Holes in the knitted fabric are not always a mistake. When we make yarnovers, a technique used in lacework, the little holes that emerge are called eyelets.
But, if you are not doing lacework or deliberately trying to make eyelets, you probably made an accidental yarnover or dropped a stitch. (See Number 1)
You can identify an accidental yarnover by the way it looks on the needle. If you see this, on the next row, slip it off the needle and continue knitting to the end of the row. An accidental yarnover is an increase, so if you do not remove it, your stitch count will increase by 1.
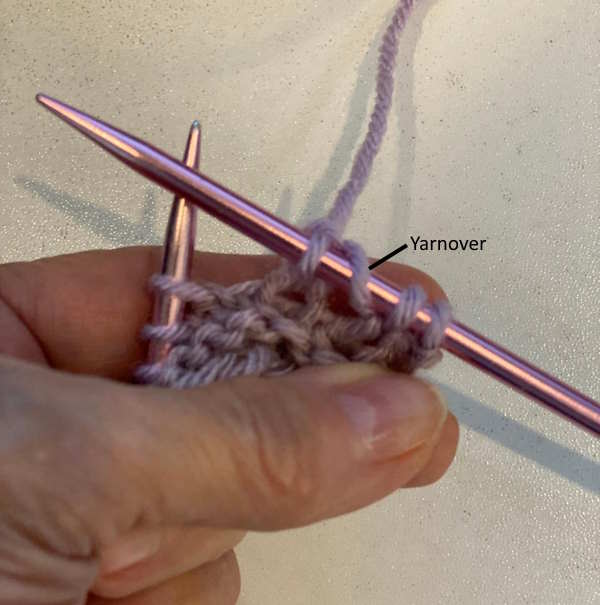 We deliberately make yarnovers when knitting eyelets and lacework, but sometimes beginners accidentally add one.
7. Casting on and Binding off Mistakes
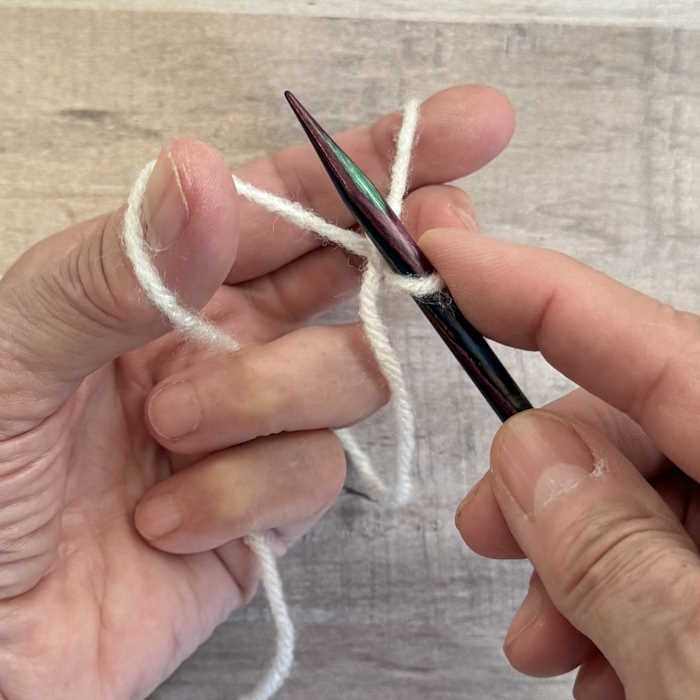
Typically tension is often the problem when casting on or binding off. You can either cast on too tightly or loosely.
Similarily, when binding off, we can either bind off too tightly or too loosely.
Casting On
If you cast it on too tightly, the edge will curl into a frown. If the cast on the edge is too loose, the stitches look sloppy. If this happens to you, the most straightforward remedy is to use a different-sized needle for casting on. Use one needle size larger if your cast-on is too tight and one smaller if your cast-on is too loose. There are also many ways to cast on, so a different cast on method, might correct the mistake.
Binding Off
The same holds for binding off. Adjust your needle size up or down so that your cast-on and bind-off edges are straight and parallel. Even blocking may not be able to correct these problems.
Learn how to cast on stitches.
Learn how to bind off stitches.
8. Wrong Choice of Yarn
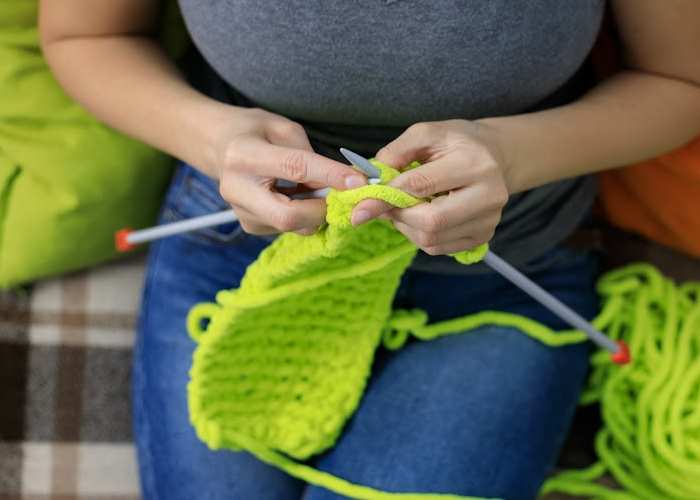 This is likely not a knitting mistake beginners make, but it's worth noting that knowledge of yarn and needles is a good skill to develop.
Another common mistake is using the wrong needles and yarn for your project. The size of your needles and the weight of your yarn should match the requirements stated in your pattern.
Using the wrong size can impact your gauge, resulting in a finished piece that is too large or too small. It can also make knitting harder, and the fabric may look different from what you intended. Always check the recommended needle size and yarn weight against both the pattern and the yarn label before starting a new project.
Learn more about knitting needles.
Learn more about Yarn.
9. Wrong Choice of Needles
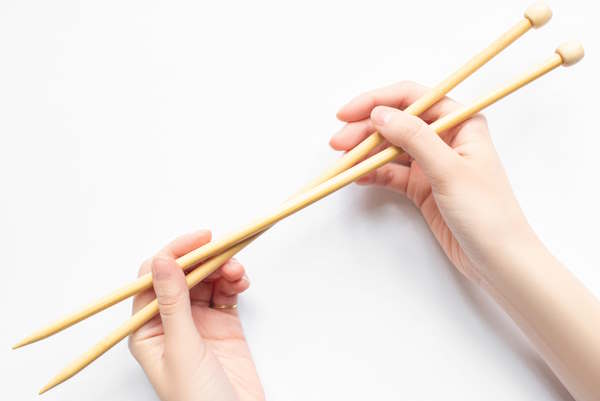 The right choice of needles can make all the difference in the world.
Using the right type of needle can make you a much more confident knitter, but when you are just getting started, it is hard to know which needles to choose. A knitter will often blame themselves if the stitches fall off the needle or the yarn splits, or even if the stitches hug the needle too tightlyly.
You want to find a set of needles that let your stitches slide easily up and down the needle shaft but do not fall of the tips by themselves. You want a pair of needles that have realitive sharp tips to get under the stitches, but not so sharp that the tip splits the yarn in half. You want needles that feel comfortable in your hands -- not to hot and not too cool. If the sound of clicking bothers you, you want needles that don't clink.
In a nutshell if you are a beginner, look for needles made out of wood or bamboo. But if you want to know more about how to choose needles, I recommend you read my article about knitting needles or supplies for knitters.
10. Not Understanding Charts or Patterns
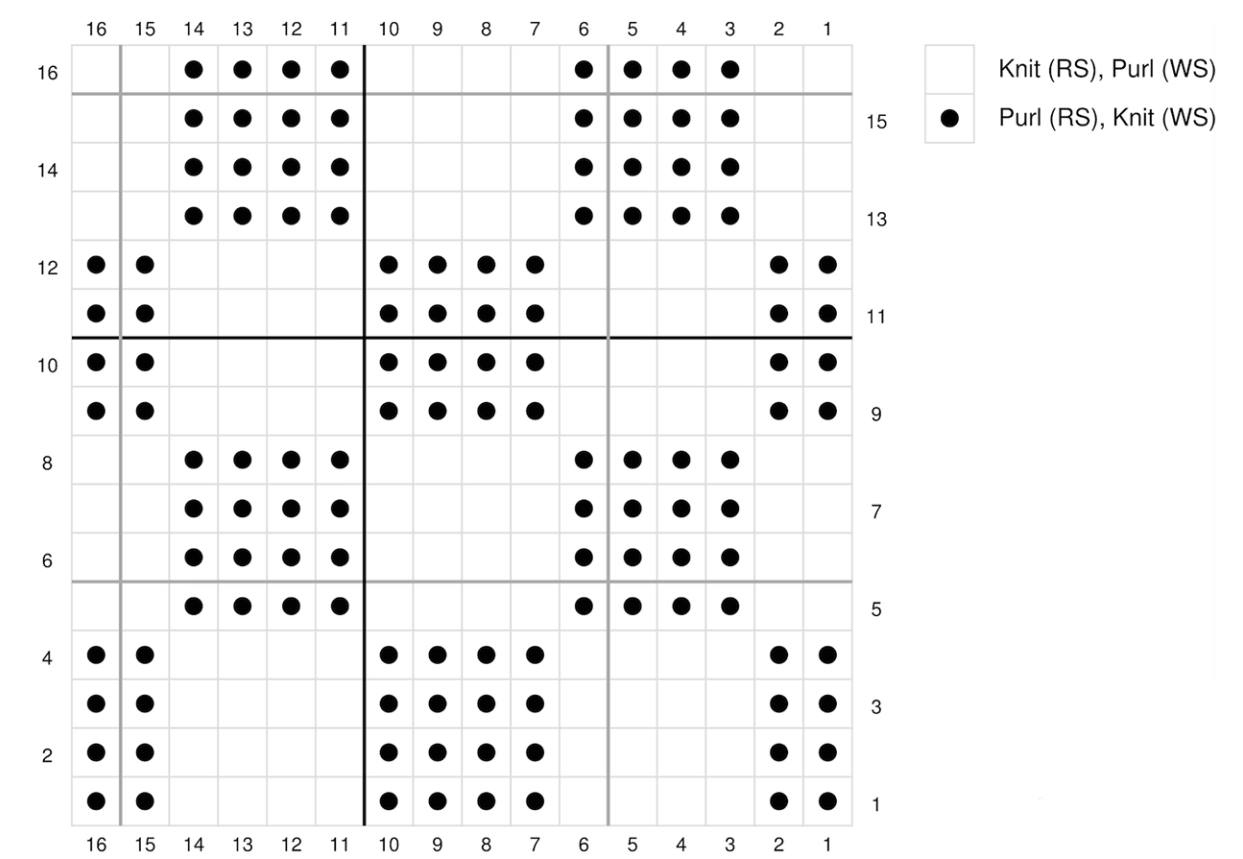
If you don't understand knitted charts and what the symbols mean, it is easy to make one type of stitch when you should have made another stitch. For example, in the chart above, look at the bottom row marked with a 1. The little dots in some of the squares refer to purl stitches, and the ones that are empty are knit stitches. The chart tells you to make 2 purl stitches, then 4 knit stitches, 4 purl stitches, 4 purl stitches, and finally 2 knits. The second row, or the wrong side row, is the opposite. This can be very confusing.
Learn to read knitting charts.
Learn to read knitting instructions.
11. Not Weaving in Ends Properly.
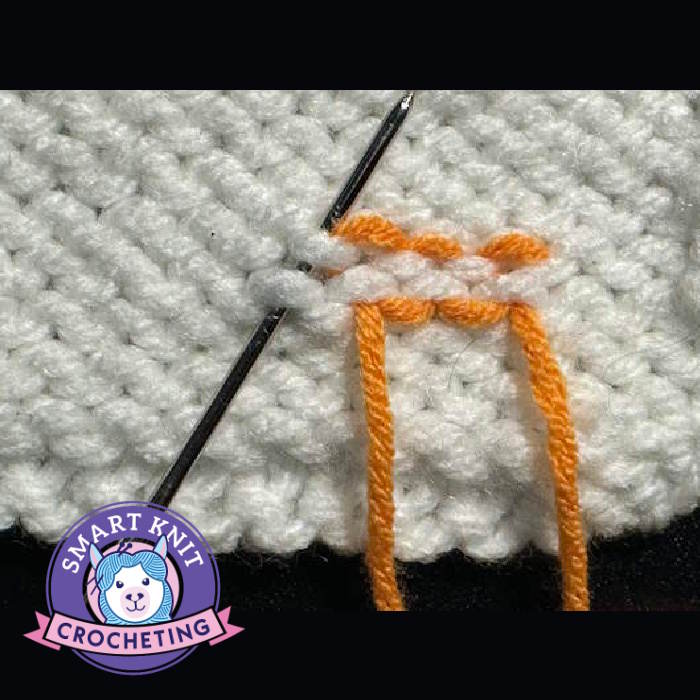
There are two basic problems when ends are not woven in properly or not at all. Beginners often think that tying a knot is the solution, but then they end up with a knot that can unravel. If the ends are not woven in, then the entire fabric can unravel. Finally, if the ends are not woven in properly, they can be seen on the right side of the fabric.
Learn how to weave in those ends.
12. Forgetting to Block Your Work
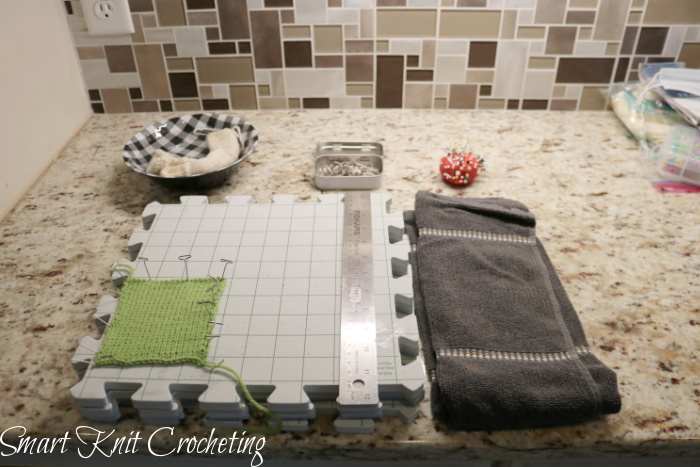
Blocking is essential in finishing your knitting projects and giving them a polished look. Blocking involves wetting your finished piece and shaping it to the desired dimensions. This process evens out your stitches and helps your project retain its shape.
Some fabrics, such as those made with the stockinette stitch, will curl in all directions, so if you need them to lie flat, you will need to block your work.
Learn more about Blocking Your Work
13. Not Making a Gauge Swatch
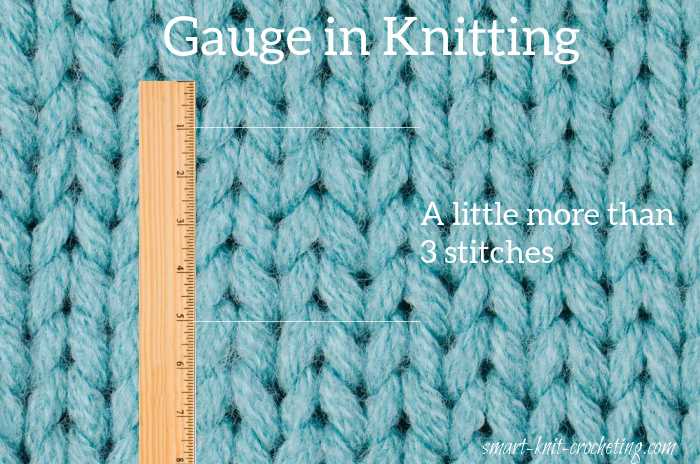
Making a gauge swatch before beginning any project is a good habit for beginners. It tells you a couple of things:
- How the fabric will look, feel, and behave.
- How big will the fabric be?
Some projects can be fine without a gauge swatch if size doesn't matter. But when you are making something to wear, you want to be sure that it will fit. Your swatch should be the same size as the designer's, but if not, you will need to make some adjustments.
Learn more about knitting gauge.
14. Losing Track of Where You Are
This can happen to anyone, beginner, intermediate or advanced knitter. As we advance from super simple to more complete stitch patterns, we may lose track of our progress.
This happens when we graduate from a two- or four-row repeat pattern to an eight- or 12-row pattern. How do you keep track of your progress?
There are several ways to avoid getting into trouble and losing your place.
- Use stitch markers to keep track of the row you are knitting.
- Use a row counter to tell you what row you are knitting.
- Use paper and pencil methods like tally marks to follow your progress.
- Use an online pattern program.
- Consider a magnetic pattern holder.
If you lose your place, learn how to read your stitches, bringing us to number 15.
15. Not Understanding How to Read Your Stitches
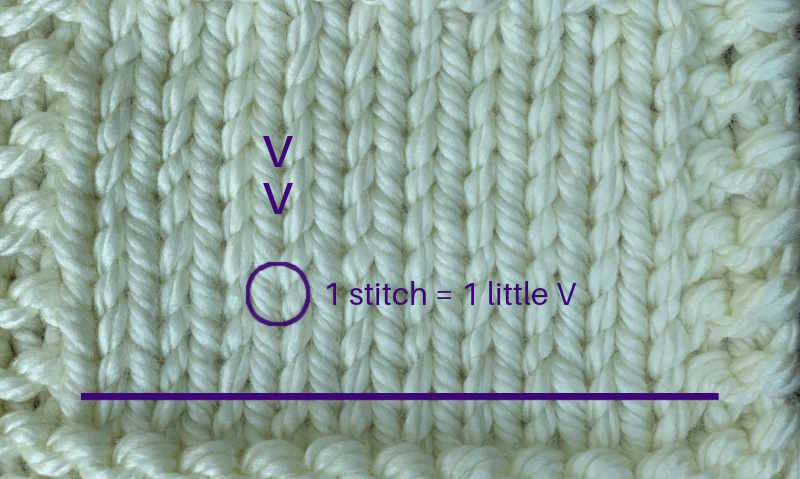 One knit stitch is circled in purple.
New Knitters will likely master stitch patterns such as garter, stockinette, rib, or seed stitch. As we learn a new stitch pattern, we must also understand what the stitches look like.
It may also be challenging to determine whether we've made any mistakes if we fail to recognize a knit from a purl. Worse yet, we may acknowledge that something looks wrong, but we can't determine where or how to fix it.
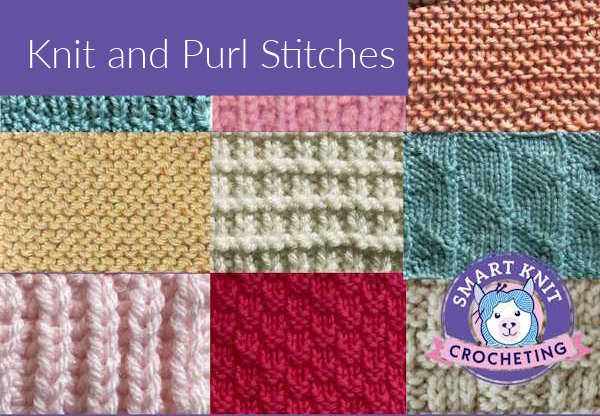
Another common confusion with beginners is not understanding which side of the fabric is the right side and which is the wrong side. There is an easy fix to this if you are working with knit and purl stitch patterns.
Did you start your first row with knit stitches? Or with Purl Stitches? It matters because the bottom edge of your fabric will tell you which side is right or wrong. For example, if the pattern says:
Rows 1 and 3 (RS): Knit
Row 2: (WS) Purl
Row 4: P 1, *K 2, P 1, repeat from * to the end of the row.
Your bottom edge will look like little bumps and the wrong side will look smooth. The opposite can be true if the designer asked you to start with a purl row.
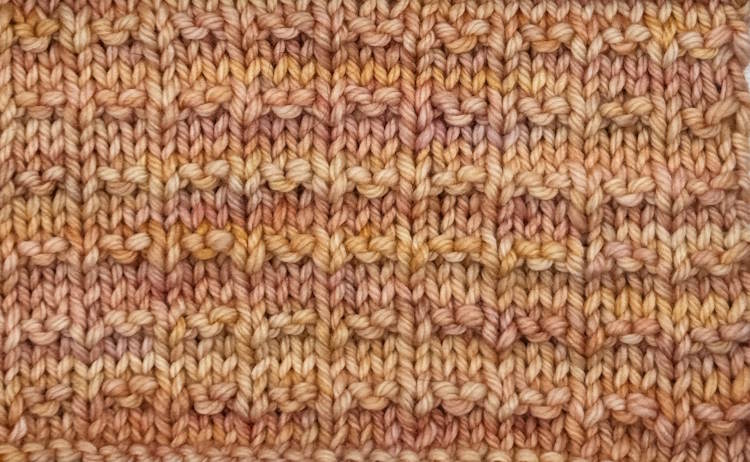 Notice the small bumps at the bottom of this photo. It means that the first row of stitches was knit. Since the pattern indicates the first row is the right side, you can conclude that this is the right side.
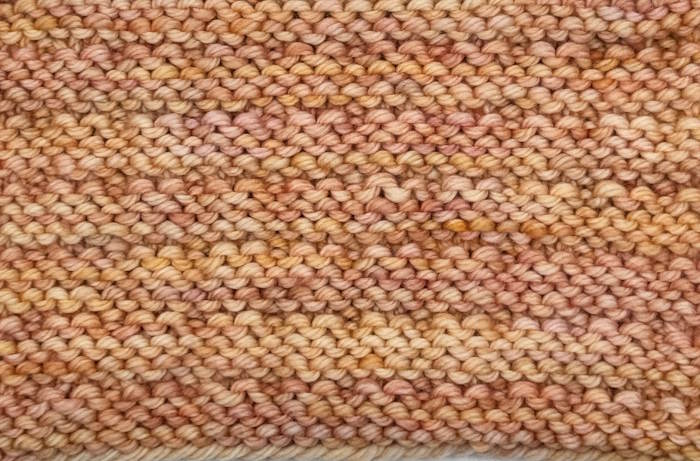 This is the wrong side because the first row of stitches looks smooth, like little whip stitches. Patterns don't often include a wrong side (WS) but will always mention whether row one is a right or wrong side.
16. Not Understanding Yarn Labels
There are lots of ways knitters go wrong when they don't understand what the yarn label is trying to say.
- Ignoring the needle size recommended.
- Not understanding how much yarn to buy for a project.
- Ignoring the instructions for washing.
- Not buying enough yarn and then going back and buying the wrong yarn lot.
- Ignoring the fiber type and how it relates to what you want to make.
Learn more about reading yarn labels
17. Knitting Under the Wrong Lighting Conditions
Note: I earn a small commission for purchases made through links in this article.
This might not be a problem for anyone with perfect vision, but for us knitters who struggle with seeing clearly, the right lighting is critical. I learned this the hard way, as my eyesight slowly deteriorated with age. The best light for knitting is natural light, and sitting outdoors to knit is ideal. However, that is not always possible. There are some solutions:
- Choose a lighter color yarn, as dark yarns are difficult to see.
- Use a neck reading light. This is an economical way to provide more light for any craft project or just reading a book. I like this option because it is portable and you can knit anywhere.
- Desk Lamp: If you prefer to knit at a table or desk, a gooseneck lamp can provide all the light you need at a reasonable cost.
- Head Lamp: If you need extra light, find a head lamp that is super bright and has a long battery life.
18. Not Choosing The Right Stitch Pattern
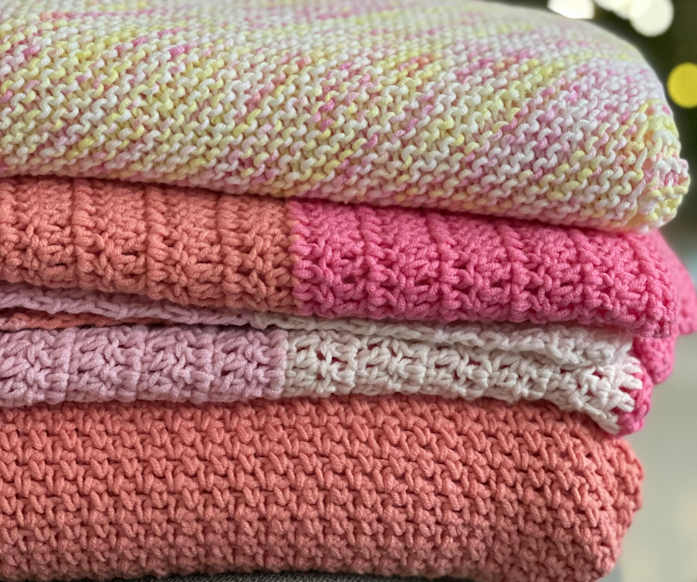
This is one that I have covered extensively on this site. If you like to knit but hate following a pattern, you are likely trying to find a stitch pattern you like, but not every beautiful stitch pattern is perfect for every pattern. Some projects, such as scarves, where both sides show, a reversible knit stitch pattern is perfect. If you are knitting a baby blanket, a stitch pattern that creates a solid fabric is important. Still, there are many perfect stitch patterns for knitting blankets. Finally, if you need the final project to lie flat, choose a stitch pattern that does not curl. Any type of stockinette stitch pattern will curl, so if you like that one, it's important to add a border. These dishcloth patterns all lie flat.
19. Fabric is Misshapened
When your square or rectangle washcloth looks more like a trapazoid, you are likely adding or loosing stitches along the rows. This is a very common mistake that even experienced knitters make from time to time.
Assuming you don't want to make increases or decreases, there are a few things you can do.
- Know how many stitches you cast on and count every row as you finish it. If you have more stitches than you started with, you may have accidently added one by spitting the yarn and making two stitches into the same stitch. You may also have accidently made a yarn over.
- If you have fewer stitches than you started with, then you probably dropped a stitch, or accidently worked two stitches together rather than separately.
Should I Just Start Over?
Many beginners ask this question and do even now. My answer probably won't help, but I would say, "it depends." If you have only knit a couple of rows and are already completely off, then yes, I would likely start over. If there are only a couple of mistakes in the work you have completed, then I'd say, first try to fix those mistakes before you end of ripping it out. Here are a couple of things that work for me so that I don't have to ask this question.
- Always start with a small gauge swatch even if you don't worry about the size of the finished project. Working a practice swatch allows you to practice the stitch pattern before you start on a large project. It will also tell you how the yarn will behave, how the color will look and whether you want to switch to a different type of needle.
- I don't knit when I'm anxious or upset for any reason. I also have a preferred place and time to do my knitting and I stick to that schedule. I can't knit late at night when I'm tired, but maybe that is your favorite time to knit. Find your happy place and time.
- Use a ruler or magnet pattern holder to keep your place, or keep track of your progress using an online app.
- Count your stitches after each row and look at your work regularly. It's always easier to spot something wrong in the row your are currently working, then to fix a mistake 6 rows below.
Knitting Mistakes Beginners Make: Conclusion
Knitting is a rewarding and versatile craft that offers endless possibilities for creativity. By avoiding common mistakes, choosing suitable materials, understanding patterns, and practicing proper tension, you'll be well on your way to becoming a confident and skilled knitter.
Remember, knitting is a journey of learning and exploration, and an inevitable part of knitting is making mistakes, so embrace the process.
Don't be afraid to make mistakes – they are part of learning.
Here I have a little confession to make.
I'm a perfectionist.
I've been that way forever, and I have struggled my entire life to overcome my perfectionist tendencies.
Knitting, more than anything else, has helped me realize that I don't need to be perfect. Yes, if you are trying to be a master knitter, you might need to knit to perfection, but for the rest of us, relax and enjoy the process.
FAQ: Common Knitting Mistakes (and Quick Fixes)
Why are my stitches so tight that they are hard to knit?
Why are my stitches so tight that they are hard to knit?
Pulling too tightly when casting on or knitting can make the stitches tight and difficult to get the needle tip under. Sometimes this happens when you tension your yarn around your fingers too tightly. Tight, hard-to-knit stitches may also happen when you pull the yarn too hard or knit only on the needle tips without sliding the stitches onto the shaft. The most common issue is that knitters grip the needles too tightly. See: Tension tips
How can I fix a dropped stitch without having to start over?
How can I fix a dropped stitch without having to start over?
Use a crochet hook to ladder the stitch back up to the needle, matching knit or purl “legs” as you go. Secure it, then count your stitches to confirm you’re back on track. Assure that all stitches are placed in the right direction on the needle. Here is an article that can provide more information about dropped stitches.
What causes holes in my knitting?
What causes holes in my knitting?
Accidental yarnovers or dropped stitches are the usual culprits. If you spot a hole, place a marker, rip back carefully to the problem row, and re-knit, avoiding extra wraps. Learn more about dropped stitches or yarn overs in knitting.
How can I stop twisting my stitches?
How can I stop twisting my stitches?
Ensure each stitch sits on the needle with the leading leg forward (closest to the needle tip), and insert the needle in the same manner every time. If you rip back, re-mount stitches correctly. Details: /twisted-stitch.html
Why doesn’t my project fit even though I followed the pattern?
Why doesn’t my project fit even though I followed the pattern?
Your gauge is not the same as the designer's. Make a gauge swatch at least 4 inches square. Calculate your gauge and match it to the gauge indicated in the pattern. If it does not match, change the needles to match the gauge. Skipping the swatch is the fastest route to sizing woes. Learn more about gauge swatches.
I lose track of my row—any easy tricks?
I lose track of my row—any easy tricks?
Use locking stitch markers, a row counter, tally marks, or a simple app to keep track of your progress. Place markers at repeats and add a removable marker at the active row so you can resume confidently. Use a metallic pattern holder and ruler to help you keep track of the row you are knitting.
I’m confused by charts and abbreviations—where should I start?
I’m confused by charts and abbreviations—where should I start?
The vast number of abbreviations used in knitting can be overwhelming for beginners. Start with the legend provided with the pattern, but don't feel obligated to memorize all the abbreviations. You will remember them as you continue to knit. Use our downloadable abbreviations chart that you can print and keep handy in your knitting bag. Start by learning how to read charts on this website for guidance on understanding them.
What info on a yarn label actually matters?
What info on a yarn label actually matters?
Look at the fiber content and how that fiber should be laundered. Look for the weight category, either written as a number or a description. Find the recommended needle size and gauge. If you are substituting yarns, check the yardage as each ball holds a different length of yarn. My Yarn Label article will provide more information.
12) What info on a yarn label actually matters?
Check fiber content (feel/care), weight category, recommended needle size, gauge, yardage, and care symbols. These determine fit, drape, and maintenance. Quick guide: /yarn-labels.html
Knitting Problems and Fixes:
Pin for Future Reference

Disclosure:
This post contains affiliate links. If you buy through them, I may earn a small commission at no extra cost to you.

Janice Jones is a Certified Knitting and Crochet Instructor who creates beginner-friendly patterns and tutorials, backed by a 389-page library of practical knitting and crochet content.
Most Popular Pages
Comprehensive Guide to Yarn

All Types of Crochet Stitches
36 Reversible Knit Stitch Glossary
How to Crochet the Second Row
Dog Sweater Patterns
Working with Alpaca Yarn
Free eBooks, Just for You
Get my beginner eBook guides to Knitting and Crocheting, just for signing up for my monthly newsletter.
Choose one or both when you sign up.
About the Author: Please allow me to introduce myself
Janice Jones is a Certified Knitting Instructor and Certified Crochet Instructor through the Craft Yarn Council who focuses on beginner-friendly patterns, stitch guides, and technique tutorials. She has built a library of 389 pages on her website, sharing practical instructions and patterns, and has completed projects ranging from crochet blankets to knit sweaters. You can explore her work on her website. She makes items for Warm Up America and often knits and crochets sweaters for her small dogs.
Thank you for visiting Smart-Knit-Crocheting. I hope this and all of my tutorials will give you the inspiration to continue your knit or crochet journey. For a complete list of all the pages on my site, please visit my table of contents.
I participate in the Amazon Services LLC Associates Program, an affiliate advertising program designed to provide a means for sites to earn advertising fees by advertising and linking to Amazon.com. “As an Amazon Associate I earn from qualifying purchases.” These earnings go towards supporting my website.
Home | Contact | About | Privacy Policy | Disclaimer
I DO NOT SELL ANY PERSONAL INFORMATION FROM THIS WEBSITE. PLEASE SEE MY PRIVACY POLICY FOR MORE DETAILS.
Copyright © 2006-2026 Smart Knit Crocheting. All Rights Reserved
Please Share
Remember, Sharing is Caring