- Home
- How to Knit: Basics
- Gauge in Knitting Projects
Understanding Gauge in Knitting Projects: Make it Right Every Time
Understanding Gauge in Knitting Projects by Janice Jones, Certified Knitting Instructor (CYC)
Updated December 2025
Getting gauge is one of the most important skills you can learn as a knitter — especially if you want your sweaters, hats, socks, and cardigans to actually fit. Yet many beginners either skip the gauge swatch or don’t truly understand what gauge means until they’ve completed an entire project, only to discover it’s too big or too small.
In this step-by-step guide, you’ll learn exactly what gauge is, why it matters, and how to measure it correctly so you can knit confidently every single time.
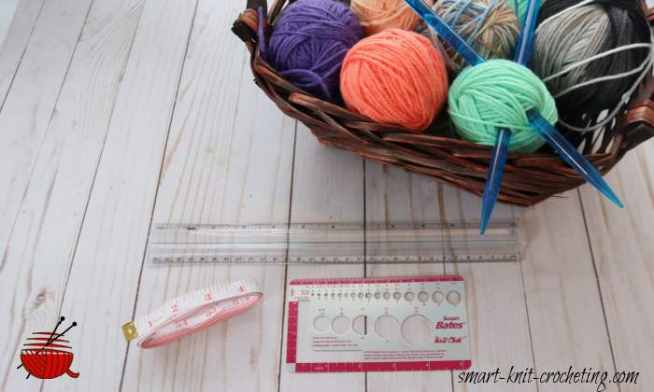 Gauge in Knitting Projects: Getting it Right
What Is Gauge in Knitting? (Beginner-Friendly Explanation)
Gauge is printed on yarn labels and in knitting patterns as the number of stitches and rows per 4 inches (or 10 centimeters) in a square.
It tells you how large or small your stitches naturally are when you knit.
Every knitter has a unique tension:
- Some knit tightly
- Some knit loosely
- Most knit somewhere in between
This means two people can use the same yarn, same needles, and same pattern — and still produce very different fabric sizes.
A typical pattern may state:
Gauge: 20 stitches × 28 rows = 4" (10 cm) in stockinette stitch
This tells you the designer’s gauge.
Your job is to make your knitting match these numbers as closely as possible.
Gauge = stitch width + row height.
Both matter when you want accurate sizing.
Does Gauge Really Matter?
YES — if you want the project to fit.
Gauge affects the:
- Width of sweaters, cardigans, and hats
- Length of sleeves
- Fit around the chest
- Size of mittens, socks, and baby garments
- Drape and density of the fabric
When gauge does NOT matter:
- Blankets
- Scarves
- Dishcloths
- Shawls that do not need a specific size
If the size can vary without consequences, you can relax about gauge.
If the project needs to fit a human body, then gauge matters big-time.
It is our job as knitters is to obtain the gauge stated on the pattern before knitting the actual garment. We do this so that our finished project equals the pattern's stated measurements. Basically, we try to obtain gauge so that our knitted piece will fit.
Fabric Structure Affects Gauge
One of the biggest surprises for new knitters is that their gauge will change depending on which stitch pattern they use. Even if you keep the same yarn and needles, the fabric behaves differently in each stitch.
Here’s how common stitch patterns affect gauge:
Stockinette Stitch
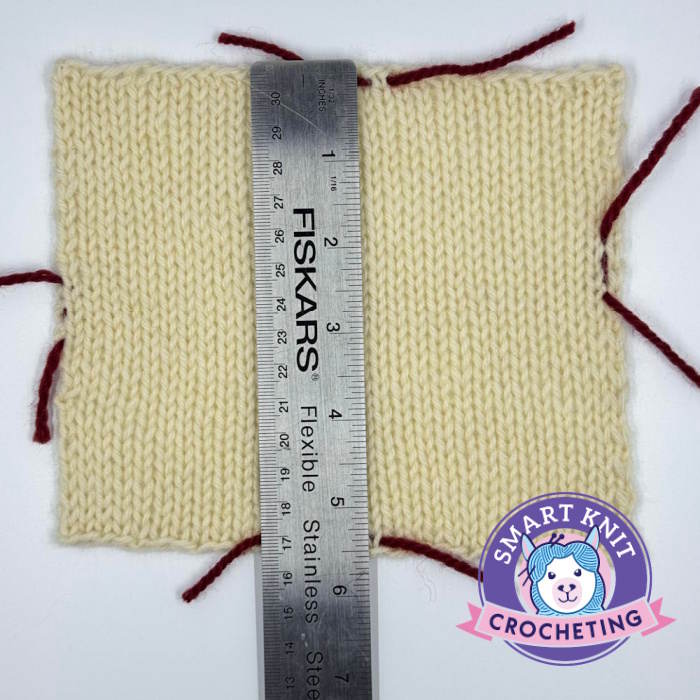
Stockinette Stitch is often the stitch pattern that is used on yarn labels to calculate gauge. It produces a smooth, even fabric with a predictable stitch and row gauge. It is an easy, beginner-friendly way to learn how to measure gauge because stitches are easy to see and count. That is why it is used on yarn labels and in patterns.
To mark the area for calculating gauge in stockinette stitch, use waste yarn or stitch markers and place them vertically between two columns of stitches on either side of the swatch.
Do not include the edge or selvage stitches.
Be sure your swatch is positioned on a table with the cast-on edge at the top. This way, you will see the little V's that are the stitches you will count. Row gauge markers are placed horizontally and alternate over and under stitches within a single row.
A common gauge for stockinette stitch using a worsted-weight yarn is:
20 stitches and 26 rows per 4-inch/10 cm square.
Garter Stitch
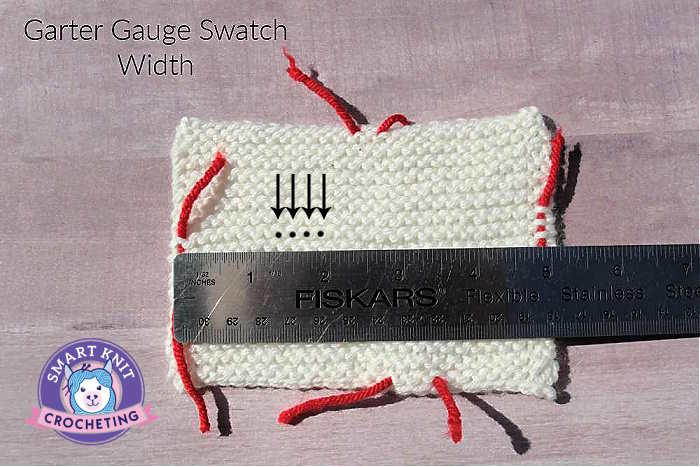
The garter pattern resembles ridges, composed of a series of smiles and frowns. Two rows create one ridge. Place the gauge markers vertically between stitches to mark the area to be counted for stitches. To count stitches, count the frowns across one row.
Row gauge markers are placed horizontally within a single row nestled between two ridges. To count rows, count the ridges and then multiply by 2.
A standard gauge for garter stitch pattern using a worsted-weight yarn is:
20 stitches and 28 rows per 4-inch/10 cm square.
Seed Stitch
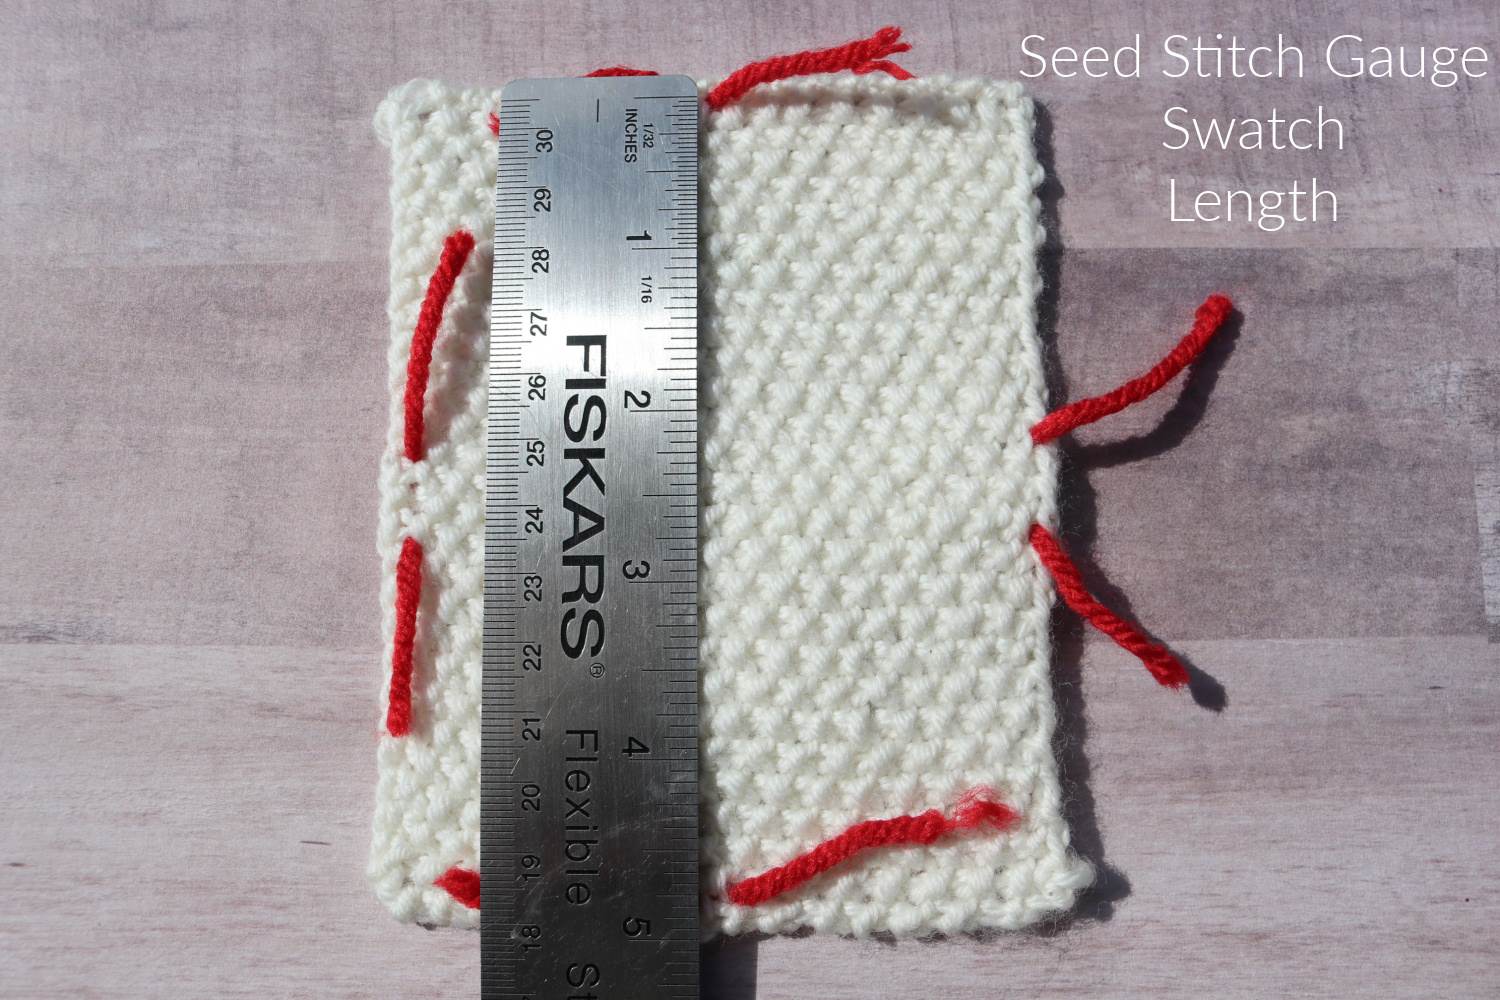
Alternating knit and purl stitches create the seed stitch and purl both across the row and each row. You can see the purl bumps, but the knit stitches recede into the fabric and are not easy to see unless you pull part the fabric.
You would place the Stitch gauge markers vertically between stitches, identified as a narrow ditch between two columns of purl bumps. Row markers are placed horizontally within a single row and alternate above a purl bump from the row below and below a purl bump from the row above.
To count stitches, count the number of columns of purl bumps between markers. For rows, choose two adjoining columns of purl bumps and count the total number of purl bumps in both.
A common gauge for seed stitch pattern using a worsted-weight yarn is
20 stitches and 37 rows per 4-inch/10 cm square.
Lace
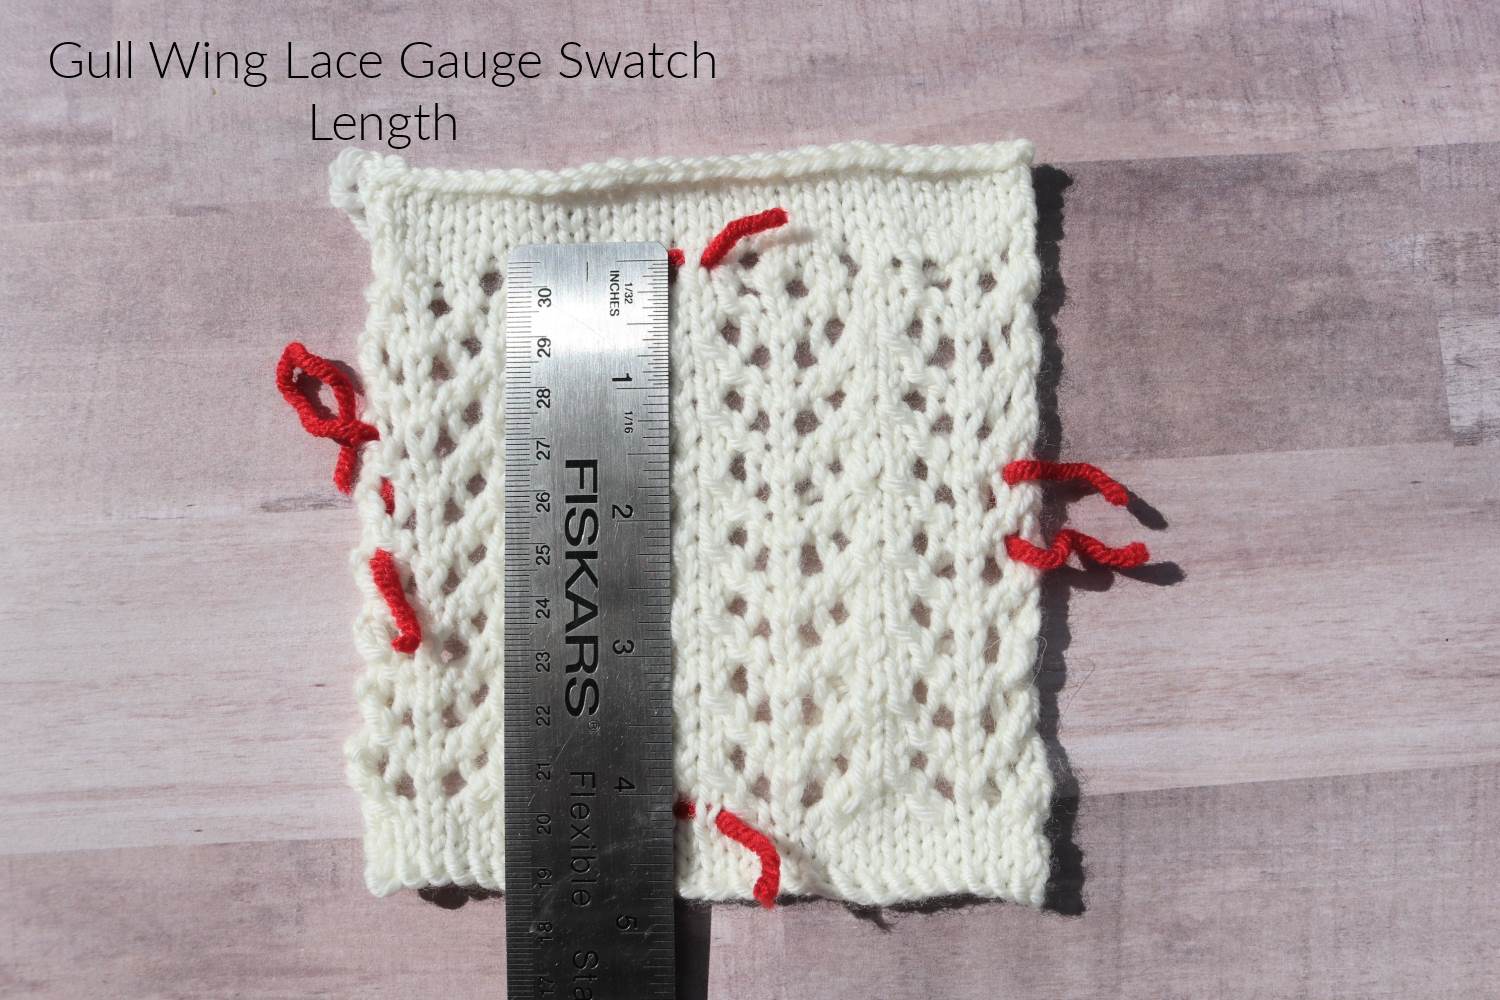
All lace patterns are different, so it is challenging to standardize them here. I've added this to show you where you might want to place your stitch markers. When calculating lace, you only want to count the stitches that are actually in the lace stitch pattern.
How to Measure Gauge in Knitting
To get an accurate gauge, you need a blocked swatch (more on blocking later).
- Cast On More Stitches Than the Pattern Uses: If the pattern’s gauge is 20 stitches, cast on 26–30 stitches instead. Measuring only the inner portion avoids curling edges and distorted stitch counts.
- Knit More Rows Than Required: If you need 28 rows, knit 32–36 rows so you can measure cleanly.
- Block Your Swatch (Very Important!): Blocking helps stitches relax into their final size. If you skip blocking, your gauge may change dramatically once your finished garment is washed. Learn more about how to block your gauge swatch.
- For wool or wool blends → wet block
- For acrylic → steam block lightly
- For cotton/linen → wet block
4. Measure Your Stitch Gauge: Lay your ruler horizontally across the center. Count how many stitches fit into 4 inches (10 cm).
5. Measure Your Row Gauge: Lay the ruler vertically and count the number of rows within 4 inches.
Row gauge is essential for:
- Raglan shaping
- Sleeve length
- Armholes
- Yoke depth
- Neckline shaping
Matching stitch gauge is usually the priority, but row gauge matters more than people think.
A More Accurate Way to Calculate Stitch Gauge
The information I provided above will give you a rough estimate of the gauge. However, according to The Knitting Guild Association, there is a more accurate and better way to measure gauge, and theirs is the recommended method.
Step One: Place Markers
After knitting your gauge swatch, you will want to block it before proceeding to this step. Once complete, use scrap yarn to mark the area where you will make your measurements.
Step Two: Measure
Using a ruler (not a tape measure), measure the width between the two markers to the nearest eighth of an inch and convert it to a decimal. Write it down.
- 1/8" = 0.125
- 1/4" = 0.25
- 3/8" = 0.375
- 1/2" = 0.5
- 5/8" = 0.625
- 3/4" = 0.75
- 7/8" = 0.875
Step Three: Count the Stitches
Count the stitches between the stitch markers. Write it down.
Step Four: Do the Math
Using the two measurements you just wrote down, divide the number of stitches by the width. Do not round off. Multiply this number by 4 to get the stitch gauge.
| Stitch Gauge | Row Gauge |
|---|---|
| Width measured to 1/8 inch (decimal): 6.25 | Length measured to 1/8 inch (decimal): 5.25 |
| Number of stitches between marking threads: 28 | Number of rows between marking threads: 31 |
| Number of stitches in one inch (not rounded): 4.48 | Number of rows in one inch (not rounded): 5.9047 |
| Number of stitches in four inches (rounded): 18 | Number of rows in four inches (rounded): 24 |
How to Adjust Your Gauge
If your stitches do not match the pattern’s gauge:
If you have too many stitches per 4 inches:
For example, if the gauge states that you should have 20 stitches per four inches (10 cm) and you have 24 stitches.
- Your knitting is too tight
- The fabric is too small
- Switch to a larger needle size
If you have too few stitches per 4 inches:
If the gauge states you should have 20 stitches per four inches (10 cm) and you have 18 stitches.
- Your knitting is too loose
- The fabric is too big
- Switch to a smaller needle size
If changing needle size doesn’t fix it:
Try changing the material of your needles.
Some knitters knit tighter on metal and looser on bamboo, and others are the opposite.
- Metal needles: fastest, smoothest
- Bamboo/wood needles: more grip, looser stitches tighten up
- Plastic needles: variable tension
Sometimes, simply switching needle material gets you to gauge instantly.
Why Your Gauge Might Still Be Off
(Common Problems)
These are the top issues beginners run into:
- Your purl stitches are looser than your knit stitches. This leads to “rowing out.” Solution: try different needles or practice tensioning your yarn. Learn more about tensioning, rowing out, and making neat stitches.
- You knit more tightly in the evening than in the morning: Oddly, this is extremely common! Or, vice versa. If possible, swatch at the same time of day you usually knit. Alternatively, your state of mind can also affect your tension. If you are relaxed, your knitting will be more relaxed. Another explanation could be the amount of caffeine you consume. If you consume caffeine, try knitting at different intervals. You might find that the amount of caffeinated beverages you consume affects your knitting. Finally, if you drink alcohol, it can have a significant effect on your tension.
- You didn’t block your swatch: Blocking may change stitch size by 10–25%.
- You changed your knitting style mid-swatch: maybe you're trying to practice English-style and Continental-style and try both in the same swatch. This may affect your tension. Learn more about knitting styles.
- You substituted yarn: Always make a swatch in the same yarn you will be using in the future project. Different fibers behave differently even within the same weight category.
Gauge When Knitting in the Round
Your knit and purl tension may differ, so your flat gauge will not match your in-the-round gauge.
If your project is knit in the round:
- Make a circular gauge swatch
- Use the “speed-swatch” method (knitting flat but carrying the yarn loosely behind the work to mimic round-knitting tension)
Never rely on a flat swatch for a sweater knit entirely in the round — your garment will be off.
Method One: Make a Circular Gauge Swatch
- Use the needles and yarn you plan to use for your project.
- Cast on twice the number of stitches you need for four inches, plus a few more stitches.
- Work the stitch pattern in the round for four inches.
- Bind off and block.
Method Two: Speed Swatch
Many knitters prefer this method.
- Using double-pointed needles (dpn), cast on the number of stitches you need for a four-inch swatch plus a few extra stitches.
- Work the first row.
- Without turning your work, slide the stitches to the other end of the DPN. Allow the yarn to hang loosely behind the needles.
- Knit the stitches.
- Repeat steps 3 and 4 until you have approximately four inches.
- Mark the stitches using scrap yarn. Do not include the first and last stitches.
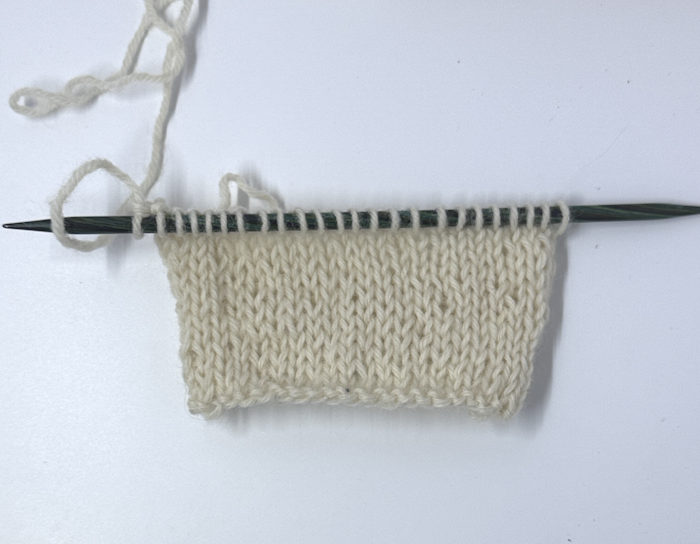 The right side of the gauge swatch worked for a circular knit project.
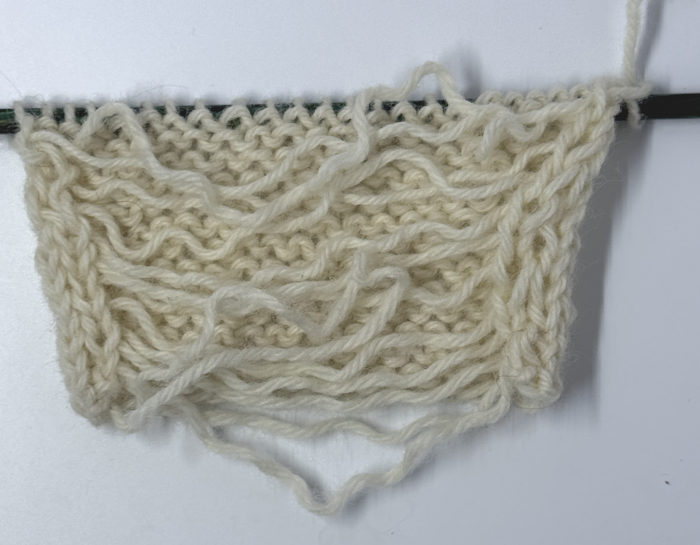 The wrong side of the gauge swatch shows the yarn hanging loosely.
Yarn Substitution & Gauge: What You Need to Know
If the pattern uses worsted weight, but you prefer another brand:
- Stay within the same weight category
- Compare yardage per gram (important!)
- Swatch with the needle size recommended on the yarn label
- Adjust needles only after the swatch dries
Even within “worsted weight,” some yarns are thicker or loftier than others.
What Happens If Your Gauge Swatch Does Match?
Then you’re ready to cast on with confidence!
- Your garment will fit
- Your shaping will work
- Your yardage estimates will be correct
- You won’t need to frog your entire project halfway through
Give yourself a pat on the back — meeting gauge is a major knitter milestone.
Frequently Asked Questions About Gauge in Knitting Projects
Do I need to block my gauge swatch?
Do I need to block my gauge swatch?
Yes, unless the pattern says explicitly “unblocked gauge.” Most garments use blocked gauge.
Why is my gauge different every time I knit the same yarn?
Why is my gauge different every time I knit the same yarn?
Stress, mood, time of day, and needle type all affect tension. Every knitter has their own way of holding and tensioning the yarn around their fingers. These differences can affect the gauge. Mood can also affect gauge. If the knitter is tense, they may knit tighter than when they are relaxed. The type of needle can also affect gauge. Bamboo needles may produce a tighter gauge than steel needles. Substituting a different yarn than the pattern calls for can also affect gauge.
Conclusion
Understanding gauge isn’t just for advanced knitters; it’s the key to garments that actually fit. Once you learn how to measure, adjust, and troubleshoot gauge, you’ll save time, yarn, money, and frustration.
Every project starts with a single stitch, but a successful project begins with a reliable gauge swatch.
