- Home
- Knit and Purl Stitches
- Shingle Stitch
The Knit Shingle Stitch
The Knit Shingle Stitch by Janice Jones, published March 24, 2026
 The Knit Shingle Stitch
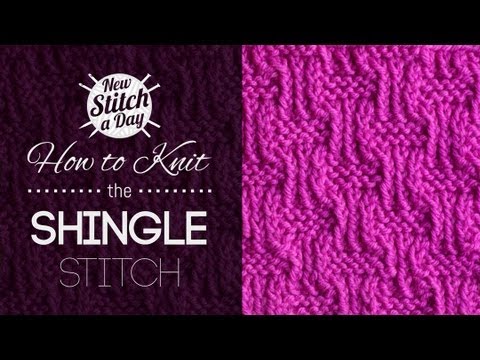
The knit shingle stitch is a richly textured pattern made with knit and purl stitches worked partly through the back loop. It creates a layered fabric with a bold, eye-catching surface, yet it is surprisingly approachable for knitters who are ready to move beyond the most basic stitches. In this tutorial, you will learn the stitch repeat, how to work it flat, and how to use it in your own projects.
The Shingle Stitch at a Glance
- Worked with Knits and Purls, with the exception that those stitches are worked through the back loops.
- Row Repeat: 12
- Stitch Multiples: 10 + 5
- Reversible
- Lies Flat
- Skill Level: Easy
Why You Will Love This Stitch
If you enjoy richly textured knitting stitches, the shingle stitch is a fun one to try. It creates a raised, layered surface that almost looks like overlapping little shingles, which gives even plain yarn a lot of visual interest.
I also love that this stitch is made with just knit and purl variations. Even though the fabric looks detailed, you do not need cables, lace skills, or complicated shaping to knit it. Once you settle into the repeat, it becomes very rhythmic.
This stitch is especially nice for knitters who want a fabric that feels substantial. It has body, texture, and a cozy look that works beautifully for scarves, cowls, cushion covers, and sampler projects. I think it would also be a great stitch pattern for a blanket.
Another plus is that it lies flat and is reversible, so you do not have to worry as much about curling edges or an unattractive wrong side. That makes it a practical choice when you want texture on both sides of your work.
Skills Needled
Before you begin, it helps to be comfortable with these basic knitting skills:
- How to knit
- How to purl
- How to knit through the back loop (ktbl) - see below
- How to purl through the back loop (ptbl) -see below
- How to read written knitting instructions
- How to weave in ends
- How to block your finished swatch or project, if desired
If you already know the knit stitch and purl stitch, this pattern can be a nice way to practice working stitches through the back loop.
How to Knit and Purl by Working into the Back Loop (tbl)
In the shingle stitch, some of the stitches are worked through the back loop. This simply means that instead of inserting your needle into the front leg of the stitch as usual, you insert it into the back leg.
To knit through the back loop (ktbl), insert the right needle from right to left into the back of the stitch, wrap the yarn, and knit the stitch as usual. This creates a twisted knit stitch that looks tighter and more defined.
To purl through the back loop (ptbl), bring the right needle behind the stitch and insert it into the back leg before wrapping the yarn and purling. This can feel a little awkward at first, but it gets easier with practice.
Working into the back loop changes the fabric's look by tightening and slightly twisting those stitches. In the shingle stitch, that extra definition is part of what gives the pattern its bold texture.
Written Instructions (Worked Flat with Straight Needles)
Cast on in multiples of 10 + 5
Row 1: (RS): k5, *k1 tbl, [p1, k1 tbl] twice, k5; rep from *to end.
Row 2: (WS): k5, *p1 tbl, [k1, p1 tbl] twice, k5; rep from * to end.
Row 3: Repeat row 1.
Row 4: Repeat row 2.
Row 5: Repeat row 1
Row 6: Repeat row 2
Row 7: k1 tbl, [p1, k1 tbl] twice, *k5, k1 tbl, [p1, k1 tbl] twice; rep from *
to end.
Row 8: p1 tbl, [k1, p1 tbl] twice, *k5, p1 tbl, [k1, p1 tbl] twice; rep from *
to end.
Row 9: Repeat row 7.
Row 10: Repeat row 8.
Row 11: Repeat row 9.
Row 12: Repeat row 10.
Repeat these 12 rows until you have reached your desired length.
If you prefer to see how the stitches are formed, this video walkthrough can help you visualize the pattern. Then use the written instructions above as your guide while you knit.
Shingle Stitch Worked Flat in Chart Form

Why Some Knitting Stitches Don’t Convert Easily to the Round
If you have ever tried to convert a stitch pattern from working flat to working in the round, you may have noticed that it does not always work the way you expect. While some stitches convert easily, others, like the shingle stitch, require more careful adjustments.
The main reason is simple: when knitting flat, you work both right-side and wrong-side rows. But when knitting in the round, you are always working from the right side of the fabric. This means that every wrong-side row must be reinterpreted to produce the same visual result as the right side.
For many basic patterns, especially the ones featured on this site, this is easy. You simply switch knit stitches to purl stitches and purl stitches to knit stitches on the wrong-side rows. However, not all stitch patterns are built on simple, repeating structures.
Some stitches include offsets, shifting stitch groups, or partial repeats that depend on turning the work at the end of each row. In these cases, the pattern may rely on extra stitches at the beginning or end of a row to keep everything aligned. These stitches are not always “edge stitches”; they are part of the design itself.
When you join your work in the round, there is no turning, and those edge-based adjustments disappear. As a result, the pattern may no longer line up correctly unless the stitch count and repeat are carefully preserved or rewritten.
The shingle stitch is a good example of this. Its repeat is written as a multiple of 10 + 5, and those extra stitches help create the offset, layered effect that gives the stitch its name. Removing them would change how the pattern flows across the fabric.
In short: stitches that have simple, symmetrical repeats usually convert easily, while stitches with offsets, shaping, or edge-dependent structure often need to be rewritten rather than directly converted.
Reference: General principles of converting flat knitting to in-the-round knitting are discussed in standard knitting resources such as Vogue Knitting: The Ultimate Knitting Book and The Principles of Knitting by June Hemmons Hiatt.
Troubleshooting and Tips
- My fabric does not look textured enough. Double-check that you are actually working the marked stitches through the back loop. If you work them normally, the pattern will lose much of its definition.
- I keep losing my place in the repeat. Break the pattern into two sections: rows 1 through 6 and rows 7 through 12. It can also help to use a row counter.
- The first few rows look uneven. That is normal. Many textured stitches need several repeats before the pattern really begins to show.
- My tension feels tight. Stitches worked through the back loop often feel tighter than regular knit and purl stitches. Try relaxing your hands a bit, or go up one needle size if your fabric feels too stiff.
- I am not sure whether I made a mistake. After every few rows, stop and look at your fabric. The textured sections should appear in offset groups, creating that layered shingle effect.
Tip: This is a great stitch to swatch before starting a project. A small swatch will help you get comfortable with the rhythm and show you whether you like the fabric with your chosen yarn.
Best Yarns for This Stitch
The best yarns for the knit shingle stitch are smooth yarns with good stitch definition. Because this pattern gets much of its beauty from texture, you will usually see it best in a plain or lightly plied yarn.
Wool, wool blends, and smooth acrylic yarns all work well. These fibers help the raised pattern stand out, making the fabric look crisp and dimensional.
I would avoid very fuzzy yarns, eyelash yarns, or heavily textured novelty yarns for this stitch. Those yarns can hide the pattern, making it harder to see the lovely shingle-like texture.
Solid colors and lightly tonal yarns are usually the best choice. Busy variegated yarns may compete with the stitch pattern, making the texture harder to notice.
Project Ideas
The knit shingle stitch works well for projects where you want plenty of texture and a fabric that feels substantial. Here are a few good ways to use it:
- Scarves and cowls: Because the stitch is reversible and lies flat, it is a lovely choice for accessories that will show both sides.
- Dishcloths and washcloths: The texture adds extra interest to these practical projects.
- Pillow covers: This stitch creates a rich, decorative surface that looks beautiful in home decor.
- Sampler blankets: A square of shingle stitch can add bold texture to a knitted stitch sampler.
- Table runners or decorative panels: The pattern features a structured, geometric look that works well as an accent piece.
Because the fabric is textured and fairly dense, I would be more likely to use it for accessories and decor than for garments that need a lot of drape.
Frequently Asked Questions
Can I use the shingle stitch for a blanket?
Can I use the shingle stitch for a blanket?
You can, especially for a sampler blanket or a smaller throw. Just keep in mind that the textured fabric may feel heavier and denser than simpler blanket stitches.
What kind of yarn works best for the shingle stitch?
What kind of yarn works best for the shingle stitch?
Smooth yarn with good stitch definition is usually the best choice. Solid or lightly tonal colors help the texture stand out.
Is the shingle stitch reversible?
Is the shingle stitch reversible?
Yes. Both sides are attractive, which is one reason this stitch works so well for accessories.
Does the shingle stitch curl?
Does the shingle stitch curl?
No, this stitch generally lies flat, which makes it especially useful for scarves, cowls, and stitch samplers.
Conclusion
The knit shingle stitch is a wonderful choice when you want a stitch pattern with lots of texture and a finished fabric that feels rich and substantial. Even though it looks detailed, it is built from simple knit and purl variations, so it is very approachable once you understand the repeat.
If you enjoy textured knitting stitches that lie flat and look attractive on both sides, this is definitely one to add to your stitch library. Try it in a smooth, solid-colored yarn first so you can really enjoy the beautiful shingle effect.
Once you have practiced it on a swatch, you may find yourself reaching for this stitch again in scarves, home decor projects, and stitch sampler patterns.

Disclosure:
This post contains affiliate links. If you buy through them, I may earn a small commission at no extra cost to you.

Janice Jones is a Certified Knitting and Crochet Instructor who creates beginner-friendly patterns and tutorials, backed by a 389-page library of practical knitting and crochet content.
Most Popular Pages
All Types of Crochet Stitches

36 Reversible Knit Stitch Glossary

How to Crochet the Second Row

Dog Sweater Patterns

Working with Alpaca Yarn

Free eBooks, Just for You
Get my beginner eBook guides to Knitting and Crocheting, just for signing up for my monthly newsletter.
Choose one or both when you sign up.


About the Author: Please allow me to Introduce myself

Janice Jones is a Certified Knitting Instructor and Certified Crochet Instructor through the Craft Yarn Council who focuses on beginner-friendly patterns, stitch guides, and technique tutorials. She has built a library of 389 pages on her website, sharing practical instructions and patterns, and has completed projects ranging from crochet blankets to knit sweaters. You can explore her work on her website. She makes items for Warm Up America and often knits and crochets sweaters for her small dogs.
Thank you for visiting Smart-Knit-Crocheting. I hope this and all of my tutorials will give you the inspiration to continue your knit or crochet journey. For a complete list of all the pages on my site, please visit my table of contents.
I participant in the Amazon Services LLC Associates Program, an affiliate advertising program designed to provide a means for sites to earn advertising fees by advertising and linking to Amazon.com. “As an Amazon Associate I earn from qualifying purchases.” These earnings go towards supporting my website.

Home | Contact | About | Privacy Policy | Disclaimer
I DO NOT SELL ANY PERSONAL INFORMATION FROM THIS WEBSITE. PLEASE SEE MY PRIVACY POLICY FOR MORE DETAILS.
Copyright © 2006-2026 Smart Knit Crocheting. All Rights Reserved
Please Share
Remember, Sharing is Caring