- Home
- Make a Knit or Crochet Garment
- Seamless Sweater
Seamless Sweater Knitting: How Seamless Sweaters Are Constructed
Updated 01-05-2026
Seamless sweaters have become one of the most popular ways to knit garments today, especially for knitters who enjoy working in the round, trying projects on as they go, and minimizing finishing work.
Unlike traditional sweaters that are knit in separate pieces and sewn together, seamless sweaters are constructed as a continuous fabric. The body and sleeves are shaped directly on the needles, with increases and decreases creating the garment's structure rather than seams.
This page is not a sweater pattern. Instead, it explains how seamless sweaters are constructed, how knitting in the round supports that construction, and how different seamless styles shape the shoulders and sleeves. Understanding these fundamentals will help you choose better patterns, troubleshoot fit issues, and gain confidence before starting your first seamless sweater project.
Whether you plan to knit a raglan, yoke, or another seamless style, the principles explained here apply across many modern sweater designs.

What Is a Seamless Sweater?
A seamless sweater is a garment that is knit without sewing together major pieces like the front, back, and sleeves. Instead of assembling flat panels after knitting, the sweater is shaped as a single, continuous structure, either entirely in the round or with minimal transitions between flat and circular knitting.
In seamless construction, shaping replaces seams. Increases and decreases create space for the shoulders, sleeves, and body, while the fabric remains connected throughout. This allows the sweater to grow organically from one section to the next.
Seamless sweaters can be knit:
- Top-down, starting at the neckline and working toward the hem
- Bottom-up, starting at the hem and working toward the shoulders
- Partially flat, then joined and worked in the round
What defines a seamless sweater is how the pieces connect, not the direction of knitting.
Many knitters choose seamless sweaters because they:
- eliminate most finishing seams
- allow fitting adjustments while knitting
- create a smooth interior with no bulky seam allowances
However, seamless construction also requires a clear understanding of shaping and gauge, since there are fewer seams to stabilize the fabric.
How Seamless Sweaters Are Constructed
At a structural level, all seamless sweaters are built from the same core components: a neckline, a body, two sleeves, and the areas where those sections meet. The difference lies in where shaping occurs and how stitches are added or redistributed as the sweater grows.
Knitting in the Round vs Flat Knitting
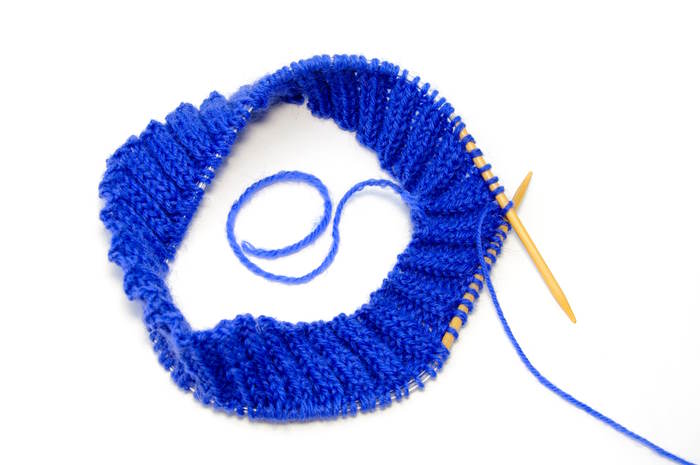
 Circular Needles
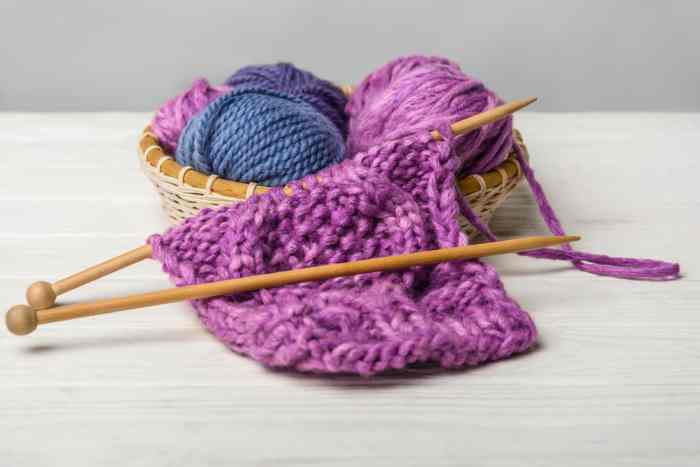
 Straight Needles
Most seamless sweaters rely heavily on knitting in the round, typically using circular needles. Working in the round creates a continuous spiral of stitches, allowing the body and sleeves to be formed without side seams.
In seamless garments:
- The torso is often worked in the round from underarm to hem
- Sleeves may be worked in the round after stitches are set aside
- Necklines and yokes are shaped using increases or short rows
Some seamless sweaters include short sections of flat knitting, especially at the neckline, yet the overall structure remains continuous.
Where Shaping Happens in Seamless Sweaters
Instead of sewing pieces together, seamless sweaters use strategic shaping to define the garment:
- Neckline shaping creates a deeper front and higher back for comfort
- Shoulder shaping determines how the sleeves connect to the body
- Underarm shaping separates the body from the sleeves
In seamless designs, these transitions happen directly on the needles. Because everything is connected, small changes in stitch count or gauge can affect the overall fit more quickly than in pieced sweaters, one reason understanding construction is so important before starting a project.
Common Types of Seamless Sweater Construction
Seamless sweaters are defined by how the body and sleeves are shaped and connected, not by a single universal method. While all seamless sweaters avoid major sewn notes, the location and style of shaping can vary significantly. Understanding these differences makes it easier to choose a pattern that suits your skill level, yarn choice, and desired fit.
Below are the most common types of seamless sweater construction used in modern knitting.
Raglan Seamless Sweaters
Raglan sweaters are one of the most recognizable seamless styles. They are identified by diagonal lines that run from the neckline to the underarm, connecting the body to the sleeves.
In seamless raglan construction:
- The sweater is often worked top-down, beginning at the neckline
- Increases the shape of the shoulders and sleeves simultaneously
- Four distinct sections emerge: front, back, and two sleeves
Raglan construction is popular because it:
- allows easy fit adjustments while knitting
- distributes shaping gradually
- works well for a wide range of body types
This method is especially common in beginner-friendly seamless sweater patterns, even though the shaping logic itself is more complex than it appears at first glance.
Seamless Yoke Sweaters
Seamless yoke sweaters use a circular yoke, where shaping occurs evenly around the neckline rather than along diagonal lines.
Key characteristics include:
- Increases spaced across the entire round
- A smooth, rounded shoulder shape
- Frequent use in colorwork and decorative stitch patterns
Because shaping is distributed across many stitches, yoke sweaters often feel visually balanced and are well-suited to designs where pattern continuity is important.
However, fit can be more sensitive to gauge and increase placement, making construction understanding especially valuable.
Seamless Saddle Shoulder Sweaters
Saddle shoulder sweaters feature a shaped “saddle” section that sits across the shoulders, with sleeves and body built on that foundation.
In seamless versions of this construction:
- The saddle is knit first
- The body and sleeves are picked up or grown from it
- The shoulders tend to feel more structured
This style is often chosen for garments where shoulder definition is important. While less common in beginner patterns, seamless saddle shoulder construction offers excellent fit potential when executed carefully.
Seamless Drop Shoulder Sweaters
Drop shoulder sweaters can also be knit seamlessly, even though the classic drop shoulder is often associated with flat, pieced construction.
In seamless drop shoulder designs:
- The body may be knit in the round
- Sleeves are attached lower on the body
- Shaping is minimal compared to raglan or yoke styles
These sweaters tend to have a relaxed fit and straightforward shaping. Seamless versions reduce finishing work while keeping the familiar drop-shoulder silhouette.
Why Construction Type Matters
Each seamless construction style affects:
- How the sweater fits across the shoulders
- How sleeves hang and move
- How easy it is to adjust sizing while knitting
No single method is “better” than the others. The best choice depends on the wearer, the yarn, and the amount of structure or flexibility you want in the finished garment.
Understanding these construction types allows you to read sweater patterns more confidently and recognize why a particular design behaves the way it does.
Understanding Seamless Sweater Shaping
Shaping is what turns a tube of knitted fabric into a wearable sweater. In seamless construction, shaping happens directly on the needles, rather than being hidden inside seams. Because of this, understanding where and why shaping occurs is far more important than memorizing individual techniques.
In seamless sweaters, shaping typically occurs in three key areas: the neckline, the shoulders, and the underarms.
Neckline Shaping and Short Rows
Human bodies are not symmetrical front to back, the front neckline usually needs to sit lower than the back for comfort and proper fit. In seamless sweaters, this difference is often created using short rows near the neckline.
Short rows allow knitters to add fabric in specific areas without completing a full round. Instead of knitting continuously in a circle, the work turns back and forth for a short section, gradually building height where it’s needed most.
In seamless sweater construction, short rows are commonly used to:
- lower the front neckline
- raise the back of the neck
- improve overall comfort and wearability
While the mechanics of short rows vary by technique, the purpose remains the same: shaping the neckline so the sweater sits naturally on the body.
Understanding this concept helps explain why many seamless sweaters begin with a brief section of flat knitting before transitioning fully into knitting in the round.
Shaping Lines, Increase Placement, and Fabric Growth
Beyond the neckline, seamless sweaters rely on planned fabric growth to form the shoulders and sleeves. This growth is created through increases placed in consistent locations.
Depending on the construction style, shaping may appear as:
- diagonal lines (as in raglan sweaters)
- evenly spaced increases (as in yoke sweaters)
- shaped shoulder sections (as in saddle shoulder designs)
What all seamless styles have in common is that stitch placement matters. Because the fabric is continuous, each increase affects how the sweater expands across the chest, arms, and shoulders.
Rather than thinking in terms of individual stitches, it’s more helpful to think in terms of zones of growth, areas where the fabric is intentionally expanding to accommodate movement and body shape.
Why Seamless Shaping Feels Different from Pieced Sweaters
In pieced sweaters, seams provide structure and stability. In seamless sweaters, shaping must do that work instead.
This means:
- Shaping decisions are more visible
- Gauge inconsistencies show up sooner
- Small errors can affect overall balance
At the same time, seamless shaping allows for flexibility. Because the sweater remains connected, knitters can often try the garment on mid-project and assess fit before committing to later sections.
This combination of visibility and flexibility is what makes seamless sweater shaping both powerful and, at times, challenging, especially for knitters new to garment construction.
Gauge and Fit in Seamless Sweaters
Gauge affects every knitted garment, but it plays an especially important role in seamless sweaters. Because the fabric is continuous and lacks stabilizing seams, even small differences in stitch size can influence how the sweater fits and hangs on the body.
Understanding why gauge matters in seamless construction helps prevent many common fit issues, and reduces frustration before it starts.
Why Gauge Matters More Without Seams
In pieced sweaters, seams provide structure. They help hold the garment in place and can mask small inconsistencies in tension. Seamless sweaters don’t have that built-in reinforcement.
As a result:
- Fabric stretch is more noticeable
- Shoulder and neckline balance is more sensitive
- Changes in gauge affect the entire garment, not just one piece
This doesn’t mean seamless sweaters are less forgiving; it simply means that gauge influences fit more directly.
Gauge and Shoulder Fit
In seamless sweaters, the shoulders are shaped through increases rather than seams. If the gauge is tighter or looser than expected, those increases can create:
- Shoulders that feel too narrow
- Sleeves that sit too low or too high
- A neckline that shifts forward or backward
Understanding this connection helps explain why two knitters using the same pattern can end up with sweaters that fit very differently.
Try-On-As-You-Go: A Seamless Advantage
One of the biggest benefits of seamless sweater construction is the ability to try the garment on while knitting.
Because the sweater remains connected:
- Fit can be checked before sleeves are separated
- Length can be adjusted before binding off
- Shaping can often be extended or shortened as needed
This flexibility is one reason many knitters prefer seamless sweaters once they understand how construction and gauge work together.
Adjusting Fit Without Rewriting a Pattern
Even without altering stitch counts or rewriting instructions, knitters can often improve fit in seamless sweaters by:
- Paying close attention to gauge consistency
- Measuring progress against the body rather than relying only on row counts
- Understanding where shaping transitions occur
When knitters know where fit changes happen, neckline, shoulders, and underarms, they can make informed decisions without needing advanced design skills.
Choose Based on Skill Level
If you are new to sweater knitting, look for seamless styles that introduce shaping gradually and predictably.
- Beginner-friendly seamless styles often include raglan or simple drop-shoulder designs worked in the round. These styles make it easier to see how the sweater grows and where shaping occurs.
- More advanced seamless styles, such as saddle shoulder or complex yokes, may require closer attention to shaping balance and gauge consistency.
Starting with a construction style that matches your current confidence level helps build skills without unnecessary frustration.
Are seamless sweaters always knit top-down?
No. While many seamless sweaters are knit top-down, seamless construction can also be worked bottom-up or in stages. What makes a sweater seamless is the way the pieces connect during knitting, not the direction in which the fabric is worked.
Are seamless sweaters easier than pieced sweaters?
Seamless sweaters are not inherently easier or harder — they are simply different. Many knitters find seamless sweaters easier because they involve less finishing, while others prefer the structure and predictability of pieced garments. The best choice depends on your experience level and learning style.


