- Home
- Types of Knit Stitches
- Knitting Rib Stitches
- Puffed Rib Stitch
Puffed Rib Stitch: Tutorial
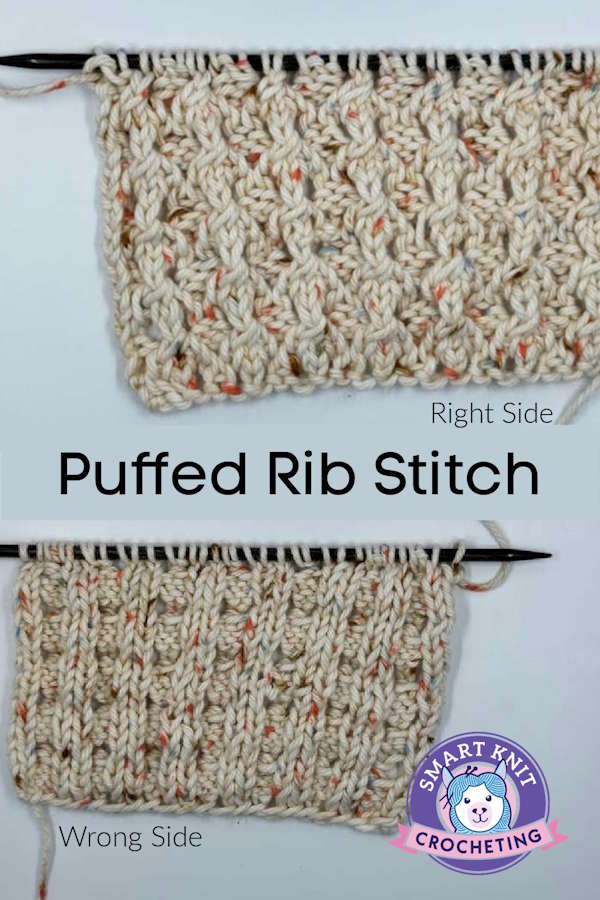
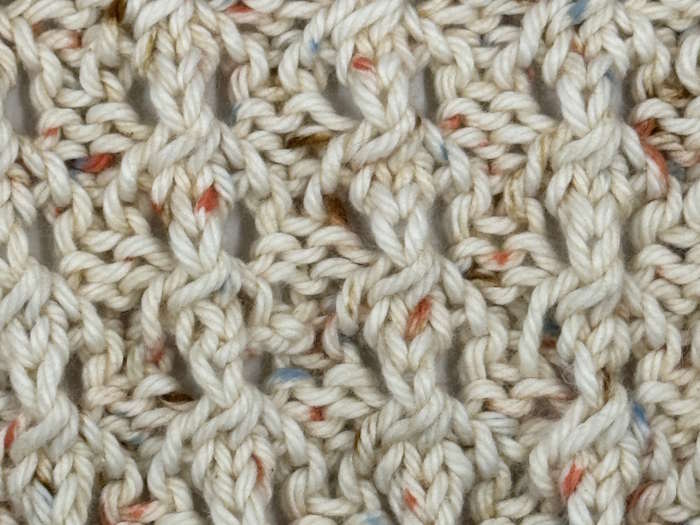
The puffed rib stitch is a highly textured knit pattern that creates ribs that resemble the 2x2 rib stitch with tiny eyelets that resemble lace. Though not reversible, both sides of the fabric are beautiful; the right side displays the little “puffs,” and the reverse side looks like a 2 x 2 rib.
This pattern can replace more traditional ribs at the cuffs or hem of vests or sweaters, or the rim of a hat. It’s perfect for the confident beginner because it uses knits and purls, but a few new techniques are employed to produce that puffed texture.
Skill Level
Easy

Supplies needed for a practice swatch
- Yarn of your choice
- Needles appropriate for the weight of the yarn you choose
- Scissors
- Yarn needle for weaving in ends
**I am using Hobby Lobby I Love This Cotton (worsted weight CYC #4) with U.S 7 (4.5 mm) needles.
Abbreviations Used
CO = cast on
BO = bind off
K = knit
P = purl
YO or YON = yarn over or yarn over needle
YFRN (yfrn) = Yarn forward around needle
P3tog = purl three stitches together all at once
St/sts = stitch/stitches
* * = Repeat the instructions within the two asterisks for the number of times indicated in the pattern.
Skills Needed for the Puffed Knit Rib Stitch
- Cast on using the long-tail cast-on
- Bind off
- Knit stitch
- Purl Stitch
- Yarn over
- YFRN: See below
Notes About the Puffed Rib Stitch
- All instructions are written in US Terms
- The fabric is technically not reversible, but it looks great on both sides.
- Cast On: Multiples of 3 + 2. For this tutorial, I cast on 23 sts. (7 x 3) = 21 + 2 = 23 sts. Please feel free to cast on whatever number of stitches, keeping in mind that it must fall within the multiples of 3 + 2 if you want to make a washcloth rather than a practice swatch; cast on at least 32 stitches.
Is the Puffed Rib Stitch Reversible
No, but both sides look great so this stitch could be used for a project where both sides will show, such as a blanket, scarf, or washcloth.
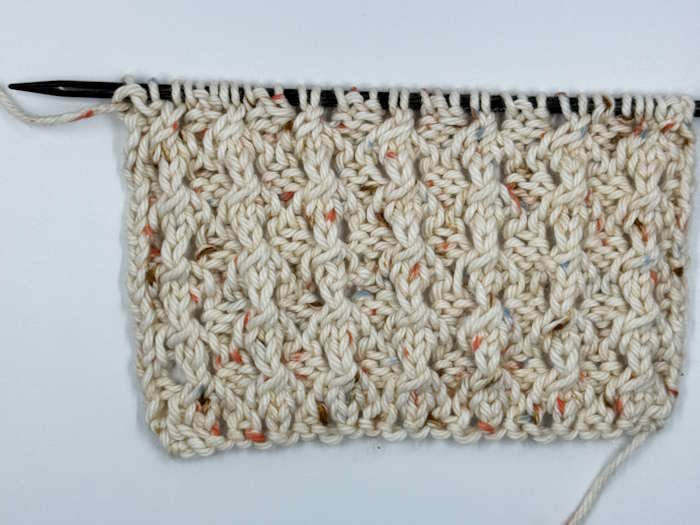 Right Side
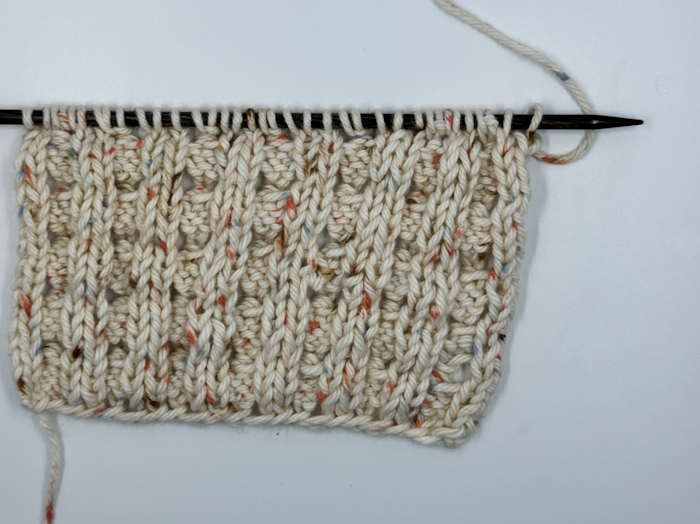 Wrong Side
Written Instructions for the Puffed Rib Stitch
Cast On: Multiples of 3 + 2. For this tutorial, I cast on 23 sts. (7 x 3) = 21 + 2 = 23 sts.
- Row 1: (Right side) P2, *yon, k1, yfrn, p2; rep from * to end. (37 sts on needle)
- Row 2: K2, *p3, k2; rep from * to end. (37 sts on needle)
- Row 3: P2, *k3, p2; rep from * to end. (37 sts on needle)
- Row 4: K2, *p3tog, k2; rep from * to end. (23 sts on needle)
Repeat rows 1-4 until you reach your desired length. Bind off, weave in ends, and block if desired.
Step 1: Puffed Rib Stitch: Cast On
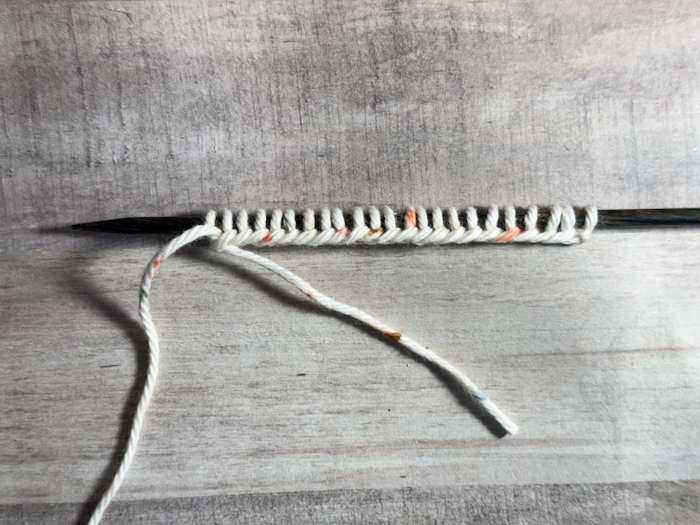 Step One: Cast on a multiple of 3 + 2
Step 2: Work Row One
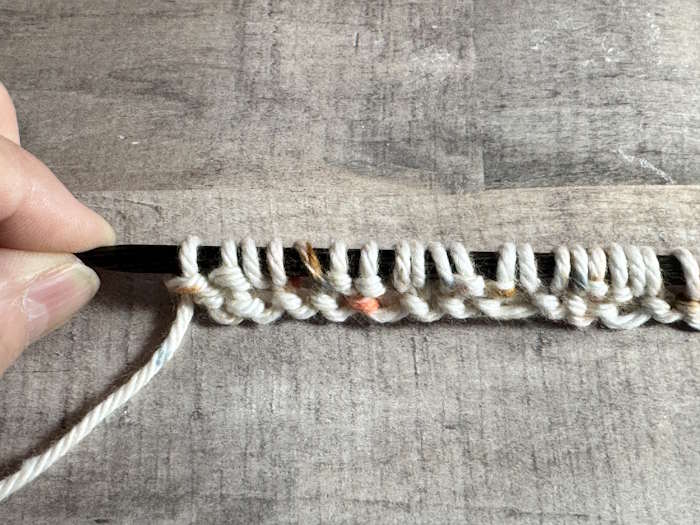 Row 1: Row 1: (Right side) P2, *yon, k1, yfrn, p2; rep from * to end. (37 sts on needle)
Step 3: Work Row 2
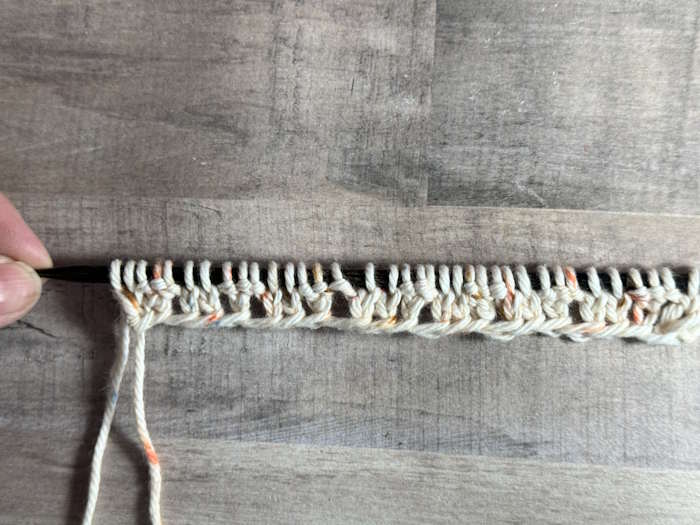 Row 2: K2, *p3, k2; rep from * to end. (37 sts on needle)
Step 4: Work Row 3
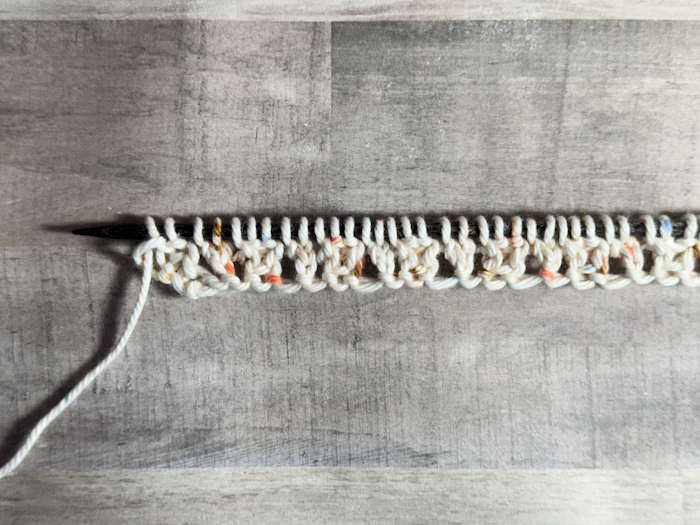 Row 3: P2, *k3, p2; rep from * to end. (37 sts on needle)
Step 5: Work Row 4
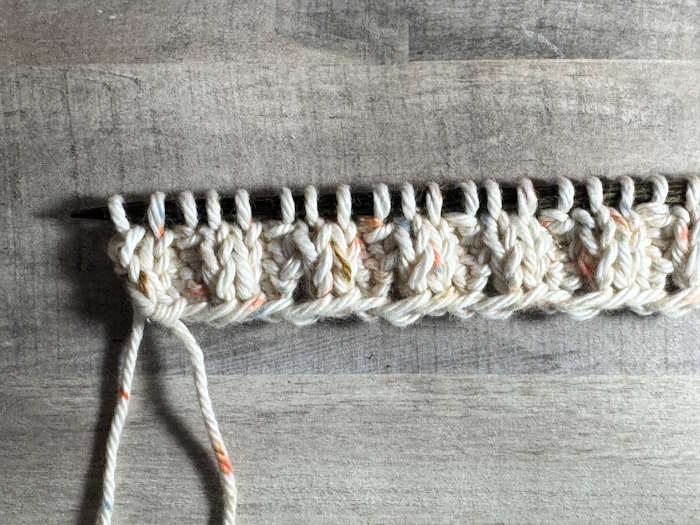 Row 4: K2, *p3tog, k2; rep from * to end. (23 sts on needle)
Pro Tips and Suggestions
- Once you have mastered the three techniques (YO, P3tog, and YFRN), this is a straightforward knit pattern. The practice swatch provides an excellent opportunity to practice these three techniques. Remember that YO and YFRN are increasing stitches, and P3tog is a decrease stitch.
- The P3tog is a decrease method, worked just like the more common P2tog. It can be a little tricky, especially if you are a tight knitter. Getting the right needle into three purl stitches is not easy when the tension is tight. To compensate, try altering your tension so it is looser or going up a needle size.
- FYI, the YFRN (yarn front around needle) is actually a yarn over, but it describes how to move the yarn from the back to front while creating another stitch at the same time.
Beginner Suggestions
When I first started knitting, and even today, I often became confused about where to pick up within a pattern after I laid my knitting down for a while. This happens more so when working on a pattern with a longer row repeat. This 4-row repeat should be easy, but this could be confusing if you are a beginner.
I have found a couple of workarounds that work for me that I want to share with you.
- Place a stitch marker at
the beginning of row 1. If you forget where you left off, count the rows after
the stitch marker.
- Use a row counter or a
paper and pencil tally mark system. I usually
use a sticky note attached to my pattern, and when the sticky gets filled up
with my scratches, I replace it with a fresh one.
- The best way to know
where you are is to learn to read your stitches on the needle and those that
have already been worked. However, this is not as easy for a beginner as using a
stitch marker or tally mark. Take a look at the photos below.
Where to Use the Puffed Rib Stitch Pattern
- This decorative rib stitch can create ribbing for cuffs and hems on garments or as a cuff for a hat or beanie.
- It is also perfect as a stand-alone stitch to make pillow covers, wash or dishcloths, even headbands or cowls.
- Since the fabric looks beautiful on both sides, it would be perfect for projects where both sides will show, such as scarves and blankets.
Frequently Asked Questions
Is the Puffed Rib Stitch Beginner-friendly?
Is the Puffed Rib Stitch Beginner-friendly?
Yes, but the knitter must be comfortable with making knit and purl stitches, the decrease method P3tog, and the increase stitches YO and YFRN.
Does this fabric lie flat?
Does this fabric lie flat?
Yes, there is no need to create a border unless you want to.
Is it Reversible?
Is it Reversible?
The front and back of the knit fabric do not look identical, but both sides are lovely.
Last Words
The puffed rib stitch is a pattern that relies on a combination of knits and purls along with increases and decreases to make a rib that is stretchy and highly textured.
Though it is considered to be a beginner-friendly stitch pattern, it does require some knowledge of how to make increases, notably yarn overs and decreases (p3tog). Once those skills are mastered it is a simple 4-row repeat that can be memorized, so the perfect stitch for working while bingeing on Netflix.
I hope this tutorial was helpful to you. Thanks for reading and happy knitting.
Janice
