- Home
- How to Knit
- Intarsia Knitting
Intarsia Knitting: Learn the Basics Step by Step
by Janice Jones, Last Updated 07-22-2026
Intarsia knitting, or colorblock knitting, is a colorwork technique used to create blocks of color, pictures, shapes, letters, and simple images in knitted fabric. Instead of carrying unused yarn across the back of the work, as you would in stranded knitting, each color section has its own small ball, butterfly, or bobbin. It is worked flat with straight needles.
That may sound complicated at first, but intarsia becomes much easier once you understand one important rule: every time you change colors, the two yarns must be twisted together so the fabric does not leave a hole.
In this tutorial, I’ll walk you through intarsia knitting slowly, beginning with the basic idea, the supplies you need, how to manage the yarn, how to read a simple chart, and how to fix the most common beginner problems. You do not need to start with an argyle sweater or a complicated picture. A small practice swatch is the best place to begin.
What is The Hardest Part of Intarsia Knitting?

In my opinion, the most challenging aspect of Intarsia is managing the extensive yarn required to create your designs.
Each section of a color requires a separate yarn source, which can be accomplished by wrapping a supply of yarn into a small ball or wrapping it around a bobbin.
This doesn’t sound challenging, but you can get overwhelmed by the number of balls that are used to make one project. The first time I tried this, I ended up with a tangled mess of little yarn balls. I spent more time untangling than knitting.
Why Choose Intarsia for Colorwork?
- Creates clear, distinct color blocks
- Results in a single-layer fabric (not thick like stranded knitting)
- Perfect for pictures and motifs
- Allows for large areas of different colors
- Creates reversible pieces when worked in stockinette stitch
Other Colorwork Techniques
If you're wondering how intarsia compares with other colorwork methods, here's a quick overview.
| Technique | How Color Is Applied | Yarn Usage / Management | Fabric & Texture | Best For | Typical Difficulty* |
|---|---|---|---|---|---|
| Stranded (Fair Isle) | Two or more colors per row; unused color carried behind as floats. | Manage 2 yarns; keep even tension on floats. | Thicker, warmer fabric; floats limit long color spans. | Traditional, repeating motifs. | Intermediate |
| Intarsia | Separate yarns for each block of color; no floats. | Use bobbins; twist yarns at joins. | Flat, smooth fabric with crisp color edges. | Large color blocks or pictures. | Intermediate |
| Duplicate Stitch | Embroidered over stitches after knitting. | No yarn management while knitting. | Same feel as base fabric; slightly thicker at embroidery. | Adding motifs or letters post-knitting. | Beginner |
| Slip Stitch | One color per row; contrast created by slipping stitches. | Single working yarn per row. | Firm texture; no floats to manage. | Simple color patterns and repeats. | Beginner |
| Mosaic Knitting | Slip-stitch colorwork using two colors alternately. | One yarn per row following a chart. | Dense, graphic texture with clear geometric shapes. | Bold two-color designs. | Beginner–Intermediate |
*Difficulty is approximate and assumes basic knitting skills.
-Yarn Management

Before we get into doing intarsia, I think we should look at how to manage all that yarn. As I mentioned above, managing the various strands of yarn is the most challenging part of this knitting technique because they are prone to tangling.
As knitters, we’d rather be knitting than detangling yarn. Many knitters hate Intarsia because the frustration of managing the yarn takes all the fun out of knitting.
Each section of a design will require its own ball or bobbin of yarn, so you may have many little balls hanging from your hook. For example, if you want to knit my little heart pattern above, you would need three balls of yarn, two balls of white, and one ball of red.
What Materials Do I Need for Intarsia?
To get started with Intarsia knitting, you'll need:
- Yarn: I am using 100% wool in several different colors that work well together. For best results, choose colors that are sufficiently different that you can immediately see the differences, such as 3 primary colors.
- Knitting needles appropriate for your yarn weight. Since I chose a worsted-weight yarn, I am using US 7 (4.5 mm) needles.
- Bobbins, yarn wrapped in butterflies, or any other method you choose to hold small amounts of yarn. You can also just allow a long piece of yarn to dangle from your needles. I’ll address that in just a moment.
- Tapestry needle for weaving in ends
- Scissors
- Row counter (recommended)
- Pattern or Chart
- Stitch markers (helpful but not required)
Now that you've gathered what you need, the next challenge is keeping all those yarns organized.
How to Get Started with Intarsia Knitting?
You have basically three ways to get started with Intarsia:
- Find a pattern already written
- Create your own pattern
- Work an easy swatch using only two colors (one color change per row). I recommend this way first so you can learn how to twist the yarn when changing colors.
Managing Yarn Bobbins/Balls
Here are a few of the more common ways that knitters manage the yarn:
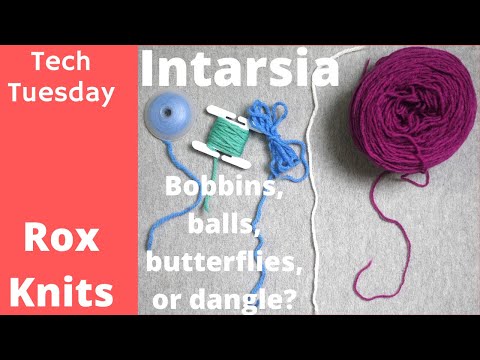
- Bobbins: Either store-bought or cut out old cardboard. Bobbins hold a small amount of yarn. They have a slit or another way of locking the yarn until it is needed.
- Butterflies are made by wrapping the yarn into little butterflies, then securing the ends with a loose knot or even a tiny hair clip.
- Little balls of yarn can also be used.
- Leave the yarn dangling. This works if your yarn tail is about a yard long, but with this method, you will need to add more yarn when you run short, which means you will have more tails to weave in. If you only have a stitch or two in a section, this might be your best solution.
- Skeins: Leave the yarn on the skein and work directly from the skein. This works if you only have a couple of colors.
- Little hair clips: I once had a teacher who recommended little girl hair clips to hold the yarn. I will admit that I've never tried this method but it does make sense.
Yarn Management
I found a little video that will explain these methods:
Hand Wound Butterflies

If you want to try using "butterflies" to create a hand-wound bobbin, it's not hard, but there is a trick. Just winding the yarn around your fingers will result in a bobbin that comes entirely undone. Here are the steps:
- Save about four inches of yarn. Hold that end with your thumb.
- Bring the yarn around your forefinger and middle finger.
- Wrap it in the opposite direction around your ring and little fingers.
- Continue wrapping in a figure-8 until you have enough.
- Cut the yarn, leaving about an 8-inch tail.
- Remove the butterfly from your fingers. Wrap the tail around the center a few times and tie a knot.
- Pull the unknotted end as your working yarn.

Reading Intarsia Charts
Intarsia charts are fairly straightforward. Each square represents a stitch, and the chart designates where to make the color changes.


Most intarsia charts are read from bottom to top. If you are knitting flat, read right-side rows from right to left, then wrong-side rows from left to right. This helps the chart match the direction you are actually knitting.
- Each square on the chart represents one stitch.
- Each row of squares represents one knitted row.
- The color of the square tells you which yarn color to use.
- When the chart color changes, you change yarn colors in your knitting.
- For stockinette intarsia, knit the right-side rows and purl the wrong-side rows unless your pattern says otherwise.
How to Change Colors in Intarsia
The most important intarsia skill is learning how to twist the yarns together when you change colors. If you simply drop one color and start knitting with the next color, a gap or hole will appear between the two color blocks.
To prevent that hole, hold the old color you are currently using in your left hand and bring it over to the left. Hold the new color in your right hand and move it up from underneath the old color and over before making the next stitch. This twists the two yarns together on the wrong side of the fabric, neatly joining the color blocks. If the first stitch is a little loose, tug a little on the yarn to snug it up.
Color changes occur on the purl side the same way as the knit side, but you will purl the stitches instead of knitting them.
When you move the old and new yarns as I just described, you are actually linking them by crossing them. This prevents the holes from occurring.
The goal is not to pull hard. The goal is to connect the two yarns just enough so the stitches sit side by side without a gap. This feels awkward for everyone in the first few rows.
Color Changes Step-by-Step
This process is used on both the right side (knit row) and the wrong side (purl row)
- Knit or purl to the place where the color changes.
- Drop the old color and move it to the left.
- Pick up the new color from underneath the old color and move to the right.
- Work the next stitch with the new color.
- Check the join. It should be snug, but not tight.
- You can weave in ends as you work intarsia
Beginner Intarsia Practice Swatch
Before starting a real project, try a small two-color practice swatch. This lets you practice changing colors, twisting the yarns, and controlling your tension without worrying about ruining a larger project.
Supplies for a Small Swatch
- Two colors of medium-weight yarn
- Knitting needles that match your yarn
- Two small yarn butterflies or bobbins
- Tapestry needle for weaving in ends
You will need three yarn sources for this swatch: one Color A section on the left, one Color B section in the center, and another Color A section on the right. Even though both outside sections use the same color, they need separate yarn sources because you are not carrying the yarn across the back. This swatch is created using only the stockinette stitch pattern (Knit 1 row, Purl 1 row).
On row 5, when the color changes begin, tie the new color on with a little half-knot as shown in the video below, or just start knitting.
Cast on 20 stitches with Color A.
- Rows 1–4: Work in a stockinette stitch pattern using Color A.
- Rows 5- 6: Knit 8 stitches with Color A, 4 with Color B, and 8 with Color A.
- Repeat Rows 5 and 6 until the center color block is about 4rows tall.
- Finish with 4 rows of stockinette pattern in Color A.
- Bind off and weave in the ends.
Here is a chart that shows how your swatch should appear.
 Notice that the chart shows white and blue, but that does not mean your swatch needs to be white and blue. Use whatever colors you have on hand.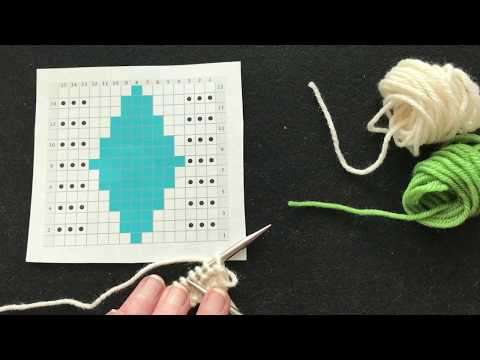
More Assistance With Intarsia
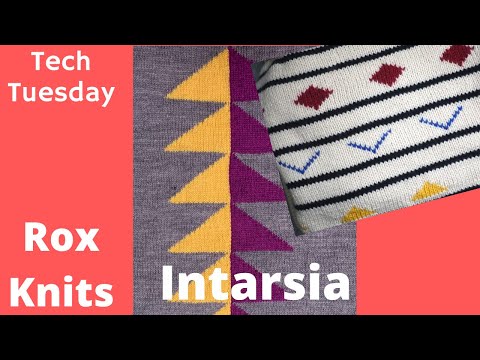
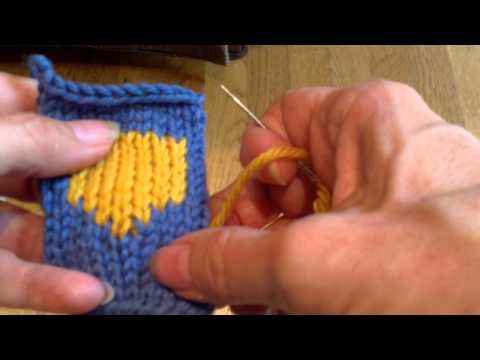
Here is another master knitter with TKGA who demonstrates these techniques.
Frequently Asked Questions
What is intarsia knitting?
What is intarsia knitting?
Intarsia knitting is a colorwork technique that uses separate yarn strands for each color block. Unlike stranded knitting, the yarns aren’t carried across the back — instead, they’re twisted together at color changes to create clean, non-bulky sections of color.
Is intarsia knitting good for beginners?
Is intarsia knitting good for beginners?
Yes! Intarsia knitting is beginner-friendly once you understand the basics of color changes. It’s a great way to create patterns and images in your knitting without floats or tangled multiple strands. But it is challenging at first until you get the hang of managing yarn tails and switching between colors.
How is intarsia different from Fair Isle knitting?
How is intarsia different from Fair Isle knitting?
Fair Isle carries yarns across the back of the work (called “floats”), while intarsia uses separate yarn sections for each color block. This makes intarsia better suited for large color areas, while Fair Isle works best for small, repeating motifs.
Can you do intarsia knitting in the round?
Can you do intarsia knitting in the round?
Technically yes, but it’s tricky. Intarsia is much easier to knit flat due to the way its color joins are made. If you try it in the round, you’ll need special techniques like yarn wraps or duplicate stitch for color changes.
What yarns work best for intarsia knitting?
What yarns work best for intarsia knitting?
Smooth, non-slippery yarns (like wool or cotton blends) are best for intarsia knitting because they help maintain tension and keep color edges crisp. Avoid fuzzy or very slippery yarns when learning.
How do you avoid holes between color blocks?
How do you avoid holes between color blocks?
Twist the two strands of yarn around each other every time you switch colors. This closes gaps between blocks and creates a seamless join. Many beginners miss this step, which is why holes appear. Here are some solutions:
- Twist yarns properly at each change
- Don't pull too tight or leave too loose
- Always bring a new color up from underneath
- Check tension after each color change
What are some easy intarsia projects for beginners?
What are some easy intarsia projects for beginners?
Start with simple geometric patterns like hearts, diamonds, or stripes. Once you’re comfortable managing multiple colors, you can move on to pictures or lettering patterns.
Why does the wrong side of my work look messy?
Why does the wrong side of my work look messy?
This is usually a tension problem that goes away with continued practice. Some ideas to help keep the wrong side tidy include:
- Weave in ends as you go
- Keep yarn twists consistent
- Trim excess yarn carefully
- Consider backing fabric for garments
Why do the edges of the color changes look uneven?
Why do the edges of the color changes look uneven?
Tension is usually a problem, whether you are pulling on the yarn too tightly or too loosely when making color changes. Tension problems normally get better with practice.
- Maintain consistent tension
- Don't pull yarns too tight
- Block work when finished
- Practice regular stitch spacing
Continue Learning Intarsia
This article is just the beginning. Explore other techniques to get a deeper understanding of Intarsia.
Color Theory and How it Relates to Choosing Yarn Colors in Intarsia
Last Words
Intarsia is considered an intermediate-to-advanced technique, so if you are a beginner, I recommend waiting a while before attempting it. This advice comes from experience as I tried this technique very early on, even before truly understanding knitting.
Be kind to yourself. This is not an easy technique to master, so give yourself time. I shied away from this type of colorwork. I was intimidated by all those yarns hanging from my needles. Yes, this takes practice—but you've now learned the fundamentals you need to begin.
Tensioning was also a problem for me, so I eventually took a class to help me build some confidence. Consider this tutorial as an introduction; additional training may be helpful.
Please avoid starting with a sweater that has numerous color changes per row. It's not advised, as it can turn you off to this color knitting technique. Begin with simple projects and gradually progress to more intricate designs.
Janice
Intarsia Knitting: Pin for Future Reference
Disclosure:
This post contains affiliate links. If you buy through them, I may earn a small commission at no extra cost to you.

Janice Jones is a Certified Knitting and Crochet Instructor who creates beginner-friendly patterns and tutorials, backed by a 389-page library of practical knitting and crochet content.
Most Popular Pages
Comprehensive Guide to Yarn

All Types of Crochet Stitches
36 Reversible Knit Stitch Glossary
How to Crochet the Second Row
Dog Sweater Patterns
Working with Alpaca Yarn
Free eBooks, Just for You
Get my beginner eBook guides to Knitting and Crocheting, just for signing up for my monthly newsletter.
Choose one or both when you sign up.
About the Author: Please allow me to introduce myself
Janice Jones is a Certified Knitting Instructor and Certified Crochet Instructor through the Craft Yarn Council who focuses on beginner-friendly patterns, stitch guides, and technique tutorials. She has built a library of 389 pages on her website, sharing practical instructions and patterns, and has completed projects ranging from crochet blankets to knit sweaters. You can explore her work on her website. She makes items for Warm Up America and often knits and crochets sweaters for her small dogs.
Thank you for visiting Smart-Knit-Crocheting. I hope this and all of my tutorials will give you the inspiration to continue your knit or crochet journey. For a complete list of all the pages on my site, please visit my table of contents.
I participant in the Amazon Services LLC Associates Program, an affiliate advertising program designed to provide a means for sites to earn advertising fees by advertising and linking to Amazon.com. “As an Amazon Associate I earn from qualifying purchases.” These earnings go towards supporting my website.
Home | Contact | About | Privacy Policy | Disclaimer
I DO NOT SELL ANY PERSONAL INFORMATION FROM THIS WEBSITE. PLEASE SEE MY PRIVACY POLICY FOR MORE DETAILS.
Copyright © 2006-2026 Smart Knit Crocheting. All Rights Reserved
Please Share
Remember, Sharing is Caring