- Home
- How to Knit
- Knitting Patterns
How to Read Knitting Patterns for the Beginner
Knitting Patterns by Janice Jones
If you are new to knitting, you've probably looked at a knitting pattern and decided it was harder to read the design than to learn to knit. I know I was overwhelmed when I first started.
It was so intimidating that all I wanted to do was create something that didn't require a pattern. But once I got started and dissected the individual parts of a design, it began to make sense.
So, let's take a look.
 How to Read Knitting Patterns for Beginners
Patterns should include some very vital information. Before you begin any new project, read the pattern complete to assure you understand it. Here are some things to look for in any instructions.
(Table of Contents)
Instructions (the "Meat" of the pattern)
Skill Level
Ideally this will be the first thing you encounter but the skill level is not always marked and sometimes it is inaccurate. There are four skill levels according to the Craft Yarn Council
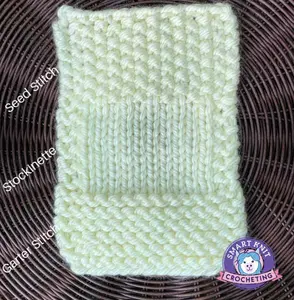
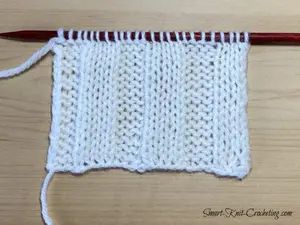
#1: Basic or beginner: These patterns are generally scarves, cowls, hats or flat pieces that use two needles and include only two stitches, knit and purl or the garter and stockinette stitches.

#2: Easy Beginner: This is the next level up and will include patterns for people who have already made a project or two. You might find more advanced stitches and some color work. These patterns often expect you to increase and decrease, cast on or bind off in a way you hadn’t done before and knitting in the round.

#3: Intermediate: These instructions for people who know the basics and want to try something a bit more challenging. Look for colorwork, basic cable stitches, lacework and knitting in the round. This is where you will be introduced to knitting patterns that use symbols and colors instead of or in addition to the normal patterns you would see in the first two skill levels.

#4: Advanced or Complex: These instructions are for the seasoned knitter. You might find more advanced color work, advanced stitch patterns, and complicated charts

Sizing and Measurements
If you are making a garment such as a sweater, the pattern will likely indicate different sizes. You might see something such as this:
Sizes:
Bust Measurement
Extra-Small/Small 28-34" [71-86.5 cm]
Medium 36-38" [91.5-96.5 cm]
Large 40-42" [101.5-106.5 cm]
Extra-Large 44-46" [112-117 cm]
2 Extra-Large 48-54" [122-137 cm]
Finished Bust
Extra-Small/Small 36" [ 91.5 cm ]
Medium 40" [ 101.5 cm ]
Large 44" [ 112 cm ]
Extra-Large 48" [ 122 cm ]
2 Extra-Large 52" [ 132 cm ]
Sizing courtesy of https://www.allfreeknitting.com/Knitted-Sweaters/Bateau-Sweater-from-Patons
In this case, the sweater can be made in five different sizes. It's best to measure before you begin your work, even if you already know what your size should be. The first instruction is the smallest size, and then the other sizes are listed in order and will appear between parenthesis.
cast on 109 (121 - 133 - 145 - 157) sts.
These numbers mean you will cast on 109 stitches if you are making an extra small/small sweater; Cast on 121 stitches for medium, 133 stitches for large, 145 stitches for extra-large, and 157 stitches for 2 Extra Large
I like to use a highlighter pen to mark the instructions with the size I’m creating, so I don't get confused about how many stitches I will be using.
What You Will Need (Supplies): Yarn to Use
Most patterns, especially those provided by yarn companies, are written with a specific yarn brand for the project. They want you to use their yarn, but you do not need to follow this part of the instructions, especially if the specified yarn is unavailable.
With that said, you will want to choose a yarn that is the same weight and approximate quantity as the recommended yarn. Sometimes this is easier said than done.
The yarn's weight is significant and if the instructions call for a number 5 bulky weight, try to choose a substitute that is also a number 5 -- bulky weight. If the pattern shows that the yarn ball is, say, 141 g (5 ounces), 256 yds. (234 m), be sure to compare your chosen ball of yarn with what the pattern is saying you will need. You may find that you must buy more or less of the substituted yarn to complete the project.
Learn more about yarn
Type of Knitting Needles
Again, many patterns will promote their products, but you need not purchase the specified brand needle unless you want to. Instead, if you have purchased a supply of knitting needles, use what you have.
The instructions will call for a specific size needle to make gauge, such as 4.5 mm (US 7). People in the US will look for the US equivalent of the metric sizes.
The size needles are only a recommendation, though, as you may need to go up or down on the size depending on the gauge swatch you make.
Read more about knitting needles.
Notions or other supplies
If you are lucky, your pattern will stipulate what other items you will need to finish the project. Here you might find such things as yarn needles, small scissors, stitch holders, etc.
See more about knitting supplies
Gauge
Almost all patterns recommend that you create a four-by-four inch gauge swatch before beginning your project.
Use the gauge size on the pattern as a starting point only. For example, the pattern might state Gauge: 16 sts = 4” (10cm); 22 rows = 4” (10 cm).
When making a gauge swatch, I recommend that you start with a few more stitches than the pattern calls for and work a few more rows. That way, you can measure your four-by-four inch swatch using the stitches and rows inside rather than measuring from the edges.
The gauge instructions should call for the type of stitches the pattern calls for, but they don't always say this. Read through the first few instruction lines and make your swatch similar to what your finished project will be.
Read more about gauge
Abbreviations and Definitions
Some beginner patterns may also add a few abbreviations used in the pattern. The "shorthand" used is a big plus if you are just getting started, but if you don't see this, bookmark or print out a list of knitting abbreviations to keep handy in your knitting kit.
See Knitting abbreviations for more information
Pattern Notes
Pattern notes is where you will learn anything about the pattern that is not mentioned anywhere else. For example, you might find that the pattern is written in US terms.
If the project is a garnment, for example they will describe how it is put together, or suggest the order in which you should knit individual pieces.
Instructions
Here is where you will find the meat of the pattern. It will tell you how many stitches to cast on and how to do each row. You'll likely encounter something such as repeat rows 2 and 3 until the piece measures 5 inches. Go slowly and either record each row with a piece of paper and pencil or use a row counter to keep your place.
What Do ( ) mean in a knitting pattern?
1. Sizing
As mentioned above, you will see parentheses used in knitting patterns do indicate sizes and instructions for a specific size. It's a good idea to highlight the size you are using. If you plan to use the pattern again, make a photocopy and mark up the copy instead of the original
Size: 36" (40", 44", 48", 52")
Cast on 109 (121 - 133 - 145 - 157) sts.
2. Repeats
Some patterns use parentheses to indicate where a repeated action takes place. These four statements mean the same thing: Work a row of one by one ribbing across the row to the end.
Row 1: Work in 1×1 rib across
Row 1: (K1, p1), repeat to end of row
Row 1: (K1, p1), rep to end
Row 1: (K1, p1) across.
3. Parentheses are used to separate American from Metric
Most American designers will list the American value first then place the Metric in parentheses. You will also see values separated by a backslash.
Another way this is used is to define different needle sizes.
Quantities
100 g (3.5 oz)
120 yds (113 m)
Needle Sizes
US size 9 (5.25 mm)
US size 9/5.25 mm
How are Astericks * Used in Knitting Patterns?
Some designers will use astericks instead of parentheses to show repeats in the line of instructions. Both instructions below mean the exact same thing, but the second one is using more abbreviations and is shorter.
Row 1: *K1, p1, repeat from * to end of row
Row 1: *K1, p1, rep from * to end.
Finishing
The finishing instructions are where you will find out what to do after you finish knitting, such as stitching seams or weaving in yarn ends.
Designer Information/Contact
Many designers will add a note about themselves and possible contact information. This is especially helpful if you have questions about the design.
Knitting Pattern Checklist
Before you begin to knit any project, check to see if the instructions have these items:
- Skill Level
- Garment Sizing and Measurements
- Yarn
- Recommended Knitting Needles and size
- Notions and other Supplies
- Gauge
- Abbreviations
- Pattern Notes
- Knitting Instructions
- Finishing Instruction
- Designer/Contact Information
Other: Additional Symbols and Terms You may encounter on a Knitting pattern
I've walked you through the major items you might encounter in a pattern but there are likely more you might see.
Asterisks, Parentheses, and Brackets
* () {}
You will likely see asterisks, parentheses and brackets used interchangeably. They all mean the same thing. When you see them, they will enclose a group of stitches that are to be repeated a specified number of times. For example,
Row 3: *P2, K2; rep from * across, end P2. All this is telling you is that you will purl 2, knit 2 and then repeat across the entire row ending with a purl 2
Symbols and other Pictographs
Most beginner or basic patterns will not make use of symbols, but as you move toward intermediate and advanced designs you are most likely to encounter a wide range of pattern instructions, including those written entirely in symbols and charts. For example, have you seen these these charts or symbols before?

This is a very simple chart of what you might find in more advanced knitting instructions. We will discuss all of these symbols with explanations in another article.
You might see these as knitting charts.
Final Words
This is by no means a comprehensive explanation of everything you might encounter when you begin to find beginner or basic knitting instructions.
It is, however, a beginner version of the most commonly found items on a knitting pattern. Use these explanations as a starting off point for finding a great beginner pattern that can help boost your progress along from basic to advanced knitter in no time at all.
Knitting Patterns: Pin for Future Reference

Did you find this article about Knitting Patterns Helpful? May I suggest you check out these other posts that might be useful as well.
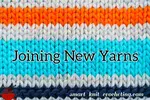
Joining Yarn in Knitting: Pictures and Step-by-Step Instructions
Joining yarn in knitting is as simple as adding a new ball of yarn, but there are more than one way of doing it. I'll show you a couple for you to try out
Illusion Knitting or Shadow Knitting: Beginner Tutorial
Illusion knitting or Shadow Knitting is a technique that produces a fabric with a hidden image. Learn how to knit this technique.
German Twisted Cast On: Complete tutorial for beginners
Learn how to knit the German Twisted Cast-On with step-by-step instructions, tips, and comparisons. Perfect for stretchy edges on socks, hats, and ribbing.
How to Count Knitting Stitches and Rows
To learn how to count knitting stitches and rows, you must first learn to recognize stitches. Learn the easiest way to count and keep track of your stitches.
How to End Knitting: A Bind Off Guide for Beginner's
Find out how to end knitting, weave in ends, block and add finishing touches to your knit projects
How to Knit for Beginners (Step-by-Step Guide)
Learn how to knit with this complete beginner guide! Discover the best tools, stitches, and easy patterns for first-time knitters; photos and tips.
Disclosure:
This post contains affiliate links. If you buy through them, I may earn a small commission at no extra cost to you.

Janice Jones is a Certified Knitting and Crochet Instructor who creates beginner-friendly patterns and tutorials, backed by a 389-page library of practical knitting and crochet content.
Most Popular Pages
All Types of Crochet Stitches

36 Reversible Knit Stitch Glossary

How to Crochet the Second Row

Dog Sweater Patterns

Working with Alpaca Yarn

Free eBooks, Just for You
Get my beginner eBook guides to Knitting and Crocheting, just for signing up for my monthly newsletter.
Choose one or both when you sign up.


About the Author: Please allow me to Introduce myself

Janice Jones is a Certified Knitting Instructor and Certified Crochet Instructor through the Craft Yarn Council who focuses on beginner-friendly patterns, stitch guides, and technique tutorials. She has built a library of 389 pages on her website, sharing practical instructions and patterns, and has completed projects ranging from crochet blankets to knit sweaters. You can explore her work on her website. She makes items for Warm Up America and often knits and crochets sweaters for her small dogs.
Thank you for visiting Smart-Knit-Crocheting. I hope this and all of my tutorials will give you the inspiration to continue your knit or crochet journey. For a complete list of all the pages on my site, please visit my table of contents.
I participant in the Amazon Services LLC Associates Program, an affiliate advertising program designed to provide a means for sites to earn advertising fees by advertising and linking to Amazon.com. “As an Amazon Associate I earn from qualifying purchases.” These earnings go towards supporting my website.

Home | Contact | About | Privacy Policy | Disclaimer
I DO NOT SELL ANY PERSONAL INFORMATION FROM THIS WEBSITE. PLEASE SEE MY PRIVACY POLICY FOR MORE DETAILS.
Copyright © 2006-2026 Smart Knit Crocheting. All Rights Reserved
Please Share
Remember, Sharing is Caring