- Home
- How to Knit: Basics
- SKP Knitting
SKP Knitting: How to Do This Decrease
SKP Knitting by Janice Jones
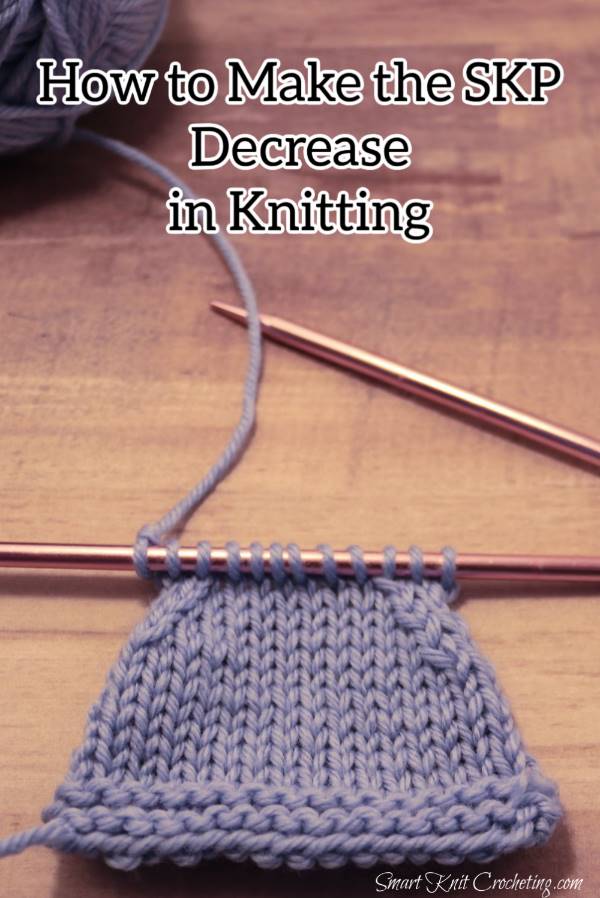
SKP is a knitting abbreviation that stands for Slip One, Knit One, Pass Knit Stitch over Slipped Stitch. It is one of many different ways to decrease a stitch in knitting.
It is considered a single decrease because you decrease only one stitch at a time. I have also seen this decrease abbreviated skpo, meaning slip one stitch, knit one stitch, and pass the slipped stitch over the knit stitch.
It is also one of the oldest decreases, meaning you might find this decrease in vintage patterns.
You may see the abbreviation SKP in a pattern, but just as likely, you may see it written as sl 1, k1, psso. Both mean the same thing.
Sl 1, k1, psso "translated" means to slip one stitch from the left needle onto the right needle as if to knit, but without knitting it. Knit the next stitch on the LH needle, then pass the slipped stitch over the knit stitch on the right needle.
Why Do Knitting Decreases?
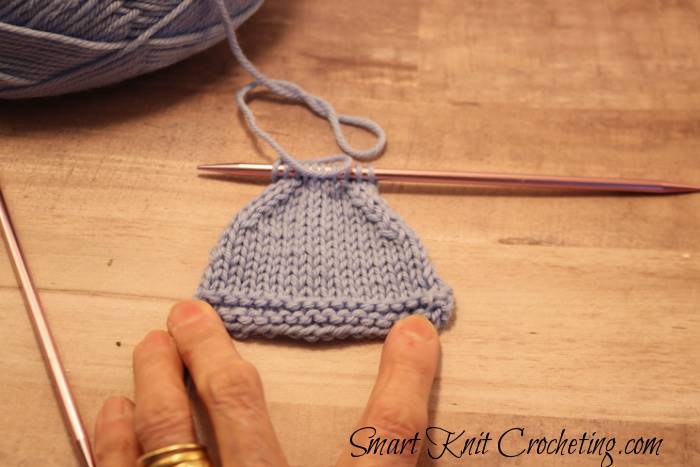
Decreased stitches are mainly used to shape a piece of knitting, such as making armholes or around-the-neck openings.
Decreases are also used when working on a decorative design such as lace. They are paired with increases, often yarnovers, to create the holes or eyelets seen in lace.
Classifying Knit Decreases
According to the Craft Yarn Council, the decreased stitches in knitting either slope or slant to the right or left. They can also be single or double decreases.
Decreases that slant to the left are typically made on the right side, whereas those that slant to the right are used on the left side.
For the best look, decreases should be symmetrical or mirror each other. So, it's important to pair a left-slanting decrease with a right-slanting decrease.
Single Left-Leaning Decreases
- Slip 1, Knit 1, pass the first stitch over (SKP)
- Slip, Slip Knit (SSK)
- Slip slip, purl (SSP) when working on the wrong side
- K2Tog tbl (Knit two together through Back Loop: Creates a twisted stitch.
Single Right-Leaning Decreases
- Knit 2 Together (K2tog)
- Purl 2 Together (P2tog)
- Knit, Slip the knit Stitch back to left needle, Pass the second stitch on the left needle over and off and back to right needle (KSP)
There are others,including twisted and looped, but they are more advanced.
How to Make the SKP Knitting
The SKP decrease requires three steps.
Step-by-Step Directions for the SKP Knitting
Step One
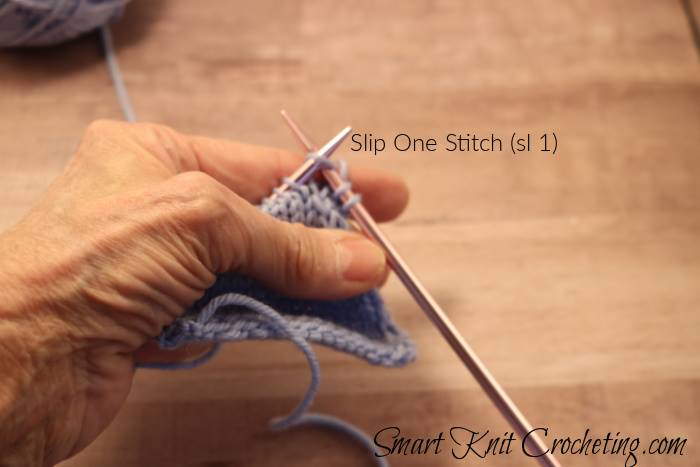
Knit to where you want to make the decrease. Your pattern should tell you where that should be. Slip one stitch from the left-hand needle to the right-hand needle, knitwise.
Remember, knitwise just means taking the stitch from the left needle as if you would knit it.
Step Two
Knit the next stitch on the left needle in the normal way.
Step Three
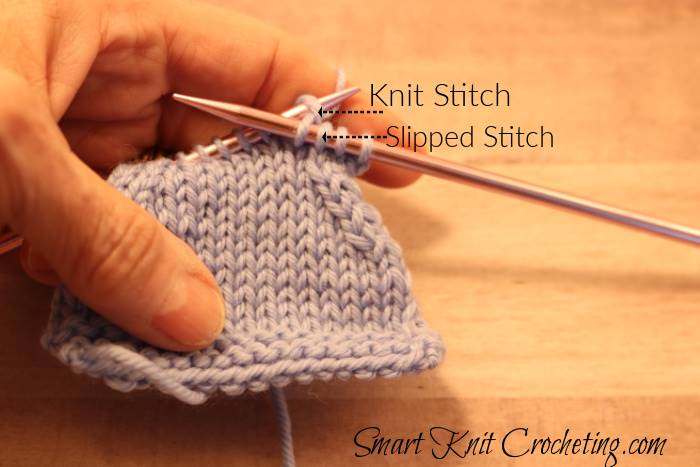
Using the left needle tip, pass the slipped stitch over the knit stitch and then off the needle as you would if you were binding off. You have decreased one stitch. This makes a decrease that will slant to the left.
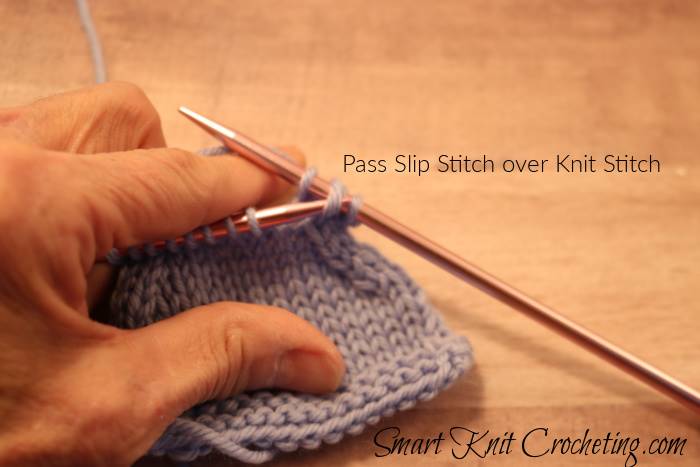
Which decrease should you use with the SKP to shape a piece of fabric to look symmetrical?
Why worry about making the decreased stitch look symmetrical? Our eyes look for symmetry. This is especially important when we are making garments such as sweaters, where we want both the right and left sides to look good.
Some patterns call for the SKP decrease to be paired with the K2tog. (Knit 2 stitches together).
Other patterns will suggest you use the SKP with the KSP decrease. (KSP stands for Knit, Slip, pass and is made by knitting one stitch, then returning it back to the left needle.
From there, you pass the stitch to the left of the stitch you just knit and off of the needle. Finally you return the stitch to the right needle, and continue.
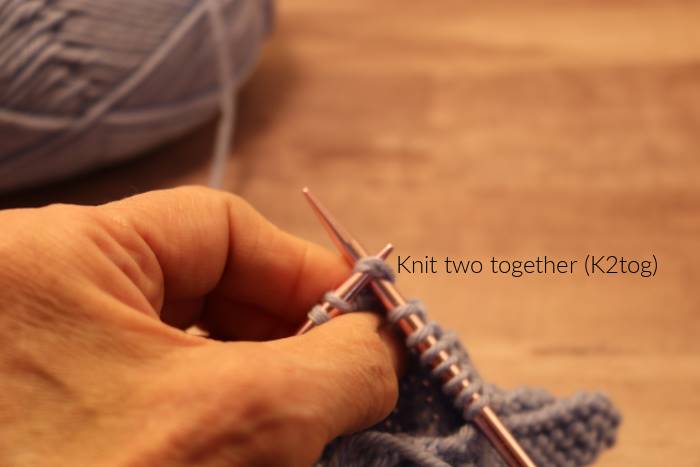 In this tutorial, I used Knit two together (k2tog) for my right slanting decrease to mirror the SKP
What is the Difference Between the SKP and the SSK?
You might be wondering why we have two decreases that slant to the left? The SKP is the older of the two decreases and produces a decrease that is not twisted.
The SSK is a newer version first identified by Barbara Walters, a master knitter and author. Like the SKP it produces a decrease that is not twisted.
When making the SSK, you first slip two stitches knitwise, one at a time from the left needle to the right needle. Next, you would slip the left needle tip in front of those two slipped stitches. Finally, you knit both of those two stitches together.
Since both look almost identical, it's really up to you which one to use. If following a pattern it is best to follow the instructions of the designer.
Tips and Tricks for Neater SKP Decreases
Any time you slip a stitch there is the possibility that the stitch will become oversized because it's easy to stretch them when slipping. The easiest way to avoid this is to keep needle tips close together and work only on the tips of the needles. The less you manipulate the stitches, the tighter and more even your decreases will be.
More Tips for Making Decreases
Many patterns are perfect in that they tell you exactly what to do and when, but some tend to keep you guessing.
For example, what do you do if your pattern says:
"dec 1 every rs row"
It is obvious you need to decrease one stitch every right side row, but what type of decrease and where do you place the decrease?
Certain decreases slant to the left and some to the right. For more information on different types of decreases, please jump to the article about decreasing a stitch.
As to where to put the decrease, the pattern leaves it up to your discretion. For the best results never make a decrease in the first or last stitch in a row. You may also want to knit two stitches before making a decrease. If pattern calls for decreases at the beginning and ending of the row, knit up to the last four stitches, make the decrease and then knit the last two stitches.
Why would you want to do this?
If you are making decreases in a piece that will need to be seamed, the first and last stitch of the row will be part of the seam. If you want your seam to look right, the second stitch on either side of the seam should look good. This row of stitches will show on the right side of the piece and if both stitches are even, it will appear seamless. If the decrease is done in this second stitch, the seam will show with stitches that are not uniform.
Your pattern says, Dec 1 every 4th row? What does that mean in flat knitting?
Row 1: Decrease Row (often a knit row)
Row 2: WS or Purl row: First row after decrease
Row 3: RS or Knit Ro: Second row after decrease
Row 4: WS or Purl row: Third row after decrease
Row 5: This is actually the 4th row where you place your decrease
