- Home
- Types of Knit Stitches
- Knitting Stitches for Beginners
- Stockinette Stitch
How to Knit the Stockinette Stitch Pattern (Beginner Guide)
by Janice Jones, Certified Knit Instructor (CYC)
The stockinette stitch is one of the first stitch patterns every knitter learns — and it’s also the most commonly used stitch in knitting patterns.
If you’ve ever seen smooth “V” shaped stitches on the front of a sweater, scarf, or hat, you were looking at stockinette stitch.
In this beginner-friendly guide, you’ll learn exactly how to knit the stockinette stitch flat and in the round, how to fix common problems like curling edges, and how to make your fabric look neat and even.
How to Create the Stockinette Stitch
What Is the Stockinette Stitch?
The stockinette stitch is a basic knitting pattern made by alternating knit and purl rows.
When working flat, you knit one row and purl the next. When working in the round, you knit every round. The front of the fabric is smooth with “V” shaped stitches, and the back has small bumps.
Stockinette Stitch at a Glance
- Skill level: Beginner
- Pattern repeat: 2 rows
- Stitch Multiples: Any
- Flat knitting: Knit 1 row, purl 1 row
- In the round: Knit every round
- Fabric: Smooth front, bumpy back
- Edges curl: Yes
How to Knit the Stockinette Stitch Pattern
I promise you, this is easy. It can be done on any number of cast-on stitches and follows a two-row pattern when working flat.
Row One: Knit the Row
Row Two: Purl the Row
Repeat this pattern for as many rows as you need.
That’s it! You may want to check out some other similar pages:
How to make the garter stitch pattern
Right and Wrong Sides of the Stockinette
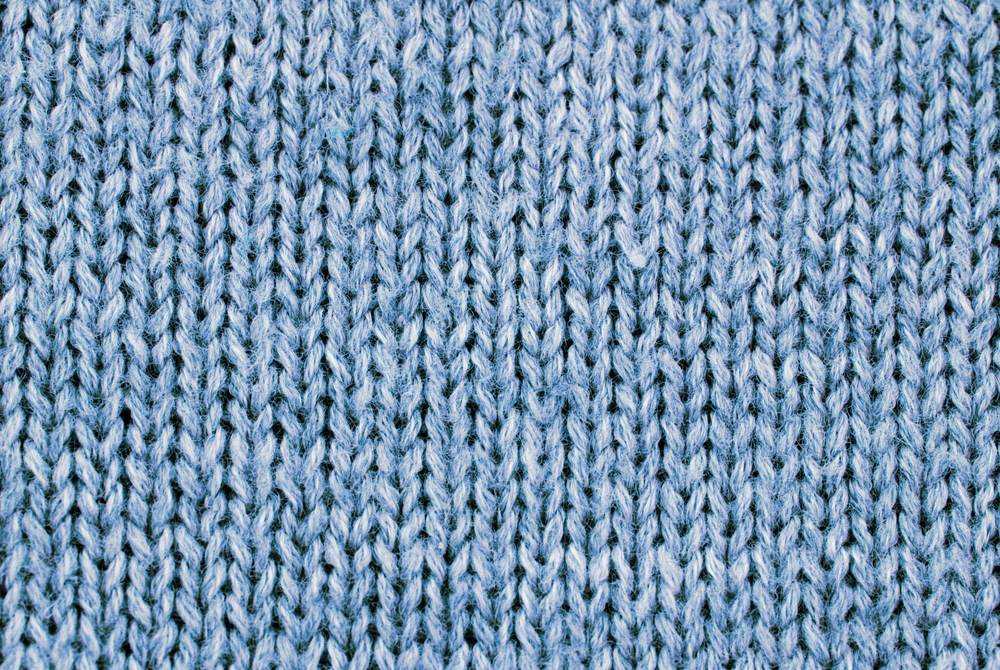
Take a look at the two photos below. The first is a photo of the right side of the fabric.
All stitches form little “v’s.” It looks similar to the garter stitch or the purl stitch on the wrong side of the material if one were to purl all rows.
Since both sides look very different, it is easy to tell the difference between the two.
Flat versus Circular Stockinette Stitch
You can knit the stocking stitch with straight needles creating a flat piece of fabric, or work it in the round using circular needles. There is just one big difference.
Stockinette Stitch Flat Knitting
Cast on the required number of stitches
Row 1: Knit
Row 2: Purl
Repeat rows 1 & 2 until the desired length is reached.
Stockinette Stitch Using Circular Needles
If you are going to making a project in the round and it calls for the stockinette stitch, the pattern is just a little different. On circular needles where you are continuously knitting in the round, you will want to cast on the required number of stitches for your pattern.
Add a stitch marker to show where the first round begins.
Begin knitting by knitting stitches from the left needle to the right. You won't be purling at all. The stockinette stitch on circular needles is made entirely by making the knit stitch. After a few rows you will notice that the right side of your work looks like the stockinette stitch and the wrong side is the reverse stockinette stitch.
 The Stockinette stitch on circular needles is done entirely with knit stitches only.
The Reverse Stockinette Stitch

The reverse stockinette stitch is simply the back side of regular stockinette stitch.
Instead of smooth “V” shaped stitches showing on the front, the fabric shows small horizontal bumps. This bumpy texture is created by purl stitches.
You can work reverse stockinette either flat or in the round.
How to Knit Reverse Stockinette (Flat)
- Cast on the required number of stitches.
- Row 1: Purl
- Row 2: Knit
- Repeat these two rows until your piece reaches the desired length.
How to Knit Reverse Stockinette (In the Round)
When working in the round, reverse stockinette is made by purling every round.
Most knitters don’t enjoy purling every stitch, which is why reverse stockinette is usually created by knitting regular stockinette and then turning the fabric inside out.
When Is Reverse Stockinette Used?
Reverse stockinette is often used:
- As a design feature for texture
- To create contrast with smooth stockinette areas
- In panels, borders, or decorative sections
- Because it shows texture so clearly, it’s best used in simple designs where the bumps are meant to stand out.
How to Count Rows and Stitches in Stockinette Stitch
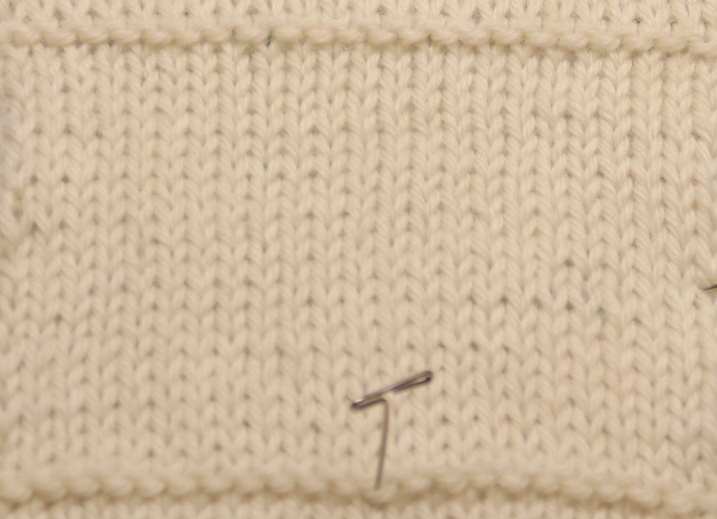
 How to count stitches in the stockinette stitch pattern
You can count rows and stitches on either the right or the wrong side of the fabric.
Right Side: Each little “V” is one stitch. With the right side facing you, count each row of v’s
Wrong Side: Each little bump is one stitch; Count one ridge as two rows.
Common Beginner Problems With Stockinette Stitch
- My edges are curling
- My stitches look uneven
- My rows look uneven
- I accidentally twisted stitches
- I can see every mistake
All of these are normal beginner issues and improve quickly with practice.
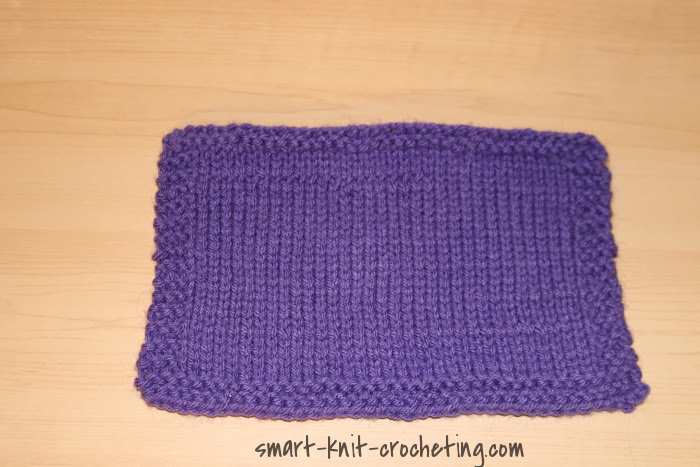
My edges are curling
 This is the reverse side of the stockinette stitch, but you can see that it curls on the edges.
One of the first things beginners notice is that stockinette stitch curls at the edges.
This happens because knit stitches pull the fabric in one direction and purl stitches pull it in the opposite direction. The fabric balances in the middle but curls at the edges.
Curling does not mean you made a mistake. Every knitter experiences this.
My stitches look uneven
For both beginners and more experienced knitters, maintaining even tension can be challenging, and any differences will be immediately apparent in the stockinette stitch.
Tension can be inconsistent between the purl and knit rows, where one or the other is worked too tightly or too loosely. You will be able to see the size differences when examining stitches.
Tension is challenging to master when you are starting. You might find yourself making either the knit or the purl row tighter. You can compensate for this by using two needles of different sizes.
If you notice that you are knitting too tightly, adjust by using a slightly larger needle. If your knitting is loose, you can use a smaller needle.
My rows look uneven
Uneven Rows or elongated stitches at the end of the rows are another beginner challenge. This usually happens when the yarn is either too tight or too loose at the beginning and end of rows. Pulling the yarn tighter at the beginning or end of the row may solve this problem. But with that said, you will want to practice so that the yarn is tight but not so tight that the needle can not slide easily under the stitch.
More tips on creating even edge stitches
I accidentally twisted stitches
Twisted stitches appear as little Vs, except that the legs of the v overlap. They occur as a result of inserting the right needle into the back loop of the stitch when knitting as opposed to the front loop.
There are so many twisted stitches on the swatch below that it is difficult to recognize it as stockinette stitch.
I can see every mistake
Errors Show Readily with the Stockinette Stitch: The stockinette stitch can show errors easily, such as a dropped stitch or a change in tension. Mistakes can be a good thing because it forces you to go back and pick up a dropped stitch.
 Right Side
How to Make the Stockinette Stitch Lay Flat
Add a Border
One way to create a flat piece of fabric is to create a border around the stockinette stitch. Common borders include using a garter stitch, a seed stitch, or a form of a ribbing stitch.
Garter Stitch Border
Cast on an even number of stitches and then add six.
Row 1 – 4: Knit
Row 4: Knit 3, purl till last three stitches, K 3
Row 5: Knit
Repeat Rows 4 and 5 until you reach your desired length
Last 3 rows: Knit and bind off.
Seed Stitch Border
This creates a nice border around the stockinette stitch and allows the finished piece to lay flat
Cast on an even number of stitches and then add 8 stitches.
Rows 1 -4 in Seed Stitch
Seed Stitch Pattern
Row 1: K1, P1 till end of row
Row 2-4: Knit in the Purl stitches and Purl in the Knit Stitches
Row 5: K1, P1 K to within last four stitches, then K1 P1
Row 6: P1, K1 to within last four stitches then P1, P1
Repeat rows 5 and 6 until desired length.
Last four rows: Repeat Rows 1-4
Blocking
You may be able to achieve a flatter fabric, but blocking is a temporary fix and would need to be repeated after the fabric is washed.
Fabric Backing
Some experts will tell you to sew a fabric backing. In my opinion, fabric backing doesn’t always work for most projects.
What Can You Do With the Stockinette Stitch?
Once you get the hang of the stockinette stitch, you will find that this is likely the most straightforward stitch pattern to make. You’ll find that knitting the stockinette stitch will become so easy that you won’t even need to pay attention to what you are doing. This makes it an ideal stitch to do while watching TV or while traveling.
The stockinette stitch is perfect if you want to work in colors or add stripes. You can even do embroidery over stitches or add beads or other embellishments. More advanced stitch patterns such as cables or other textured stitches are also worked alongside the stockinette creating a nice contrast with the flat stockinette.
Frequently Asked Questions About the Stockinette Stitch
Does the stockinette stitch curl?
Does the stockinette stitch curl?
Yes. The stockinette stitch naturally curls at the edges.
The top and bottom curl toward the front, and the side edges curl toward the back. This happens because knit stitches and purl stitches have different tensions. It’s normal and not a mistake.
How do I stop the stockinette stitch from curling?
How do I stop the stockinette stitch from curling?
You can’t completely stop stockinette from curling on its own, but you can manage it. Common solutions include:
- Adding a border in garter stitch, seed stitch, or ribbing
- Using a pattern that combines stockinette with another stitch
- Blocking the finished piece (this helps, but is usually temporary)
Is the stockinette stitch reversible?
Is the stockinette stitch reversible?
No. The stockinette stitch is not reversible.
The front side appears smooth with “V”- shaped stitches, while the back side seems bumpy. If you need both sides to look the same, a reversible stitch like garter or ribbing is a better choice.
Why do my stockinette stitches look uneven?
Why do my stockinette stitches look uneven?
This is very common for beginners. Uneven stitches usually happen because knit stitches and purl stitches are worked with slightly different tension.
With practice, your tension will even out. Many knitters also find that using the correct needle size and relaxing their hands helps a lot.
Is stockinette stitch worked differently in the round?
Is stockinette stitch worked differently in the round?
Yes. When knitting stockinette stitch in the round, you knit every round.
You do not purl at all. This creates the same smooth fabric without needing to turn your work.
Does the stockinette stitch use more yarn than the garter stitch?
Does the stockinette stitch use more yarn than the garter stitch?
Yes, slightly. Stockinette stitch uses a bit more yarn than garter stitch, but less than some textured stitches. The difference is usually slight and not something beginners need to worry about.
Shop For Supplies on Amazon
Check out the Yarn Selection on Amazon.
Look for Crochet Supplies or Crochet Books
Discover Knitting Supplies and Knitting Books on Amazon
Pin for Future Reference

Disclosure:
This post contains affiliate links. If you buy through them, I may earn a small commission at no extra cost to you.

Janice Jones is a Certified Knitting and Crochet Instructor who creates beginner-friendly patterns and tutorials, backed by a 389-page library of practical knitting and crochet content.
Most Popular Pages
All Types of Crochet Stitches

36 Reversible Knit Stitch Glossary

How to Crochet the Second Row

Dog Sweater Patterns

Working with Alpaca Yarn

Free eBooks, Just for You
Get my beginner eBook guides to Knitting and Crocheting, just for signing up for my monthly newsletter.
Choose one or both when you sign up.


About the Author: Please allow me to Introduce myself

Janice Jones is a Certified Knitting Instructor and Certified Crochet Instructor through the Craft Yarn Council who focuses on beginner-friendly patterns, stitch guides, and technique tutorials. She has built a library of 389 pages on her website, sharing practical instructions and patterns, and has completed projects ranging from crochet blankets to knit sweaters. You can explore her work on her website. She makes items for Warm Up America and often knits and crochets sweaters for her small dogs.
Thank you for visiting Smart-Knit-Crocheting. I hope this and all of my tutorials will give you the inspiration to continue your knit or crochet journey. For a complete list of all the pages on my site, please visit my table of contents.
I participant in the Amazon Services LLC Associates Program, an affiliate advertising program designed to provide a means for sites to earn advertising fees by advertising and linking to Amazon.com. “As an Amazon Associate I earn from qualifying purchases.” These earnings go towards supporting my website.

Home | Contact | About | Privacy Policy | Disclaimer
I DO NOT SELL ANY PERSONAL INFORMATION FROM THIS WEBSITE. PLEASE SEE MY PRIVACY POLICY FOR MORE DETAILS.
Copyright © 2006-2026 Smart Knit Crocheting. All Rights Reserved
Please Share
Remember, Sharing is Caring