- Home
- How to Knit: Basics
- Knitting Edge Stitches
Knitting Edge Stitches So They Look as Great as All The Rest
Knitting Edge Stitches by Janice Jones
Have you ever looked at a swatch of knitted fabric and wondered why all your stitches look great except the edges? Perhaps you know what I mean -- those oversized, uneven stitches that seem to stick out like a sore thumb.
I know that getting the tension right on a swatch of fabric is easier said than done. Edge stitches that are uneven are just one tension problem that knitters face.
I have struggled with issue and still do, but luckily there are some fixes to make all of your knitting look great.
Selvage verses Edge Stitches
Before we can begin to fix ugly edge stitches, we need to know what and where they are located. Ordinarily, you might think the edge stitches are those first and last stitches in a row of knitting. They are not.
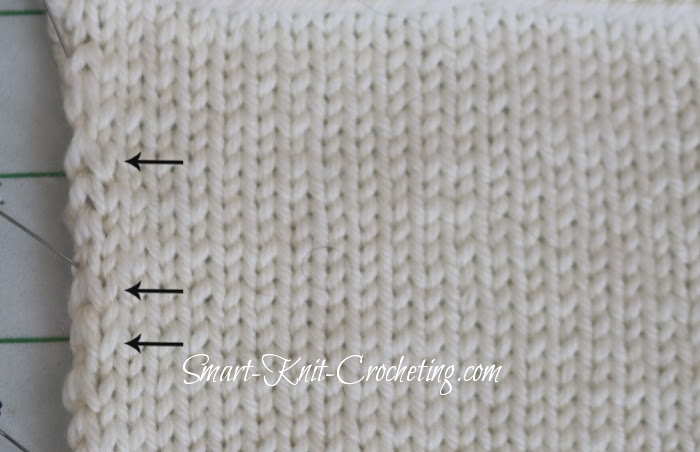
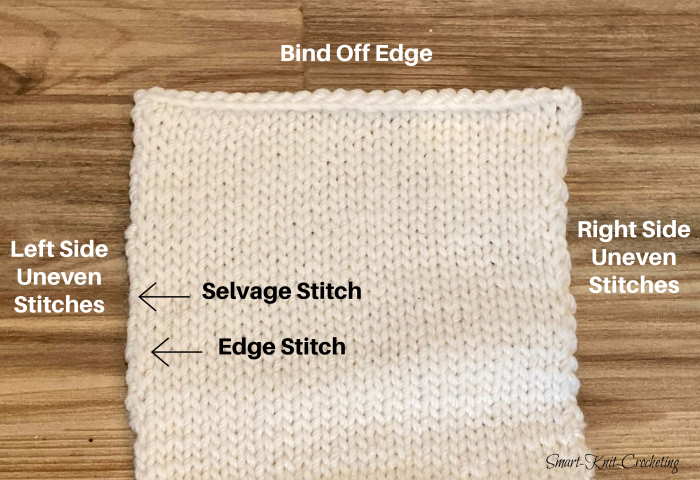
The first and last stitch in a row is called the selvage stitch because these are the stitches that will be hidden from sight when the fabric is seamed. Selvage stitches can be quite dreadful, large and loose and can make the swatch look bad. There are ways to deal with problems in selvage stitches, but that is the topic for another article.
In this article we will focus on the edge stitches. These are the stitches that sit directly next to the selvage stitches. They will be the second stitch in a row and the next to last stitch in a row.
How Even are Your Edge Stitches?
If you notice that the edge stitches (not selvage stitches) uneven, you may have a problem. Uneven stitches means that some are bigger or looser than others. You can have this problem on the right side, the left side, or on both sides of the swatch.
 Uneven stitches on the left side of the fabric
How to Fix Ugly Edge Stitches
Before you can fix these unsightly stitches, you need to figure out where they are which may mean looking at the edges in good light and a magnifying glass.

- The sloppy edges are on the left
- The sloppy edges are on the right
- Both edges have sloppy stitches
Knitting Edge Stitches Neatly on the Left, Right or Both Sides of the Fabric
If your problems are seen on the left edge, you are likely knitting looser than you purl. In this case, you will want to tighten the first few stitches on the purl side of your work. I'll give specifics below.
If the edge gutters are on the right side, the first stitches of the knit side (public side) will need to be tightened.
And, it goes without saying, that if you have issues on both sides, you will need to tighten the first few stitches on both the knit and the purl side of the swatch.
Now that you have an idea about where your problems lie, it's time to come up with a fix. I have outlined several ideas for fixing uneven edge stitches. There really is no one size that fits all, so to speak because every knitter knits a little differently.
The best way to find out what works for you is to try each method on a new stockinette swatch using a light colored yarn. Wool works good for this little exercise. Pick a yarn that will allow you to see each stitch clearly which means no novelty yarns.
If you don't want to knit more than one swatch, at least knit 6 to 8 rows using the methods I am going to describe below. At a stitch marker at the end of the row and make a quick note as to the method you tried.
Once you are done experimenting, take a close look at the swatch you just knitted and see which method worked best for you. If non of them worked perfectly, I've added a couple of additional suggestions at the end of the article that might be worth trying.

Knitting Edge Stitches Evenly
Here are six methods that have been published to work on edge stitches with tension problems. Finding the one that works is challenging because not all methods work equally well for everyone.
See which one works best for you.
Method One
One method is to knit the first stitch as you normally would but then knit the next several stitches tighter. This also works if the problem is loose purl stitches.
Here you would purl the first stitch at your normal tension and the tighten the next couple of stitches. If you pull hard to tighten the first stitch, this will cause the stitch below the needle to become even smaller, thus defeating your purpose.
Remember that you will be tightening the stitches on the side that has a problem.
Right side problem: Tighten first stitches on the knit side
Left side problem: Tighten first stitches on purl side
Both Sides: Tighten first knit stitches, then tighten first purl stitches
Method Two
The second method is to work the first three stitches of each row tighter than the rest of the row and the last three stitches looser than you did the rest of the row.
Method Three
One more method that is worth mentioning includes Maggie Righetti’s method of knitting or purling the first stitch normally and then inserting the needle into the next stitch as if to knit or purl, but before working the stitch, tug at the yarn and then finish the stitch.
She describes this method in her book, Knitting in Plain English
Method Four
Another way involves the use of both “picking” and “throwing.” Most western knitters fall into either the category of continental knitting or English knitting. Continental knitters consider themselves to be pickers, while English knitters are throwers.
It is possible to do both and many if not most master knitters have a preference but can knit in both traditions. Sometimes it is possible to experiment with both methods and see which one creates the best tension. Perhaps knitting in the continental manner and purling in the English method might improve tension. Of course, the opposite is also correct.
Method Five
Combination knitting might improve edge tension problems also. Combination knitting involves creating knit and purl stitches a bit differently than is normal.
In this case, you would only knit or purl in the combination method about the first two or three stitches of each row. On the purl side of the fabric, you would wrap the yarn around the needle as if to purl in the opposite direction. On the knit side, you would insert your needle into the back leg of the knitting needle instead of the customary front leg.
This method uses less yarn for purling so the stitches tend to be smaller.
Method Six
Finally, according to Arenda Holladay, one method would be to work the first three stitches of every row as you would normally, but tighten the next stitch in the row. This would be done on the side where you are having a problem.
Video Tutorial

I found this video done by Suzanna Bryant to be very helpful in demonstrating the different techniques I just described.
More Tips to Consider
Sometimes messy edge stitches are just a symptom of a broader tension problem. Be sure to read my article about knitting even stitches.
Fix Overall Tension Problems
Often you can deal with those edge stitch issues by paying more attention to the way you are tensioning your yarn through your fingers.
Everyone has a preferred way to hold the yarn and the needles, but if you are having problems, say with larger purl stitches than knit stitches, you may want to wrap the yarn around a finger one more time than you would when making knit stitches.
Experiment with Different Types of Needles
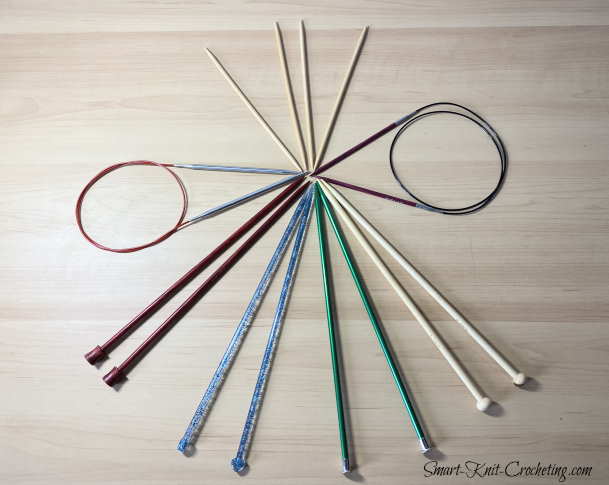
You have a choice to knit with needles made out of different materials such as wood, bamboo, stainless steel, or some form of plastic. Beginning knitters should try all types to see which ones feel best in their hands and which ones provide the best tension.
 When Knitting Edge Stitches, Find the Type of Needle that Works Best for You
For example, advanced knitters normally prefer steel needles because they can knit faster with stainless steel. Beginning knitters on the other hand, would do best to try bamboo or wood as the yarn hugs the needle and stitches do not fall off so easily. If you lose a stitch, it is going to create a hole so you will want to fix it. The problem is that all that additional manipulation to recover the lost stitch adds to the tension problems.
All Yarn is Not Alike
As you experiment with different types of yarn, you are going to find that there are some that you love to work with, some that do just OK, and others you just hate.
While trying to control your edge tension, it is best to find a yarn that you love and one that won't add to the problem.
Knitting With Two Different Size Needles
This method of knitting with two needles that are not the same size has been suggested by others and may work for you especially if you are creating something in stockinette stitch. For example, if the pattern calls for a size US 8/5.0 mm needle, but your purl stitches are much larger than your knit stitches, try using a US 7/4.5 mm needle to work the purl rows and the size 8 needle to work the knit rows.
This won't work for tension problems occurring in other types of stitches such as ribbing, cables, or seed stitch.
If you are working on circular needles, you will need a set that has interchangeable needle tips.
Conclusion and Last Words About Knitting Edge Stitches
Please do not feel bad or think you are a bad knitter if you have problems with your edge stitches. This is a very common problem among knitters and I struggle with it as well.
Sometimes I find that I must just find a quiet place without distractions to knit. Concentrating on my knitting entirely without letting my mind wander too far helps me solve some of these problems. This is called Mindful Knitting but it is not something you can do while binging on your favorite Netflix show.
It does take practice and I know we all want to be perfect master knitters but like anything worth doing well, it does take time.
Happy Knitting.


