- Home
- Types of Knit Stitches
- Knitting Rib Stitches
- Slip Stitch Rib
- Twisted Rib Knit Stitch Pattern
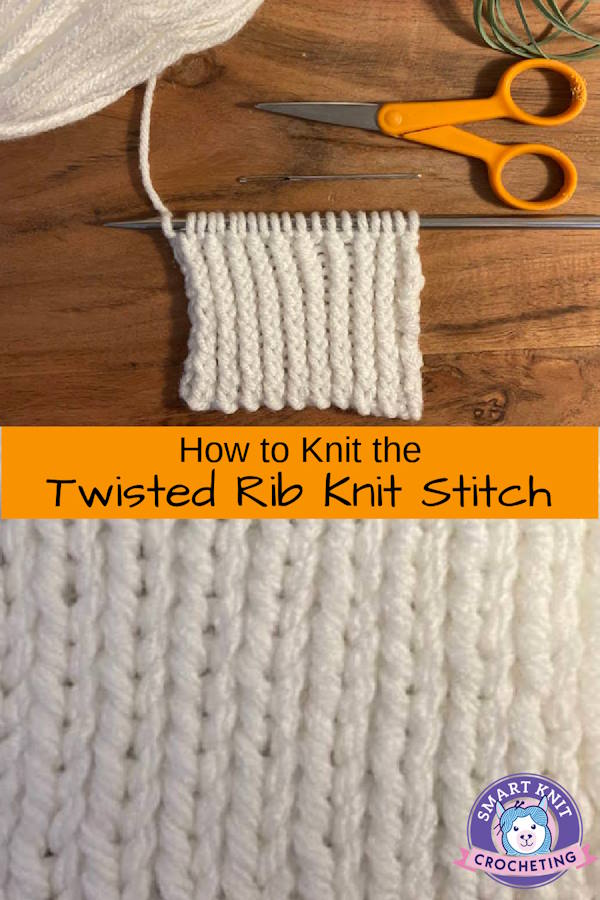
Twisted Rib Knit Stitch Pattern: Beginner-friendly Tutorial
Twisted Rib Knit Stitch Pattern, by Janice
The twisted rib knit stitch creates an aesthetically pleasing and richly textured fabric with a reversible pattern resembling twisted rope columns.
Additionally, its elasticity makes it a great choice for various projects. Running the spectrum from scarves to hats, blankets to sweaters, the twisted rib stitch adds depth and sophistication to knitting projects.
In this article, I will discuss the twisted rib pattern offering a step-by-step guide on creating this stunning pattern. I will also provide you with the information you need to knit the half-twisted rib stitch.
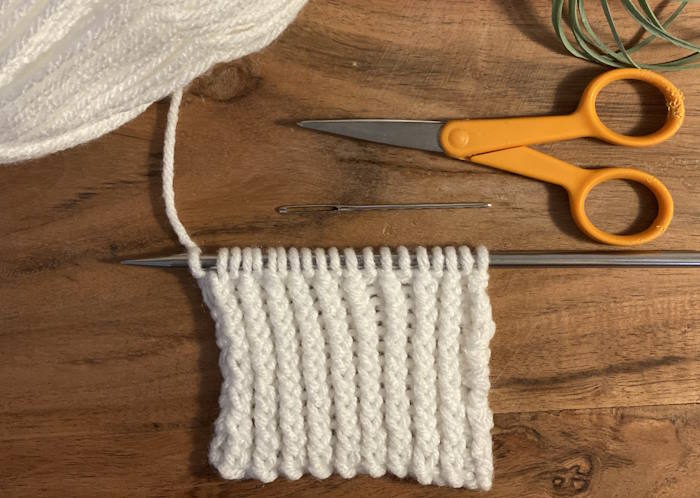
Differences Between the 1x1 Rib and the Twisted Rib Stitch
The traditional one-by-one rib stitch is created by alternating knit and purl stitches within the same row, resulting in a fabric that showcases raised 'ribs' of knit stitches separated by sunk 'valleys' of purl stitches, with both sides of the fabric appearing identical.
This stitch is renowned for its excellent elasticity and is often used for areas requiring stretch, such as cuffs and necklines.
On the other hand, the twisted rib knit stitch pattern differs slightly in technique - instead of regular knit stitches, you would knit through the back loop.
This seemingly small shift in approach drastically changes the appearance of the completed fabric.
The twisted stitches create a more pronounced three-dimensional 'twist' that runs down the rib's length, giving a much more textured and intricate aesthetic compared to the smoother, more uniform appearance of the traditional one-by-one rib stitch. The pattern adds a beautiful depth to the fabric with slightly reduced elasticity.
Skill Level

Easy: This pattern uses a technique called knitting or purling through the back loop
Abbreviations
- CO - cast on (we used the long tail method)
- K - knit
- Ktbl - knit through the back loop
- P - purl
- Ptbl - purl through the back loop
- BO - bind off (we bound off in a pattern)
- * * - Work the instructions between the two asterisks for the number of times indicated in the directions.
Notes about the Twisted Rib Knit Stitch Pattern
- This pattern is worked on an even number of stitches
- This requires a one-row repeat.
- Purl stitches are worked through the back loop (ptbl)
- Knit stitches are worked through the back loop (ktbl)
- The pattern is reversible
- All instructions are in US Terms
- There are two ways to make this stitch, the Full Twist and the Half Twist Rib Knit
Is this Knit Rib Pattern Reversible?
Yes, both the front and back sides are the same.
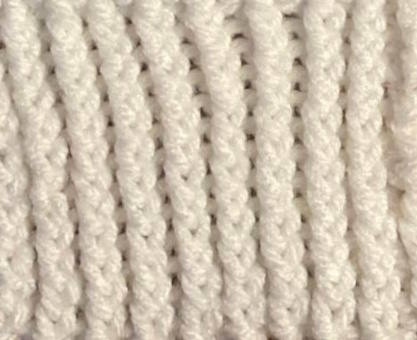 Right Side
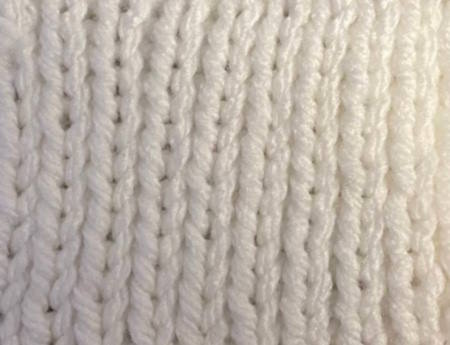 Wrong Side
Supplies Needed for this Tutorial
- Yarn*
- Needles (size appropriate for the yarn you choose
- Scissors
- Yarn Needle
*For this tutorial, I used Lion Brand Basic Stitch, anti-pilling yarn #4 worsted weight yarn and a US Number 8 (5.0 mm) needles.

Two Ways to Make the Twisted Rib Knit Stitch Pattern
1. Full Twist Rib Stitch
Instructions for Full Twist (working flat)
- Cast on an even number of stitches.
- Row 1 (right side) - *Ktbl, Ptbl.* Repeat to the end of the row.
- Repeat row one until you reach your desired length.
- Bind off in pattern. (Knit the knit stitches and purl the purl stitches as you bind off.) Weave in Ends
If you work in the round, the directions are the same: repeat Row 1 to the desired length.
2. Half Twisted Rib Stitch
Instructions for Half Twist (working flat)
- Cast on an even number of stitches.
- Row 1 (right side) - *Ktbl, P1.* Repeat to the end of the row.
- Row 2 (wrong side) - *K1, Ptbl * Repeat to the end of the row.
- Repeat Rows 1 and 2 to the desired length.
- Bind off in pattern. (Knit the knit stitches and purl the purl stitches as you bind off.)
*repeat Row 1 to the desired length for knitting in the round.
Additional Tips
Your rib will look great if you continue to work through the back loop. It becomes a problem if you make some of your knit stitches by working in the front loop and some through the back loop.
While this seems obvious, as you become comfortable with this stitch and go into "your zone," it's easy to go back to the way you normally knit.
For this reason, it is important to concentrate on what you are doing and view your work regularly.
I also recommend knitting slightly looser than you normally wood to make inserting the hook into your stitch easier, especially when working through the back loop of the purl stitch.
Chart Instructions
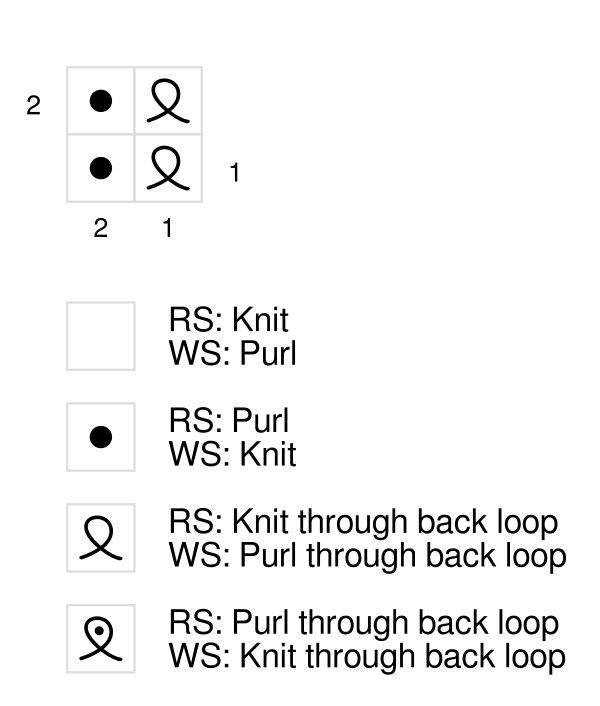
The written instructions for the Full and Half Twisted Rib Stitches are easy to follow; however, as patterns become more complex, it's essential to know that there is another more visual way of following directions.
For more information on reading the knitting chart, please check out my article.
What Can You Make with the Twisted Rib Knit Stitch Pattern?
This knit pattern is not quite as stretchy as a typical 1 x 1 rib that you often find in the hems and leave cuffs of sweaters or the brim of hats.
Still, it is stretchy enough to use this stitch for an added touch of texture in any place where you need a rib stitch. Try making a beanie entirely with this stitch, or use it for cowls or slouchy hats.
Last Words
In conclusion, the Twisted Rib Knit Stitch Pattern is valuable to any knitter's repertoire.
It offers a delightful alternative to traditional ribbing, bringing a sophisticated texture to your projects. Although it may require more patience and practice, the final result is undoubtedly worth the effort.
