- Home
- How to Crochet
- How to Fix Crochet Mistakes
How to Fix Crochet Mistakes: 20 Errors and How to Correct Them
How to Fix Crochet Mistakes by Janice Jones
Crochet mistakes are common, even for experienced crocheters. But the good news is that most errors can be fixed with patience and attention to detail.
 How to Fix Crochet Mistakes
The key is to catch and address mistakes early before they become too difficult to fix. In this article, we'll explore some of the most common crochet mistakes and provide tips on how to fix them.
First, I have a confession to make. I'm probably the most qualified person to write about mistakes. Why?
Because I made many of the ones listed below without knowing they were mistakes until it was too late. You might ask, how did you find your mistakes? That's easy.
Sharing My Personal Crochet Mistake History
I'm sure I'm not the only one who has made these mistakes:
- Making granny squares that are not the same size (tension issues)
- Creating a scarf that gradually gets wider and wider (adding additional stitches)
- Making a blanket with uneven dimensions (forgetting to count stitches)
- Working swatches that include yarn under instead of yarn overs (I got caught on this one from the Craft Yarn Council)
- I used the cheapest yarn I could find for all my beginner projects (not understanding much about yarn)
- Using a hook that split the yarn and made it difficult to crochet (not understanding the differences between hooks)
I could go on and on, but you get the point. No matter what we decide, all new endeavors will likely produce mistakes.
“Mistakes are a fact of life. It is the response to error that counts.” - Nikki Giovanni
The Most Common Mistakes Crocheters Make
Here is a list of some of the most common problems beginners as well as experienced crocheter's make. Keep reading to learn how to correct the problem.
- Not Understanding US and UK terminology
- Creating Uneven Edges
- Not Using the Right Yarn
- Not Using the Right Hook
- Not Understanding where to place the first stitch
- Making Yarn unders when you should be making yarn overs
- Not understanding how to read stitches
- Not understanding how to read pattern instructions
- Not leaving a long enough tail to weave in
- Not counting stitches
- Not creating a gauge swatch
- Failing to block your work
- Making too loose or too tight chain
- Not understanding how to weave in ends
- Getting the tension wrong
- Not understanding where to insert the hook
- Not keeping track of where you are in a pattern
- Working the Wrong Number of Chains at the Beginning of the Row
- Not using stitch markers or a row counter
- Giving up
How to Fix Crochet Mistakes
Many of these mistakes have an easy fix; others are fixed through experience.
I hope that some of these fixes will propel you onto bigger and better crochet projects, but if you have experienced a problem you don't see here, please feel free to contact me, and I will see if I can help you succeed with your crocheting.
1. Not Understanding US and UK Terms
This is a mistake many make before they realize that there are differences between the US and the UK crochet terminology. Here is a short list of the terminology differences you should be aware of:
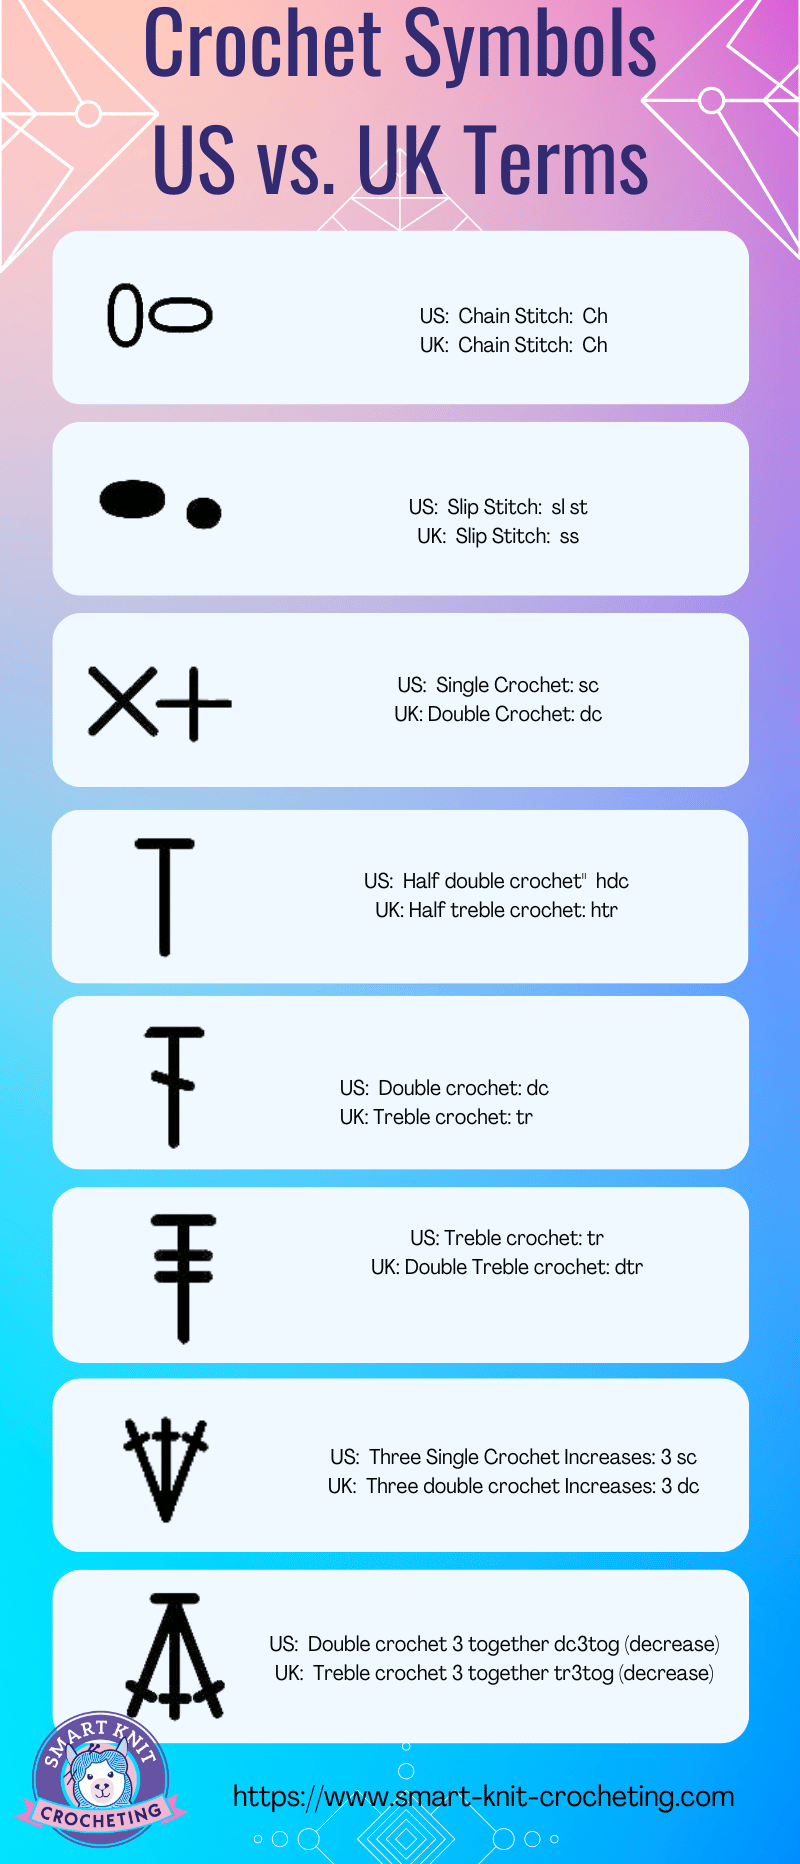 Crochet terms and symbols may be different in US or UK terms
Sometimes, it is not immediately apparent, but there are some things you can check to see if you are encountering US or UK patterns or websites.
- Pattern or Crochet books will have copyright information and where the book was published. Check the location where it was published. You will be dealing with US terminology if it was created in the US.
- Websites: Many websites will let you know where they are located, and information will be provided, such as "written in US terms." If not, look for typical spellings such as colour vs. color to ascertain where the website is located. If all else fails, use the "contact form" and contact the owner to confirm.
- YouTube tutorials: This is usually an easy one. American accents are easy to identify, and most YouTubers will tell you what terms they use.
2. Creating Uneven Edges
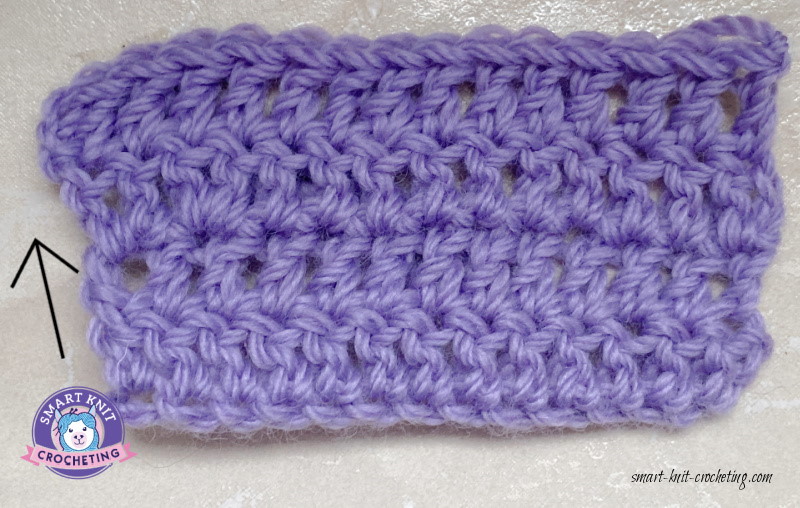 Failure to keep the same number of stitches on each row will cause uneven edges.
Failure to keep the correct number of stitches on each row will cause uneven edges. Maintaining a consistent stitch count is the easiest way to keep crochet edges even.
This is likely one of the most common mistakes beginners make. If you use a crochet pattern, it will tell you how many stitches you need, and we can keep the correct stitch count by counting stitches at the end of each row.
Sometimes, this is caused when we fail to make the last stitch of the row. Other times, we forget the right place to put the first stitch at the beginning of each row. But there are fixes for those wonky edges.
You may notice that the fabric you create slowly gets broader or narrower. This is due to adding additional stitches or losing stitches.
Learning how to "read" your stitches (see number 8 below) is the first step, and then counting the stitches at the end of the row will prevent this problem.
Each row should have the same number of stitches on each row unless you are deliberately increasing or decreasing stitches.
Another cause of this problem is when the beginner doesn't know where to insert the hook at the beginning of the row.
3. Not Using the Right Yarn or Buying Enough Yarn to Complete the Whole Project
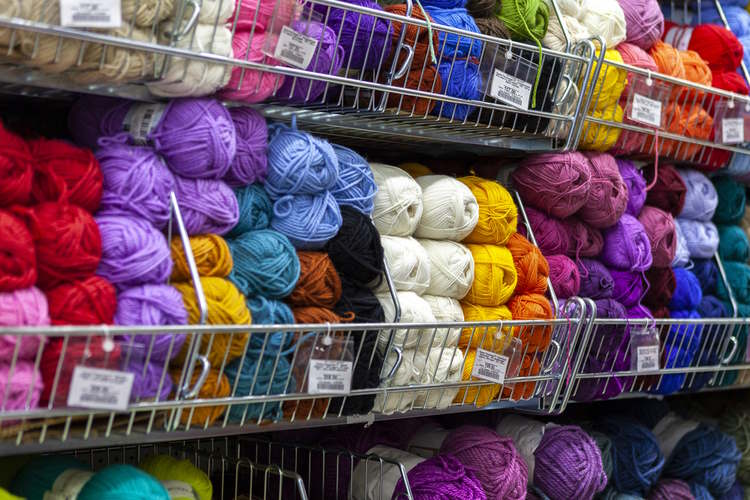 A big mistake beginners make is not Using the suitable yarn.
When a beginner walks into a yarn or hobby store, they may need help knowing where to begin. Does this sound like you?
- You are overwhelmed by all the vibrant colors
- You love the unique fuzzy textures
- You are enthralled by the soft feel of some yarns
- You walk out of the store with all the wrong yarns
If you are teaching yourself to crochet, one of the first lessons is a quick overview of yarn. For beginners, choose a smooth, light-colored yarn in a worsted-weight yarn for your first projects or practice swatch.
4. Not Using the Right Hook
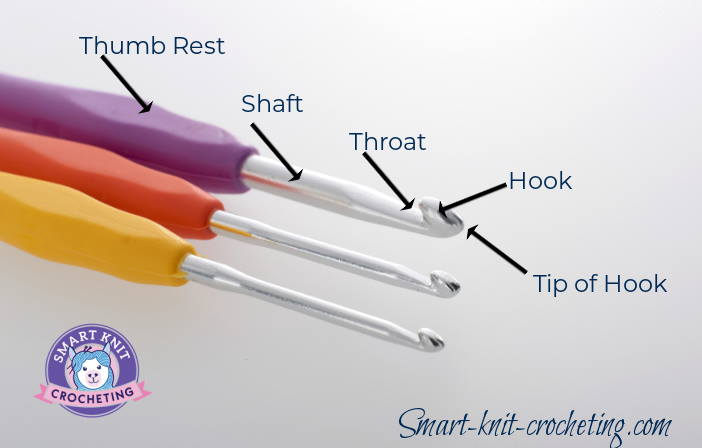
A crochet hook is a crochet hook, but they are not all the same. Learning about crochet hooks should be high on your list of things to know early in your crochet adventure.
From the shape of the hook to the shape of the handle, there are many differences, and everyone has a preference for their particular needs. Beyond personal preferences, some hooks are easier to use when doing projects and using different yarns.
If you are working from a pattern, the designer will indicate what hook size was used to match the gauge. This may or may not be the right hook for you, primarily if you cannot obtain gauge.
You may need to go up or down a hook size to reach the correct gauge. If you are creating something without a pattern, you may also want to consider the drape of the fabric.
If you want a drapey fabric but seem to crochet a stiff fabric, chances are you are using a hook size that is too small. The opposite is also true.
5. Not Understanding Where to Place the First Stitch
So you've mastered the chain stitch and created a chain. Now what? Most beginners learn the basic stitches first, such as single crochet (sc), half double crochet (hdc), double crochet (dc), and treble crochet (tr), but how do you start that first row of these stitches? Check out my tutorial on creating the next row of crochet stitches to be sure you're doing it correctly.
6. Making Yarn Unders When you Should be Making Yarn Overs
 Yarn Over (YO)
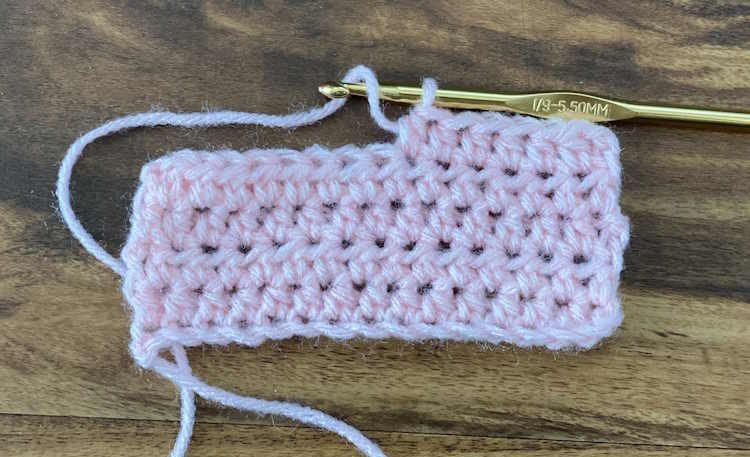 Yarn Under
Crochet uses a technique called a yarn over to make most stitches. Yarn over (YO) or yarn over hook (yoh) refers to how we wrap the yarn over our turn before or after inserting the pin.
Yarn under is a technique when we crochet by wrapping the yarn so the hook is on top. A yarn under can create a tighter stitch that is appropriate for Amigrami but is not the standard way we crochet. Observe how you wrap the yarn around the hook to ensure you create yarnovers.
7. Not Understanding How to Read Stitches
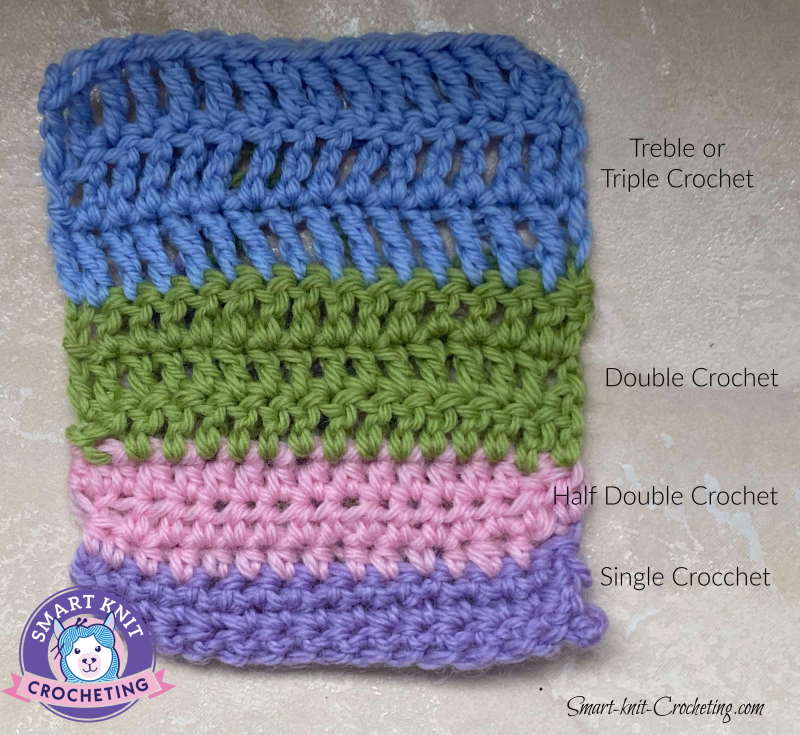 A typical mistake made by beginners is not learning how to "read" their stitches.
Some basic stitches, such as the treble crochet stitch, are straightforward to see, but some shorter stitches are more complicated to see or "read." Before you can count your stitches, you need to know how to identify them.
It is good to stop after learning to make and examine a particular stitch closely. See how it's created and compares or contrasts with stitches you have already learned.
Learn how to make basic crochet stitches. Single Crochet, Half Double Crochet, Double Crochet, Treble Crochet (US terms).
8. Not Understanding How to Read Pattern Instructions
Crochet patterns can be challenging to read and understand because not all are created equally. There are some industry recommendations, but not everyone follows them, so it's likely you will find instructions that are very easy to follow and others that leave you scratching your head.
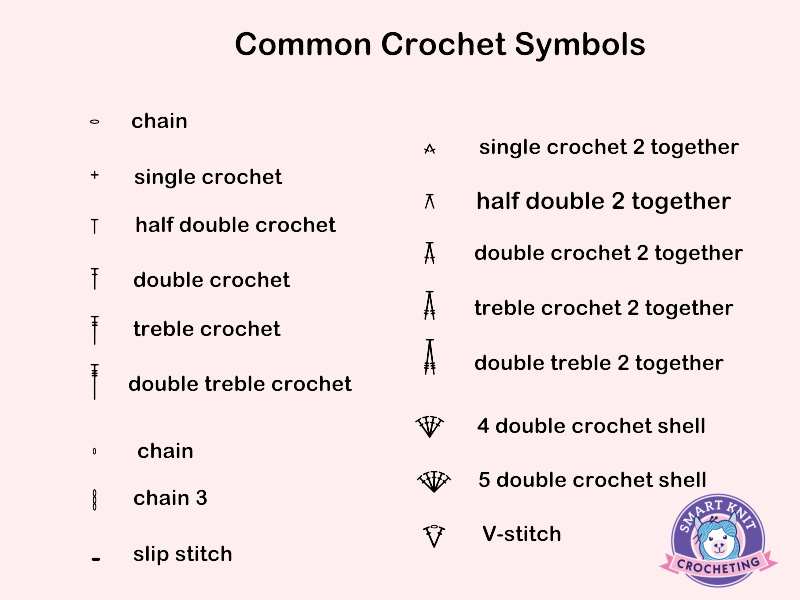
Pattern Instructions are provided in two forms: written and chart form. If you plan to follow a pattern, learning how to decipher one or both of these forms are necessary. For charts, an understanding of crochet symbols. Written instructions use abbreviations.
Learn how to read crochet charts
Learn how to read and understand crochet written instructions
9. Not Leaving a Long Enough Tail to Weave in
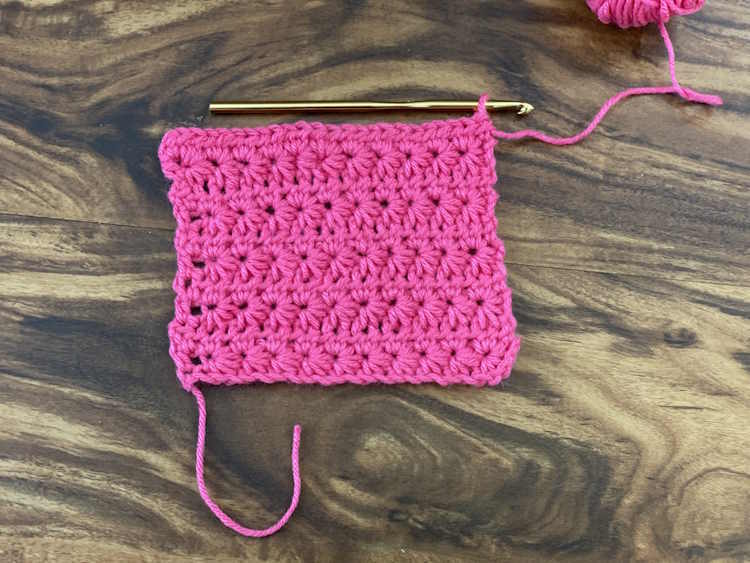 Leave at least a six-inch yarn tail you will weave in once crocheting is finished.
Some beginners need to understand the importance of weaving in ends. The ends can ravel out quickly, especially in the laundry when the ends are knotted and the yarn cut close.
A good six-inch tail will ensure you can weave in the ends in three different directions. If the yarn ends are too short, you may need to insert the needle and then thread the yarn each time to weave through each stitch.
10. How to Fix Crochet Mistakes: Not Counting Stitches
As I mentioned, identifying and counting stitches is a fundamental skill all crocheters must master. Sometimes it is important to count individual stitches. There are two ways to acomplish this task: Count the posts or count the little V's at the top of the stitches.
On more complicated patterns, you may need to count the stitch patterns rather than individual stitches. For example, when working the crochet shell stitch, you will want to count the shells rather the individual stitches that make up the shell.
11. How to Fix Crochet Mistakes: Not Creating a Gauge Swatch
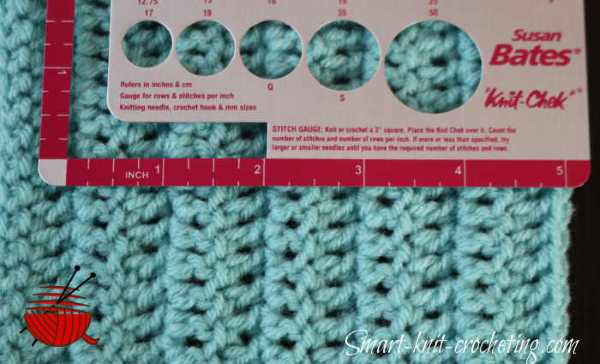 How to Create a Gauge Swatch
Anyone creating a fabric to wear knows that a gauge swatch will ensure the finished project will fit. But what about something simple, such as a dishcloth? Do you need a gauge swatch? Technically, no, especially if you don't care what size the finished cloth is.
But, just as learning to make a double crochet stitch is the goal of the beginner, creating a gauge swatch should also be a skill to be mastered. If your pattern does not indicate gauge, you won't be able to create a swatch, if it does, its a good idea to make one.
12. How to Fix Crochet Mistakes: Block Your Work
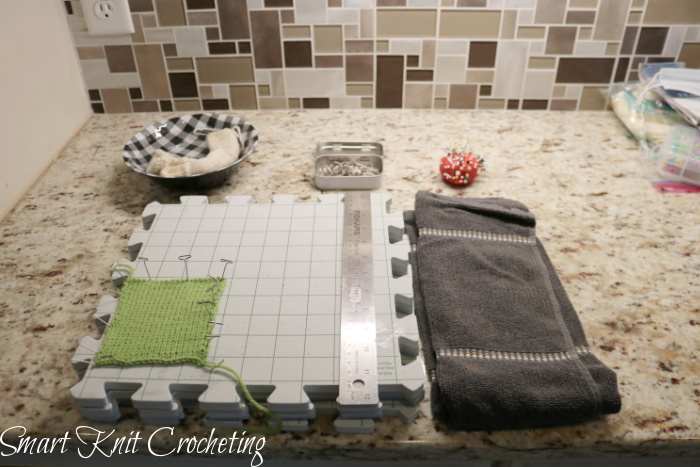
If you knit, you are likely in the habit of blocking your work, but if you are new to crochet, this step is often overlooked. Crochet fabric tends to lay flatter than similar knit swatches.
Even though most crochet swatches lay flat, they benefit from blocking, especially lace and eyelet work.
Blocking gives a finished professional look to projects by adding moisture to help shape and fix the shape using pins or pegs. It also allows you to even out the tension and spread out the lace to see the texture. So, don't pass up the chance to make your work look professional.
13. How to Fix Crochet Mistakes: Making Too Loose or Too Tight Chains
For the absolute beginner, just learning how to make a chain stitch is an accomplishment in and of itself. But after the thrill of creating a series of chain stitches wears off, it may become evident that those chains don't look as good as they should.
The first chain may be too tight, causing the rest of the fabric to curl. When the chain stitches are made too tightly, inserting the hook into them is problematic, resulting in considerable pressure and frustration. Crocheting shouldn't be that hard!
The fabric looks sloppy and poorly shaped when the chain is too loose.
Sometimes, the easiest solution is to go up or down the size of the crochet hook. Usually, though, the correct tension is achieved overtime with practice.
As you can see in the photos below, what should be a rectangular swatch turns into a odd curved shape.
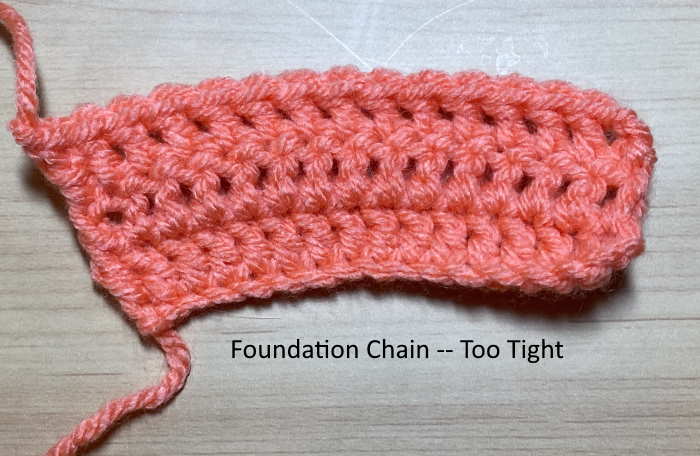 The beginning chain, shown at the bottom of the photo, was crocheted too tightly.
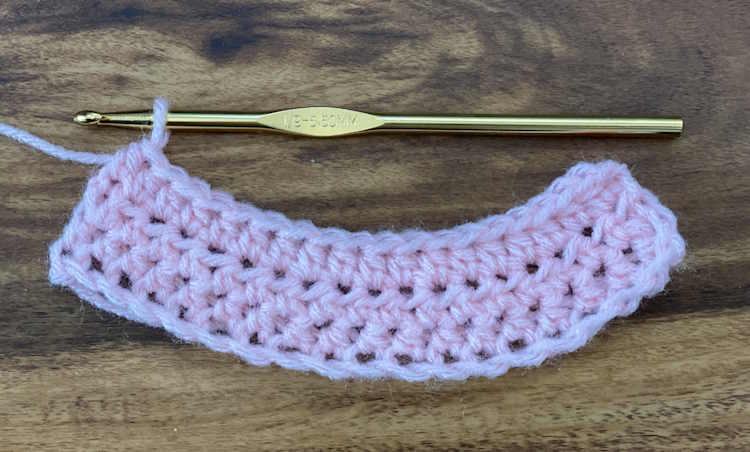 This crochet swatch shows the beginning chain that was too loose.
14. How to Fix Crochet Mistakes: Weave in Ends
As mentioned, weaving in all ends is part of the crochet process. Weaving in the ends ensures that they won't unravel out. This is so important when making gifts for people who do not crochet. If their beloved gift ravels out, there's little they can do to fix the problem.
In some situations you can work over the yarn ends as you go. The problem with this method is that the ends are only woven in one direction and could unravel.
The general consenses is that crochet tails should be woven in three different directions for about one inch for each direction using a blunt tipped yarn or tapestry needle.
Learn how to Weave in Ends
15. How to Fix Crochet Mistakes: Getting the Tension Wrong
Tension refers to how loose or tight we make our stitches. It is important if we want the finished product to be the same as it is in the pattern. (Gauge) It is also critical if we want all of our stitches to be the same size.
There are many reasons why we get poor tension.
How we hold our yarn and hook: Learn how to hold the yarn. Another problem we can face is dealing with the yarn itself. If we're tugging on the yarn that is attached to a skein, our tension may be too tight. Unraveling a supply of yarn before beginning usually solves this problem.
If we're not mindful of our crochet, we may pull the yarn high before pulling through. Conversely, if we don't pull the yarn up, it will be difficult to get the hook through to complete the stitch.
Our mood may cause us to crochet too tightly. If we're tense, we may crochet too tightly. If we are relaxed, the opposite might happen.
This happens to me.
When I sit down to crochet when stressed, the tension starts tight, but as I continue to crochet, I relax, so the stitches begin to loosen.
Tight stitches look much smaller than loosely made ones. The result, as you can imagine, is a fabric that is tight on one end and loose on the other end. Another way this happens is when we use the wrong crochet hook size.
16. Not Understanding Where to Insert the Hook
This may seem obvious, but it's not at all clear for some beginners. A well-written pattern should tell you where to insert your hook, but some assume you already know. In crochet, you may insert your hook:
- In both loops of next stitch
- In both loops of the previous stitch
- In the front loop only (flo)
- In the back loop only (blo)
- In the bump of the crochet chain
- In the chain space
- In the space between stitches
- Around the front post (FP)
- Around the back post (BP)
- Work in the row below or two or three rows below
I'm sure I've forgotten some, but I think it's clear that beginners can be very confused about all of these hook insertions. If you get it wrong, the stitch doesn't look right.
17. How to Fix Crochet Mistakes: Not Keeping Track of Where You are at in a Pattern
This one is not just for beginners. As patterns get more complex, it's easy to get lost, especially if you need to put your crochet down for awhile. Even when crocheting, a difficult pattern with many row repeats, can be challenging.
One method is to use a ruler or piece of paper to clip to the row where you are working. Post it notes also work well. If you want a more sophisticated system, you can purchase a pattern keeper.
This one is for knitting patterns but works just as well for crochet project. It works by magnets holding the pattern and a magnetic ruler that can be moved down as you complete a row. This has been a lifesaver for me, who is one of those people who tend to loose my place.
18. Working the Wrong Number of Chains at the Beginning of the Row
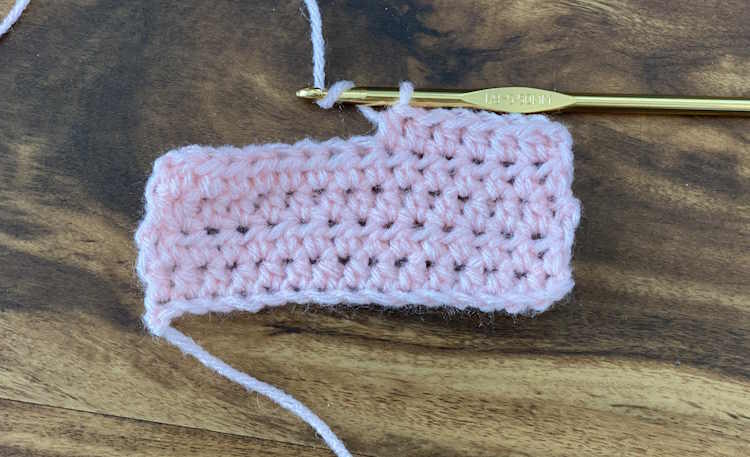
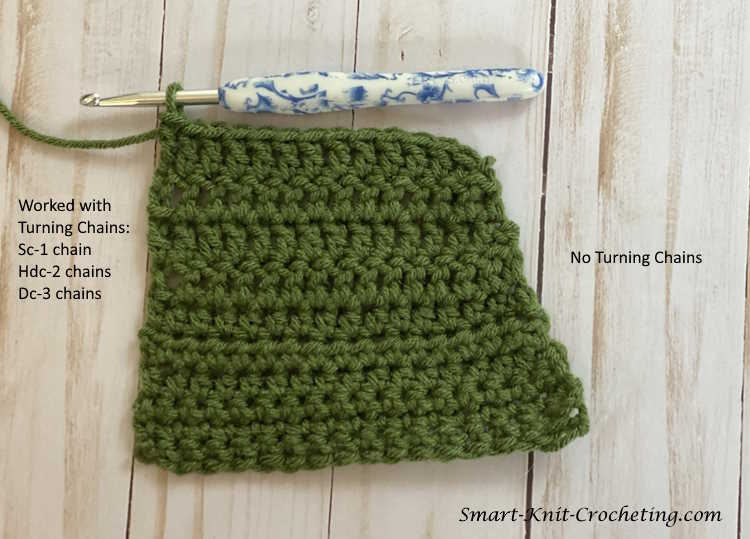 This swatch shows what happens when there are no turning chains.
If your work looks wonky with one side taller than the other, you may have crocheted the wrong number of chains at the begining of the row.
Most patterns tell us how many chains to make when we turn the work to begin a new row. But if you have decided to make a project without a pattern, it's important to know how many chains to make. The following is a good rule-of-thumb, but is not written in stone.
- Chain 0ne for Single Crochet
- Chain Two for Half Double Crochet
- Chain Three for Double Crochet
- Chain Four for Treble Crochet
You may find my article, Crocheting the Second Row to be Helpful
19. Not Using Stitch Markers or Row Counters
Stitch markers can be your best friend if you use them consistently. They mark the beginning of a round, can identify the right or wrong side of the fabric, or keep track of multiple stitch patterns.
Always use markers that are designed for crocheting and not knitting. If you find ones that look like little rings, they are only used in knitting because they are placed on the needle. Choose commercially available interlocking stitch markers or even safety pins or bobby pins in a crunch.
A row counter may take many shapes, but all are designed to help you keep track of the number of rows or rounds you have worked.
Some people find them to be more trouble than they are worth and will use a paper and pencil tally mark system. The best approach is to find what works for you and stick with it.
20. Giving Up: How to Fix Crochet Mistakes
As they say, Rome was not built in a day, and people don't become master crocheters after their first attempt. Learning all the techniques to become a competent crocheter takes time, patience, dedication, and practice.
Would you like to know everything? Of course not. You may want to learn how to crochet in order to make a simple baby blanket for your granddaughter, or beanies for the entire family. Maybe all you are interested in is amigrami. It's really up to do.
But giving up is not the answer if you desire to learn crochet. Not the best of the best mastered how to crochet in a day, week, or even a year. It's my sincerest hope that you won't give up. Every new skill you acquire takes you closer and closer to mastery.
How to Fix Crochet Mistakes: Conclusion
We all make mistakes, especially when we are learning a new hobby. The 20 mistakes mentioned in this article are likely the most common ones that beginners and even more advanced crocheters make.
The most important things to remember is that there are solutions for all of them, and there is no correct answer for everything.
In our journey to become more proficient and confident crocheters, we want to make it a practice to put these solutions into practice. I hope this article saves you valuable time on your next new crochet project.
