- Home
- Types of Knit Stitches
- Textured Knitting Stitches
- Herringbone Knit Stitch
Herringbone Knit Stitch Tutorial
by Janice Jones, Updated December 31, 2025
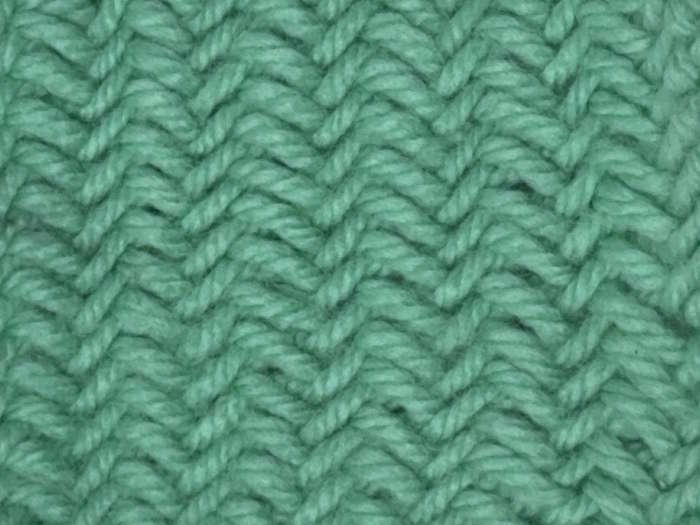
The Herringbone stitch is a beautiful, woven-like textured knitting pattern that creates a diagonal, zigzag effect resembling the traditional herringbone textile.
The term herringbone dates back to Roman times, when roads were created using stones arranged in an interlocking zigzag pattern. It’s also used in making floors and, now, in textiles, including knitting.

When I first encountered the Herringbone knit stitch, it was love at first sight. Yet, it looked so complicated that I thought it was reserved for only the most advanced knitters. Wow, was I ever wrong? It is a variation of knits and purls with a slight twist.
Due to its elegant look, this stitch is often used in scarves, blankets, cowls, and home décor projects.
Skill Level

Beginners can learn this stitch with a little practice.
Abbreviations:
- K2tog = Knit two stitches together
- K2tog tbl = Knit two together through the back loop
- P2tog = Purl two together
- K = knit
- P = Purl
- CO = Cast on
- * * Work the instructions between the asterisks for the number of times indicated in the pattern
Skills Needed
- How to cast on and bind off
- How to make the knit two together through the back loop
- How to make the purl two together
- How to block
- How to weave in ends
Notes:
- You can cast on any number of stitches, but an even number of stitches works well.
- Use a needle size one to two sizes larger than you usually would for the yarn weight you choose. For example, if you typically use a US 7 (4.5 mm) needle with worsted weight yarn, try a US 8 to US 10 size. If you are a very tight knitter, consider going up three needle sizes.
- Fabric Created with the Herringbone Stitch is dense, tight, and firm.
- The fabric tends to stretch on the bias, so blocking is necessary to create a lovely square or rectangle.
- It can be created flat or worked in the round.
- It is a Yarn Eater: Due to its overlapping nature, it consumes more yarn than usual stitches.
Is it Reversible?
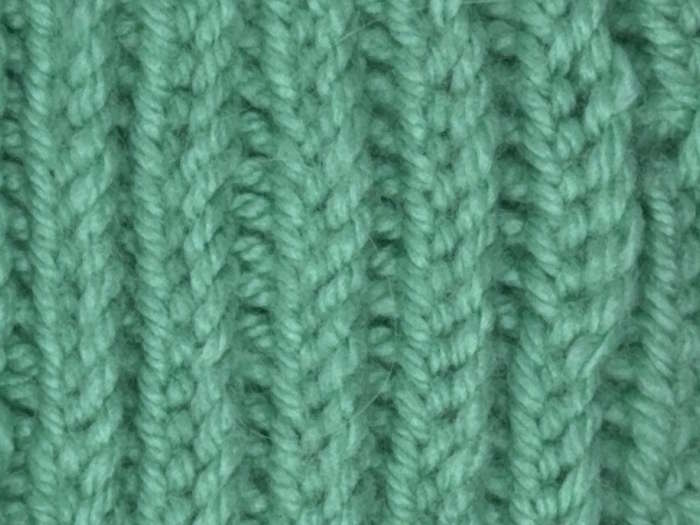
No, the front and back sides do not look identical; however, the reverse side has a pleasant look, making it ideal for scarves, blankets, and other items where both sides will show.
 Herringbone Knit Stitch Wrong Side
 Herringbone Knit Stitch Right Side
Supplies Needed for a Practice Swatch
- Yarn, in a light color to be able to see the stitches easily
- Knitting needles of one to two sizes larger than you might use with the yarn you choose
- Scissors
- Yarn needle for weaving in ends
Pattern Instructions:

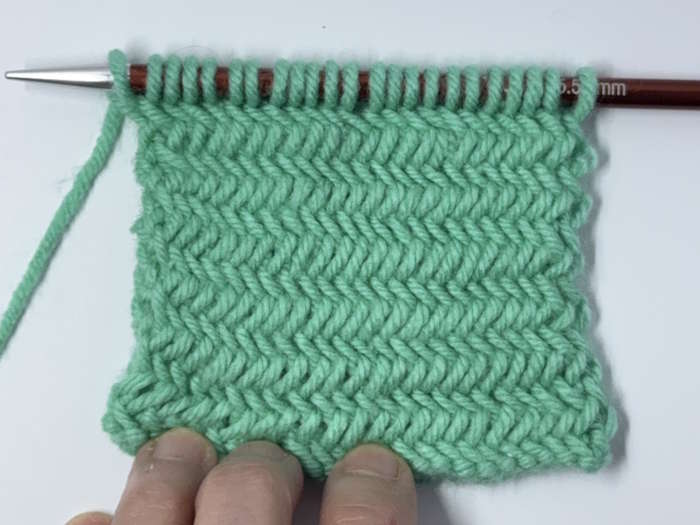
For the swatch shown, I cast on 24 stitches, which created a 3.25-wide swatch using US #9 (5.5 mm) needles.
Cast on an even number of stitches
Row 1 (RS - Right Side):
- Knit two stitches together through the back loop (K2tog tbl) but only drop the first stitch off the left needle; keep the second stitch on the needle.
- At the end of the row, Knit one through the back loop to finish the row.
Row 2 (WS - Wrong Side):
- Purl two stitches together (P2tog) but only drop the first stitch off the left needle; keep the second stitch on the needle.
- At the end of the row, purl one to finish the row.
Repeat Rows 1 and 2 until the desired length is reached.
Bind off loosely and block to reduce bias.
Pro Tips for Success
Use larger needles – Since the stitch is tight, use one or two sizes up from the recommended size of the yarn.
Relax your tension – The stitch can get dense, so keep an even, loose tension.
Block finished pieces – Wet blocking helps the fabric lay flatter and removes biasing.
Choose the right yarn – Smooth, worsted, or bulky weight yarns work best.
Take Your Time - Until you get comfortable knitting two stitches together through the back loop, it's best to relax and enjoy the process.
Best Projects for Herringbone Stitch
Projects that need a thick, dense fabric such as home decor and some wearables.
- Herringbone Scarf
- Herringbone Cowl
- Herringbone Pillow Cover
- Herringbone Hand Warmers
Herringbone Knit Stitch: Pin For Future Reference
Last Words
The Herringbone knit stitch creates a woven like texture to your knitting projects. Whether you want to make a blanket, or a knitted basket, the herringbone stitch would be a good choice. Worked with a variation of the K2tog and P2tog, a zigzag pattern develops on the right side and a horizontal rib like pattern on the wrong.
This is a good stitch to add to your knitting skills toolbag. Happy Knitting!


