- Home
- Knitting Rib Stitches
- Horizontal Knit Welt Stitch
Horizontal Knit Welt Stitch How-to Tutorial for Beginners
Horizontal Knit Welt Stitch by Janice Jones Last updated May 15, 2026
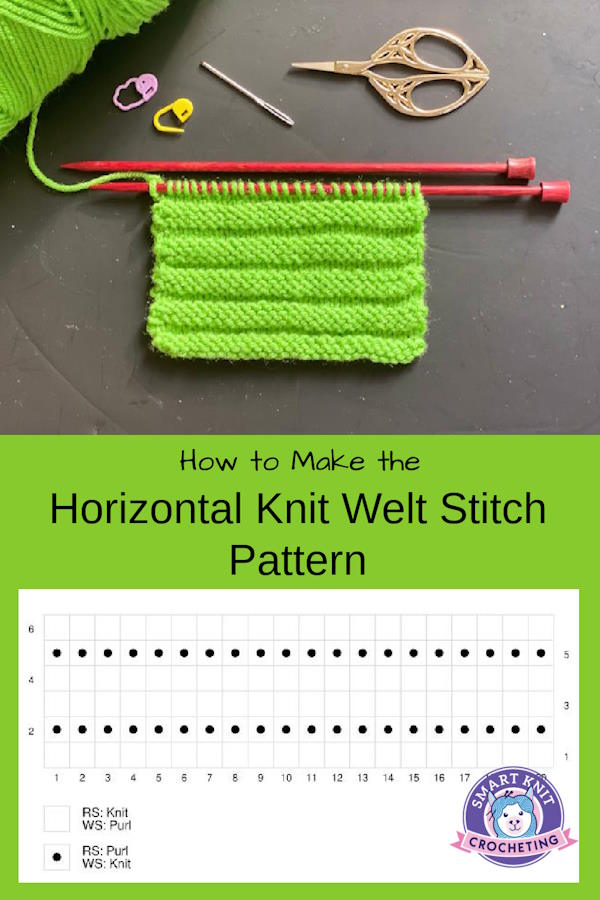
The Horizontal Knit Welt Stitch is a beginner-friendly knit and purl stitch pattern that creates raised horizontal ridges across the fabric. Although it belongs to the family of knitting rib stitches, this pattern stretches vertically rather than side to side like traditional ribbing.
Because it uses only knit and purl rows worked over a simple 6-row repeat, this stitch is an excellent choice for beginners who want to move beyond basic garter and stockinette stitch patterns without learning complicated techniques.
The Horizontal Knit Welt Stitch is also reversible, meaning both sides of the fabric look nearly identical. The extra texture gives the fabric a thicker appearance, making it a good option for scarves, blankets, dishcloths, cowls, and other cozy projects where both sides of the work may show.
You may also see this pattern called the Reverse Ridge Stitch. The term “welt” refers to the raised ridges created within the knitted fabric.
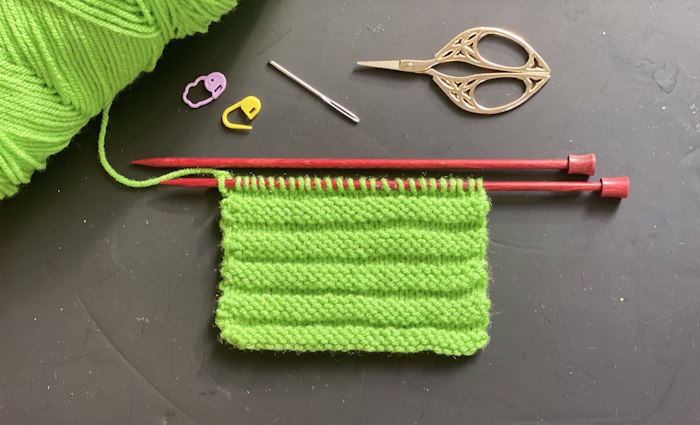 Horizontal Knit Welt Stitch Pattern Tutorial
At a Glance
- Skill level: Basic/Beginner
- Stitch family: Rib Stitches, Knit and Purl Stitches
- Repeat: 6 rows
- Multiple: Any number of stitches
- Reversible: Yes
- Lies flat: mostly flat
- Best uses: scarves, blankets, dishcloths, cowls
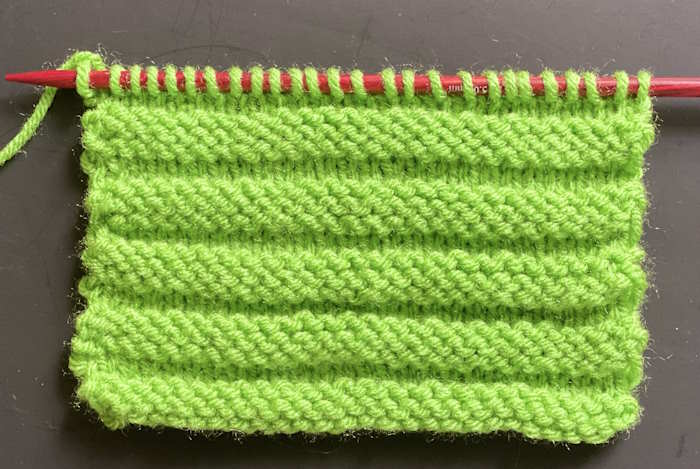 Right Side
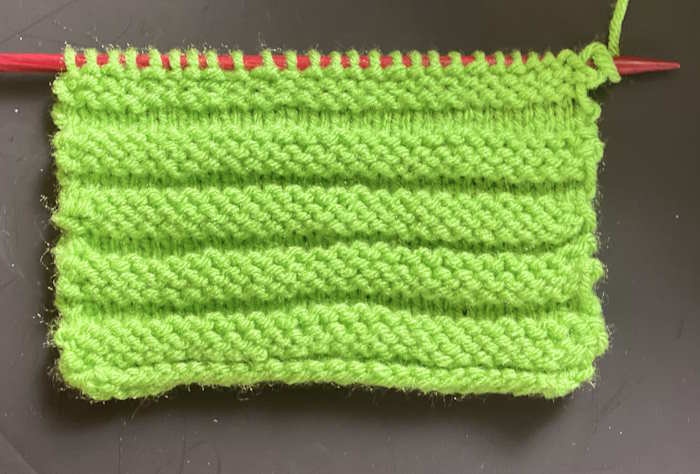 Wrong Side
What can you make with the Horizontal Welt Knit Stitch?
This knit pattern works well for blankets and scarves. Designers have also used this stitch to create hats. I personally think it would be very easy to knit some fingerless gloves without the need for too much math and measuring.
How to Make the Horizontal Welt Stitch Pattern
Skills Required for This Tutorial
- Cast on (I used the long-tail cast on method)
- Bind Off
- How to Make the Knit Stitch
- How to Make the Purl Stitch
- Weave in Ends
- Understanding Abbreviations
- Reading Knit Charts
Supplies
For this stitch tutorial, use whatever yarn you have on hand and the corresponding knitting needles.
- For the tutorial, I used Red Heart Super Saver Yarn, a worsted-weight acrylic yarn
- Number 8 (5.0 mm) knitting needles
- Scissors
- Yarn needle for weaving in ends
- One stitch marker for identifying the right side of the work (optional)
Abbreviations
- CO: Cast on
- st: Stitch
- P: Purl
- K: Knit
- RS: Right side of the work
- BO: Bind off
- WS: Wrong side of the work
Written Instructions for Working Flat with Straight Needles
Cast on any number of stitches
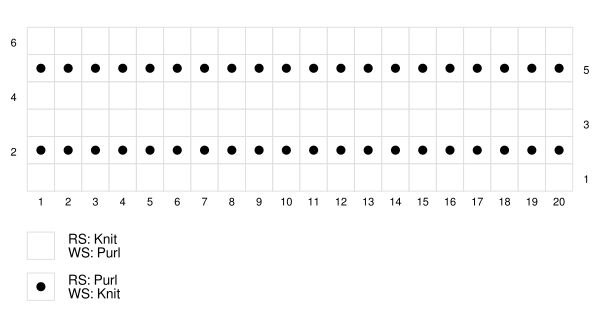
Row 1 (RS): Knit across.
Row 2 (WS): Purl across.
Row 3: Knit across.
Row 4: Knit across.
Row 5: Purl across.
Row 6: Knit across.
Repeat these six rows until you reach your desired length. Bind off and weave in ends.
Instructions for Working Flat in Chart Form
Instructions for Working in the Round on Circular Needles
Cast on any number of stitches. Join to work in the round, making sure that stitches are not twisted. Place a stitch marker to indicate where your rounds begin.
Round 1: Knit all stitches
Round 2: Purl all stitches
Round 3: Knit all stitches
Round 4: Knit all stitches
Round 5: Purl all stitches
Round 6: Knit all stitches
Repeat these six rounds until your project reaches the desired length.
Problem Solving / Troubleshooting
My Ridges Don’t Look Even
Tension problems often show up as rows that have uneven stitches. Some may appear larger than others. This can be frustrating for beginners, especially when they see a picture online and wonder why their work looks different. Regular knitting practice will often solve the problem of uneven tension, but becoming aware of how we knit can also help. Learn more about tension issues in my article about how to knit even stitches.
I lost track of the 6-row repeat
The best way I have found to keep track of where I am in my project is very old-school. I keep a notepad and pencil nearby and use old-fashioned tally marks. You can also keep track with row counters. Learning to read your stitches will also help if you don't know which row to knit next.
My edges look messy
Salvage stitches, or the first and last stitches in a row, are often messy because they only have one edge to connect to the next stitch. There's not much that you can do about that. However, sitting next to the salvage stitches are the edge stitches (the second stitch in the row and the next-to-last stitch). These stitches shouldn't look messy, but many beginners struggle with this problem. Again, this is a tension problem that can be fixed. My article on tension might help.
Frequently Asked Questions
Is the Horizontal Knit Welt Stitch good for beginners?
Is the Horizontal Knit Welt Stitch good for beginners?
Yes. This stitch pattern uses only knit and purl stitches, making it a great choice for beginners who want to practice basic skills while creating textured fabric.
Is the Horizontal Knit Welt Stitch reversible?
Is the Horizontal Knit Welt Stitch reversible?
Yes. Both sides of the fabric look nearly identical, which makes this stitch useful for scarves, blankets, cowls, and other projects where both sides may be visible.
Does the Horizontal Knit Welt Stitch curl?
Does the Horizontal Knit Welt Stitch curl?
This stitch generally lies flatter than stockinette stitch because the alternating knit and purl rows help balance the fabric. However, the edges may still curl slightly depending on the yarn and tension used.
Why is it called a welt stitch?
Why is it called a welt stitch?
In knitting, the word “welt” refers to a raised ridge or tube-like section worked into the fabric. In this pattern, the horizontal ridges create that welted appearance.
Is this stitch the same as garter stitch?
Is this stitch the same as garter stitch?
No. Although both stitches create horizontal ridges, garter stitch is made by knitting every row, while the Horizontal Knit Welt Stitch combines knit and purl rows in a 6-row repeat.
What projects work well with the Horizontal Knit Welt Stitch?
What projects work well with the Horizontal Knit Welt Stitch?
This stitch works especially well for scarves, blankets, dishcloths, cowls, hats, and simple home decor projects because the textured fabric is warm, stretchy, and reversible.
More Related Stitches to Investigate
The Horizontal Welt Knit Stitch: Pin for Future Reference

Disclosure:
This post contains affiliate links. If you buy through them, I may earn a small commission at no extra cost to you.
Janice Jones is a Certified Knitting and Crochet Instructor who creates beginner-friendly patterns and tutorials, backed by a 389-page library of practical knitting and crochet content.
Most Popular Pages
Comprehensive Guide to Yarn

All Types of Crochet Stitches
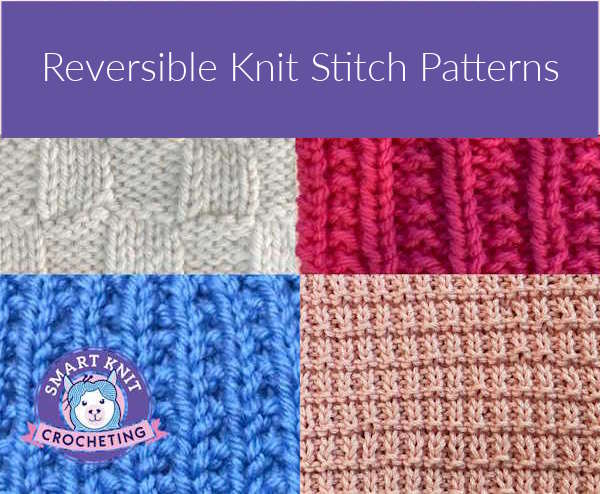
36 Reversible Knit Stitch Glossary
How to Crochet the Second Row
Dog Sweater Patterns
Working with Alpaca Yarn
Free eBooks, Just for You
Get my beginner eBook guides to Knitting and Crocheting, just for signing up for my monthly newsletter.
Choose one or both when you sign up.
About the Author: Please allow me to introduce myself
Janice Jones is a Certified Knitting Instructor and Certified Crochet Instructor through the Craft Yarn Council who focuses on beginner-friendly patterns, stitch guides, and technique tutorials. She has built a library of 389 pages on her website, sharing practical instructions and patterns, and has completed projects ranging from crochet blankets to knit sweaters. You can explore her work on her website. She makes items for Warm Up America and often knits and crochets sweaters for her small dogs.
Thank you for visiting Smart-Knit-Crocheting. I hope this and all of my tutorials will give you the inspiration to continue your knit or crochet journey. For a complete list of all the pages on my site, please visit my table of contents.
I participant in the Amazon Services LLC Associates Program, an affiliate advertising program designed to provide a means for sites to earn advertising fees by advertising and linking to Amazon.com. “As an Amazon Associate I earn from qualifying purchases.” These earnings go towards supporting my website.
Home | Contact | About | Privacy Policy | Disclaimer
I DO NOT SELL ANY PERSONAL INFORMATION FROM THIS WEBSITE. PLEASE SEE MY PRIVACY POLICY FOR MORE DETAILS.
Copyright © 2006-2026 Smart Knit Crocheting. All Rights Reserved
Please Share
Remember, Sharing is Caring