- Home
- Easy Beginner Knit Projects
- Knitting a Scarf for Beginners
Knitting a Scarf for Beginners: Two Free Patterns, Plus Tips and Tutorials
By Janice Jones, Certified Knitting and Crochet Instructions, Last Updated 01-05-2025
Are you ready to knit your first scarf? Perhaps someone told you that a scarf is a great beginning project, and it is, but be aware that it might not be the fastest project for those new to knitting.
If a scarf seems scary, I’ll try to remove any fear you might have. If you want a shorter project, consider a dishcloth or a set of coasters. Ready to begin?
This beginner-friendly guide walks you from zero to finished scarf with everything in one place: a clear materials list, a simple sizing section with standard widths/lengths, and a no-math cast-on calculator/table that converts your gauge into the correct stitch count.


These patterns are meant for first-time knitters. My apologies to anyone who has already progressed beyond this phase; please skip over the basics.
You’ll get two step-by-step patterns side by side—Classic Garter and Easy Seed, plus photos, edge options, a thorough troubleshooting hub for common beginner problems, and a quick finish section.
I will also give you some simple variations that you can use, even if you are an absolute beginner. Don’t forget to check out the Frequently Asked Questions before you begin your first scarf. You will get answers to the many questions that beginners often ask.
Feel Free to Jump Directly to the Patterns if you prefer.
Classic Striped Garter Stitch Scarf
Materials You’ll Need
- Yarn (recommend worsted weight for ease of use or bulky for speed).
- Needles: size 7 or 8 (4.5 to 5.0 mm) if you choose worsted weight yarn or a size 10-11 (6 to 8 mm)
- Tapestry needle
- Scissors
- Optional stitch markers
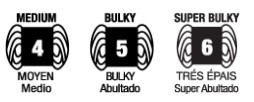
If you are new to fibers, may I suggest you start with my Comprehensive Guide to Yarn? For this project, I recommend choosing a light-colored yarn (avoid black or dark navy blue, as they are challenging to see even in good light). Pick yarn in either worsted-weight (#4) or bulky #5 or 6. Look for these Craft Yarn Council Symbols on the yarn band:
Acrylic yarn is less expensive, but wool feels better in your hands. Look for these symbols on the yarn ball. Naturally, if you are allergic to wool, choose a synthetic yarn.

Choosing Your Scarf Size
There are three standard-width sizes for adult scarves: skinny (4–5"), classic (6–8"), and wide (9–12"). It is your choice.
There are also some generally acceptable lengths for scarves: 50–60" (child), 60–70" (adult standard), 70–80"+ (long). Again, it is up to you, so think about the look you want to achieve with your first scarf.
If you are wondering how long it will take to finish your scarf, I recommend reading my article, "How Long Does It Take to Knit a Scarf."
The size you chose determines how many stitches you will put onto your needle (called casting on)
Width
| Yarn Weight | Typical Gauge (sts per inch) |
Skinny 4–5″ |
Classic 6–8″ |
Wide 9–12″ |
|---|---|---|---|---|
| DK (#3) | ≈ 5.5 | ≈ 22–28 sts | ≈ 33–44 sts | ≈ 50–66 sts |
| Worsted (#4) | ≈ 4.5 | ≈ 18–23 sts | ≈ 27–36 sts | ≈ 41–54 sts |
| Bulky (#5) | ≈ 3.5 | ≈ 14–18 sts | ≈ 21–28 sts | ≈ 32–42 sts |
| Super Bulky (#6) | ≈ 2.25 | ≈ 9–11 sts | ≈ 14–18 sts | ≈ 20–27 sts |
How to use: Cast-on range = desired width × your gauge (sts/in). These ranges use common gauges for each weight. Always swatch and adjust. For seed or 1×1 rib, use an even stitch count; for 2×2 rib, use a multiple of 4 (add selvedge/edge stitches as needed).
Length
| Style / Wearer | Length (in) | Length (cm) | Notes |
|---|---|---|---|
| Child (Small) | 40–50″ | 102–127 cm | Young kids; simple wrap without long tails. |
| Child (Large) / Tween | 50–55″ | 127–140 cm | A bit longer; grows with the wearer. |
| Adult — Standard | 60–70″ | 152–178 cm | Classic wrap once with modest tails. |
| Adult — Long | 70–80″ | 178–203 cm | For a fuller wrap or taller wearers. |
| Skinny / Fashion | 55–65″ | 140–165 cm | Narrow width; great for beginners and styling knots. |
| Oversized / Wrap | 80–90″ | 203–229 cm | Drapey, extra-long tails; cozy statement piece. |
Notes: Lengths exclude fringe (add fringe length separately). Choose longer lengths for taller wearers or if you like an extra wrap. Pair this with your width × weight table to plan cast-on and yardage.
| Style | Circumference (in) | Circumference (cm) | Notes |
|---|---|---|---|
| Single-Loop Cowl | 22–28″ | 56–71 cm | Close fit at neck; great for bulky yarns. |
| Infinity (Double Loop) | 55–65″ | 140–165 cm | Wraps twice comfortably; common beginner project. |
How Many Stitches to Cast On
Before you can begin knitting, you will need to get some stitches on your needles. This is called casting on. A mentor of mine told me to cast on the stitches for students and then just let them start knitting.
Since this advice might not be practical here, may I suggest you review my article on how to cast on using the long-tail cast on. We will be making our scarf from one end to another, so the width you want your scarf to be will determine the number of stitches to cast on.
For example, if you'd like to make a skinny scarf (the fastest scarf) and are using a worsted-weight yarn, cast on 18-23 stitches according to the chart above. Let's choose 20 stitches to make it easy.
Gauge
I don't want to make this any more complicated than it needs to be, but you are likely to encounter this term sometime soon in your knitting journey.
Gauge refers to the number of stitches and rows within a specific square of fabric, usually 4 inches (10cm). It is necessary because everyone knits differently; some of us knit tightly, and others knit loosely. This helps knitters know that what they make, such as a sweater, will fit.
For our project, a scarf, the gauge is not as important. I just introduced it here, so you can put it into the back of your mind for future reference.
Returning to the initial lesson, where you are using worsted-weight yarn, CKC #4, and a size 7 needle, your gauge will be approximately 20 stitches per 4 inches (10 cm).
This means that your scarf should be about 4 inches wide.
Learn more about Gauge here.
Step-by-Step Easy Beginner Scarf Patterns
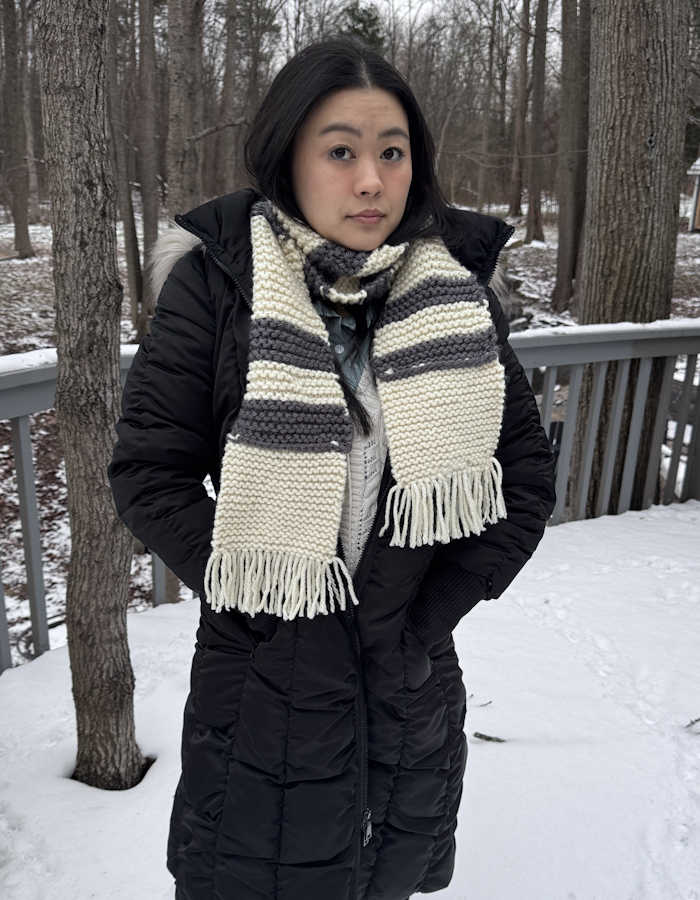
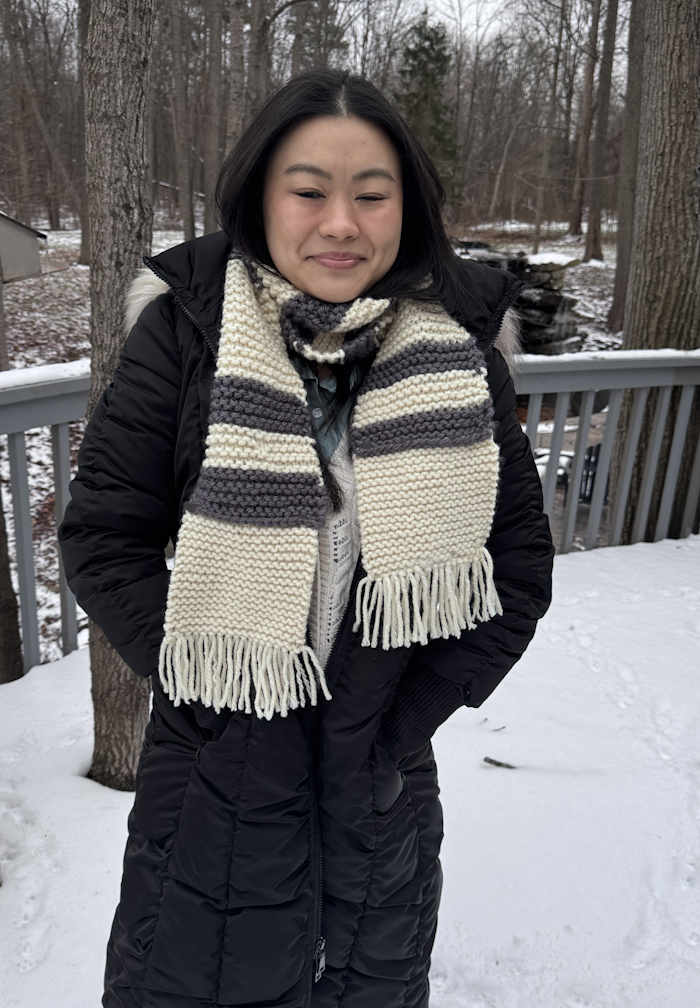
Pattern A – Classic Garter Stitch Scarf (Bulky)

This is a truly beginner-friendly scarf, made entirely of garter stitch in a bulky-weight yarn. I have used two colors, but it can be made entirely of one color if you prefer not to change colors. The pattern is written for one size using bulky-weight yarn.
Supplies
- Yarn: Bulky Weight Yarn in either one or two colors. I used Lion Brand hue + me (Bulky Weight, CKC #5 Acrylic Yarn in colors Salt and Shadow, one skein of each.
- Needles: US 11 (8.0 mm) needles Knit Pro Interchangeable Needles
- Tapestry needle
- Scissors
Abbreviations
K = knit
CO = cast on
BO = bind off
RS = right side
WS = wrong side
Instructions
Striped: Color A (Shadow); Color B (Salt)
Changing Colors: Color changes occur at the end of the wrong-side row. Leave a 6-inch tail and pick up the new color. You can knot the two tails loosely while you work. Before weaving in the ends, remove the knot.
With Color A, CO 18 Sts.
Rows 1 - 6: Knit across with Color A. Change to Color B
Rows 7- 12: Knit across with Color B. Change back to Color A
Rows 13 - 19: Using Color A, Knit across. Change to Color B
Work next 26 rows in Color B. Change to Color A
Work next 26 rows in Color A. Change to Color B
Work next 26 rows in Color B. Change to Color A
Work the next 8 rows in Color A. Change to Color B
Work the next 8 rows in Color B. Change to Color A
Work the next 8 rows in Color A. Change to Color B
Work 26 rows in Color B
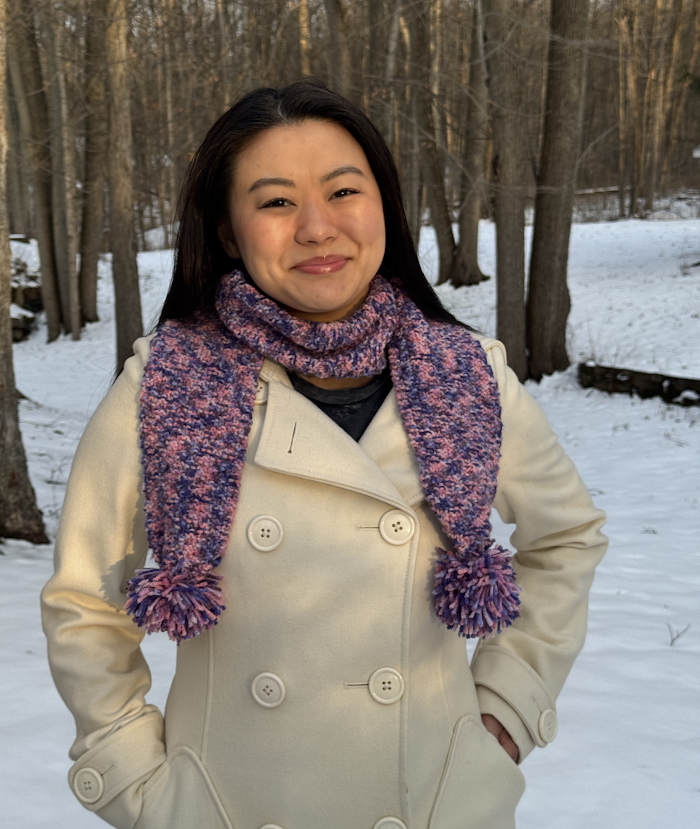
Pattern B – Simple Box Stitch Scarf (Worsted-Weight)

This simple box stitch scarf is a beginner-friendly stitch pattern that is worked on a 4-row repeat with a stitch multiple of 4 + 2. It is reversible and lays flat, which is perfect for a beginner-level scarf.
Supplies
- Yarn: Worsted Weight Acrylic Yarn. (I used a discontinued yarn from Joanns for this project)
- Needles: Size 8 (5.0 mm) straight needles
- Scissors
- Tapestry Needle for Weaving in Ends.
- Pom Poms (2), Optional
Gauge
Not critical; typical worsted ≈ 18 sts × 24 rows = 4" in box stitch pattern.
Skinny (~4"): CO 22 stitches
Classic (~7"): CO 30
Wide (~9"): CO 42
Abbreviations
K +knit
P =purl
RS =right side
WS =wrong side
rep =repeat
sts =stitches
* * Repeat the instructions between the two asterisks for the number of times indicated
Instructions
Cast on 22 stitches for a skinny scarf
Row 1 (RS): K2, *p2, k2; rep from * to end.
Row 2: P2, *k2, p2; rep from * to end.
Row 3: P2, *k2, p2; rep from * to end.
Row 4: K2, *p2, k2; rep from * to end.
Repeat Rows 1–4 to the desired length. See the Chart above. Bind off in pattern, weave in ends.
The instructions for the matching beanie is also free on this site.
Edge Options for Beginners
I will also offer some options. Beginners love step-by-step patterns, but I also love empowering them with the knowledge to make alterations that make their projects unique and special. That is the philosophy behind knitting (or crocheting) smart.
| Edge Style | Look | Skill Level | Pros | Cons |
|---|---|---|---|---|
| Garter Edge | Flat, ridged border with a soft, classic look. | Beginner | Helps prevent curl on stockinette; hides color changes well; very forgiving; easy to maintain even tension. | Slightly bulkier/wider; can “flare” if too many edge stitches; rustic rather than crisp. |
| Slipped Stitch Selvedge | Neat “chain” edge; slim and crisp. | Beginner–Easy | Very tidy edges; great for seaming or picking up stitches; less bulk than garter; elegant finish on rib/seed. | Does not stop curl in plain stockinette; can tighten if you pull the first stitch; color changes may show at the edge. |
| I-cord Edge | Rounded, tubular “cord” — very polished. | Intermediate | Premium look; neatly encloses carried yarn; adds structure; helps control curl more than slipped edge. | Slower to knit; uses more yarn; tension-sensitive (can pull in); a bit fiddly at color changes. |
Tips: For garter edges, knit the first/last 2–3 stitches every row (or add a 3–4 stitch border each side). For a slipped selvedge, a common recipe is: slip 1 purlwise with yarn in front at the start of every row, work pattern, knit last stitch. For an i-cord edge, dedicate 2–3 edge stitches per side and treat them as an i-cord (e.g., slip with yarn in front on RS/WS as your pattern dictates). On plain stockinette scarves, use a garter or i-cord edge to combat curling.
Use a Border Stitch
One of the major complaints that I hear from beginners is that their edges look awful. There are different reasons for this.
Creating Your Scarf with Stockinette Stitch: If you decide to make your scarf with the stockinette stitch (i.e., knit one row, purl the next), the edges will curl. There is absolutely nothing you can do about that, but here is a solution.
My patterns do not encourage this, but some like to make this type of scarf. The solution is to work the first 3 or 4 stitches in garter or seed stitch. This will prevent the edges and ends from curling.
Wonky Edge Stitches
The first or last stitch on each row is wonky, causing the edges to look uneven. By wonky, I mean that some stitches look bigger than others. This often occurs in stockinette stitch, but it can also be seen in other stitch patterns.
Some people suggest slipping rather than knitting or purling the first stitch to "cure" this problem. Tension problems are usually the issues, and this can be corrected. Read my article on tension edge stitches for the solutions.
Need for Clean Edges
Using an Icord on the edges, especially on skinny scarves (i.e, Sofie Scarves), creates a unique solution for edge problems. Sadly, this is considered to be an immediate technique that beginners should not attempt just yet.
Troubleshooting & Beginner Tips
Beginners often encounter problems when they first start out and may not know how to fix them or what to search for to get their questions answered. I’ve add a few issues that almost all beginners face and how to fix them.
Uneven Tension
When beginners begin to evaluate their work, they may compare the fabric they have made with that of expert or master knitters and wonder why it doesn't look the same.
Trust me, I've been there many times. First, relax and be kind to yourself. Experts and masters never started with that level of expertise. They practiced and practiced until their knitting resembled the style it has today. Tension is something everyone struggles with. I have an article that might help: Knitting Tension Problems
Dropped Stitches
This is a pervasive issue, affecting both beginners and experts alike. This happens when stitches accidentally slip off the tip of the needles when you aren't aware of them leaving. Sometimes switching from metal or aluminium needles to bamboo or wood needles helps solve this problem.
Counting the stitches at the end of each row will identify dropped stitches immediately. But when they fall off unnoticed, fixing the problem is the only solution. Please read my article about Knitting Mistakes to Learn More.
Curling Edges
I've mentioned this problem above, but I'd like to offer a couple of easy solutions here. Plain stockinette fabric is the biggest culprit for curled edges, but any fabric that uses stockinette as the background can also create curled edges. Blocking can help a little, but adding a border is the best solution. Two borders work well.
1. Add four rows of garter stitch (knit every stitch) before beginning your pattern. Then, add four garter stitches on either side of the stitch pattern, so the first and last four stitches will always be knit stitches with the pattern stitch worked in the middle.
2. Add four rows of seed stitch (knit 1, purl 1, knit 1, purl 1) before beginning your pattern. Then add a 4-seed stitch pattern at the beginning and end of each row. See more about the seed stitch pattern.
Running Out of Yarn
It happens. There is an easy fix, and in fact, there are many fixes, so it is up to you how to fix it to the best of your ability. Here are a couple of articles that will help with this problem.
Frequently Asked Questions About Knitting a Scarf
How many stitches should I cast on for a scarf?
How many stitches should I cast on for a scarf?
It depends on your yarn and the width you want. For worsted-weight yarn, most adult scarves require 30–40 stitches to achieve a width of about 6–8 inches. Thinner yarns will need more stitches, and bulky yarns fewer. Always knit a small swatch first to check your width.
How long should a knitted scarf be?
How long should a knitted scarf be?
A good rule of thumb is to make your scarf about as long as the wearer’s height or slightly longer.
- Child: 36–48″
- Teen: 55–60″
- Adult: 60–70″
- Extra-long: up to 80″
What’s the easiest scarf pattern for a beginner?
What’s the easiest scarf pattern for a beginner?
Start with a garter stitch scarf — you only need to know how to cast on, knit, and bind off. It’s relaxing, forgiving, and looks great in nearly any yarn.
Conclusion
Knitting your first scarf is a rite of passage for every knitter. It teaches rhythm, tension, and patience which are the core skills that open the door to sweaters, hats, and cozy blankets. Be proud of every stitch, and remember that no two scarves (or knitters) are exactly alike.


