- Home
- Types of Knit Stitches
- Knitting Rib Stitches
- Twin Rib Knit Stitches
How to Knit the Twin Rib Stitch (Easy Step-by-Step Tutorial)
By Janice Jones, Certified Knitting Instructor
If you love the look of classic ribbing but want to try something a little different, the twin rib stitch is a fun addition to your knitting toolkit! It’s easy to learn, works up quickly, and creates a soft, stretchy fabric that looks great on both sides. Don’t worry if you are a beginner; this interesting texture is easy to work if you know how to make the knit and purl stitches.
This stitch adds beautiful texture to scarves, hats, cuffs, and cozy sweaters — anywhere you’d like a bit of extra detail. In this quick guide, I’ll show you how to knit the twin rib stitch step by step, along with a few simple tips to make your stitches neat and even.
 Twin Knit Stitch (Right Side Facing)
Skill Level

Abbreviations
K – knit
P – purl
CO – Cast On
BO – Bind off
* * Work the instructions between the two asterisks for the number of times indicated on the pattern
RS – right side
WS – wrong side
Skills Needed to Make the Rib Knit Stitch
- How to make a knit stitch
- How to make a purl stitch
- How to cast on
- How to bind off
- How to weave in ends
- How to block (optional)
- How to read knitting instructions
Supplies Needed to Make a Practice Swatch
- Knitting Needles: For this practice swatch, I used size 7 (4.5 mm) needles by Knit Picks.
- Yarn: I used a CKC #4 Worsted-Weight Yarn. I used Knit Picks Wool of the Andes, 100% Wool, Worsted Weight Yarn.
- Scissors
- Tapestry Needle
Tip: I recommend using a reasonably priced 100% wool yarn in a light, solid color when just starting. It's easy to work with, blocks beautifully, and you can see your stitches clearly.
Notes
- This stitch pattern repeats every 2 rows and is worked on a multiple of 6 stitches.
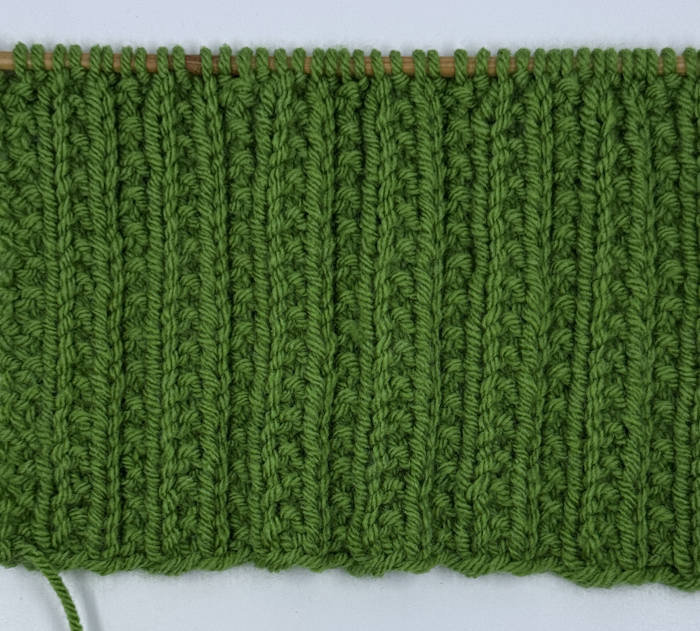
- This is a reversible pattern, meaning that it looks great on both sides.
- This pattern lies flat
 Wrong Side Showing of the Twin Rib Stitch
Written Instructions for Working Flat on Straight Needles
Written Instructions (Flat)
Cast on a multiple of 6 stitches (6, 12, 18, 24, 30, 36, etc.)
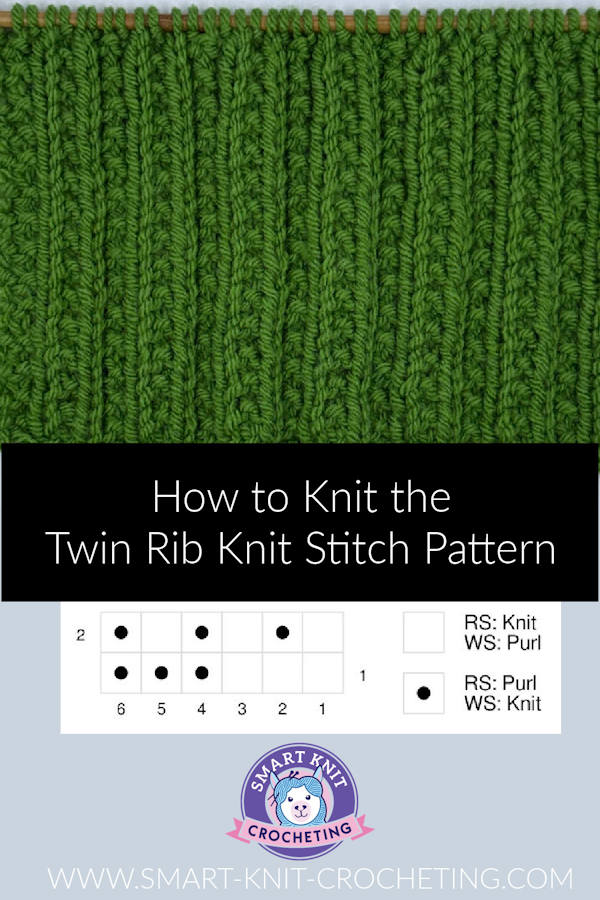
Row 1 (RS): *K3, p3; rep from * to end.
Row 2 (WS): *K1, p1; rep from * to end.
Repeat rows 1 and 2 for the pattern.
Written Instructions (In the Round)
Cast on a multiple of 6 stitches (6, 12, 18, 24, 30, 36, etc.) Place a stitch marker at the beginning of the round. Join in the round.
Round 1: *K3, p3; rep around.
Round 2: *K1, p1; repeat around.
Repeat rounds 1 and 2 for the pattern.
Knitting Instructions Presented in Chart Form for working flat

Troubleshooting and Additional Tips
My ribs don’t line up!
This is common when you first start to knit. Count your stitches at the end of every row. If they are not correct, go back and look at the stitches to determine if you got off somewhere on the row. Be sure you did not drop a stitch or make an accidental yarn over.
Edges curling?
This pattern should lie flat, but if you are making something like a dishcloth, consider adding four additional stitches on either side of the stitch pattern. You can either work these extra stitches as all knit stitches or in the seed stitch pattern.
Too tight?
If you find you are knitting too tightly, relax and let your tension ease. If that does not work, go up one needle size to see if that helps produce a fabric with a little better drape.
The stitches don’t look even
This is one of those beginner issues that will resolve with more practice. If you notice that the stitches between knits and purls are oversized, try tugging on the yarn slightly as you transition from a knit to a purl.
What can you make with the Twin Rib Stitch
- Twin rib socks
- Twin rib scarf or hat.
- Headband or Ear Warmer
- Twin rib fingerless mittens
More Rib Stitch Patterns More Knit and Purl Stitch Patterns
Frequently Asked Questions
What is the twin rib stitch?
What is the twin rib stitch?
The twin rib stitch is a simple variation of traditional ribbing that creates thicker, more defined columns. It combines knit and purl stitches in an alternating pattern, giving the fabric extra texture and stretch. It’s great for cuffs, scarves, and other projects that need a bit of elasticity. It is also a good stitch for a thick baby blanket.
Is the twin rib stitch reversible?
Is the twin rib stitch reversible?
Yes! One of the best things about the twin rib stitch is that it looks good on both sides of your work. Each side has a slightly different texture, but both are neat and attractive, perfect for projects like scarves, where both sides will show.
Can you knit the twin rib stitch in the round?
Can you knit the twin rib stitch in the round?
Definitely, the twin rib stitch works beautifully in the round, which makes it ideal for hats, sleeves, and socks. The stitch pattern doesn’t change; keep working around without turning your work at the end of each row.
How many stitches do I cast on for twin rib?
How many stitches do I cast on for twin rib?
The stitch usually works in a multiple of six stitches. But this may vary slightly depending on your pattern, so it’s always a good idea to check your gauge before you start.
What’s the difference between the twin rib stitch and a 2×2 rib?
What’s the difference between the twin rib stitch and a 2×2 rib?
While both stitches use knit and purl repeats, the twin rib stitch has a staggered pattern that shifts the ribs on alternate rows. This gives it a more textured look than the traditional 2×2 rib, which stacks the same stitches directly on top of each other.
Does the twin rib stitch curl at the edges?
Does the twin rib stitch curl at the edges?
No, not much! Because the twin rib stitch includes both knit and purl stitches, it naturally lies flat and resists curling, unlike the stockinette stitch. For extra neat edges, you can always add a few rows of garter stitch at the top and bottom.
What kind of projects can I use it for?
What kind of projects can I use it for?
The twin rib stitch is excellent for anything that needs stretching, like hats, cuffs, socks, and neckbands. It’s also lovely for scarves or blankets where you want a bit of texture without complicated shaping.
Last Words
And that’s it, you’ve learned how to knit the twin rib stitch!
It’s an easy pattern with a beautiful, professional finish that works well on a wide range of projects. Once you’ve got the rhythm down, try using it for scarves, cuffs, or cozy hats to show off its soft, textured look.


