- Home
- Knit and Purl Stitches
- Granite Lace Knitting Stitch
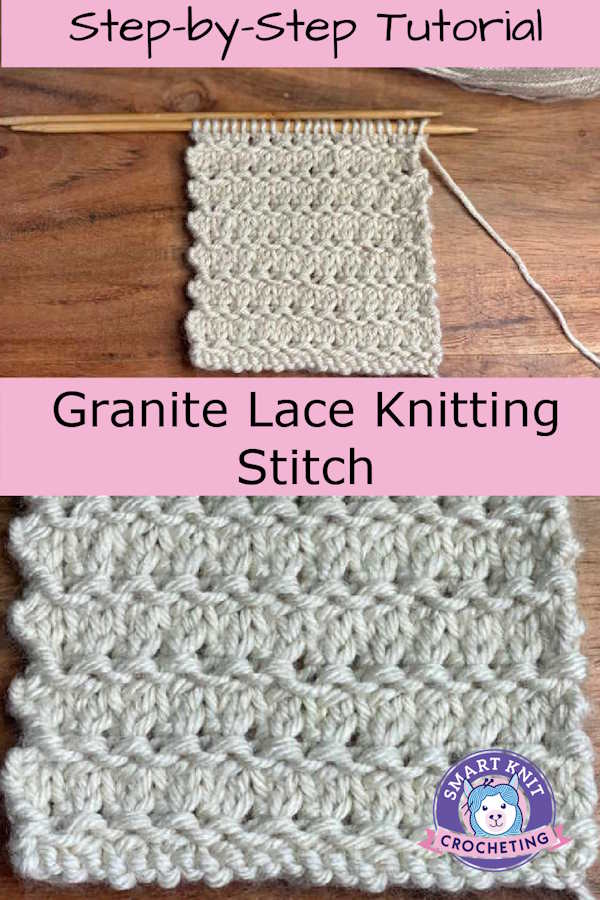
Granite Lace Knitting Stitch: Step-by-Step Tutorial
Granite Lace Knitting Stitch, by Janice Jones
The Granite Lace Knitting Stitch is an intriguing and sophisticated knitting pattern, often admired for its distinctive combination of complexity and elegance. The fabric produced is lacy and that criss-cross design is reminisce of granite rock.
It is slightly more challenging than the basic stitches because it introduces two new techniques, knit back and forth and knit two together, it's not as difficult as it looks. The row of decreases followed by a row of increases creates the lacy design.
Perfect for advanced knitters seeking to explore more innovative and expressive needlework or intermediate ones wanting to step up their game, Granite Lace Stitch lends itself wonderfully to a variety of projects like shawls, scarves, or stoles.
Skill Level

This pattern is considered Easy because it does have two skills (knit front and back) and (knit two together) are above the basic level.
Abbreviations Used
K - Knit
P - Purl
K2tog - Knit two together
KFB - Knit Front and back
CO - Cast On
BO - Bind off
RS - Right Side
WS - Wrong Side
Skills Needed
- How to make the knit stitch
- How to make the purl stitch
- How to cast on
- How to bind off
- How to Decrease in Knitting: How to make K2Tog (knit two together) - see below
- How to Increase in Knitting: How to do Kfb (knit front and back) - see below
Notes About the
- All instructions are written in US Terms.
- K2Tog is a single stitch decrease. To make this, with the yarn in back, insert the right knitting needle through the first TWO stitches on the left knitting needle as you would if you were only knitting one stitch. Wrap the yarn around the needle and pull through both stitches. pull through both stitches.
How to Make a K2Tog
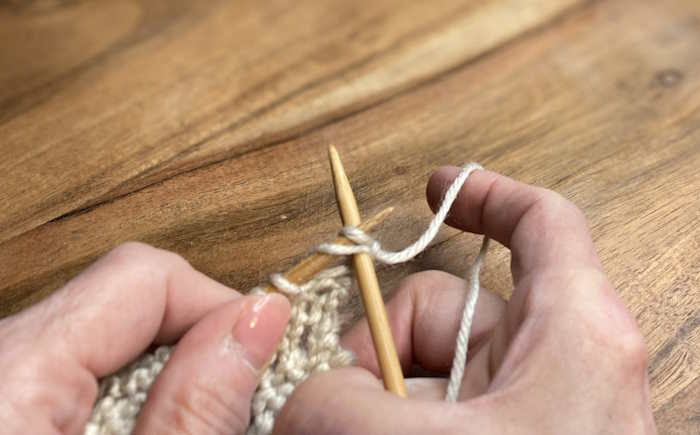 Step One: Insert the right knitting needle through the first TWO stitches on the left knitting needle as you would if you were only knitting one stitch.
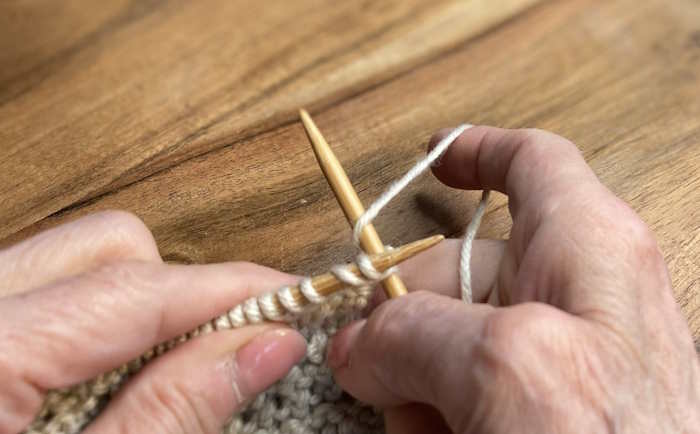 Step Two: Wrap the yarn around the needle as if making a knit stitch.
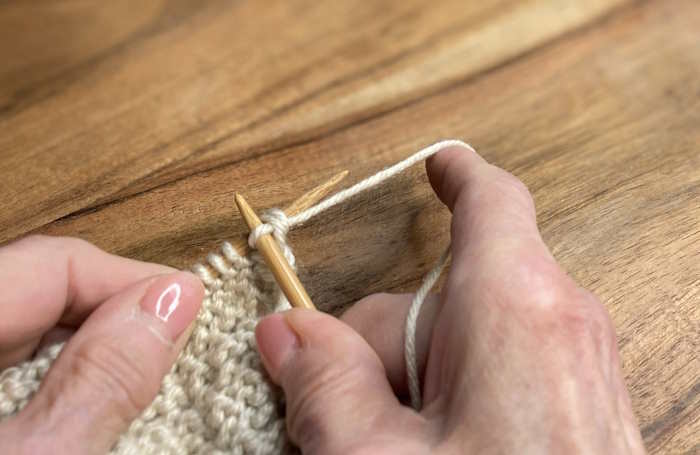 Step Three: Pull through both stitches.
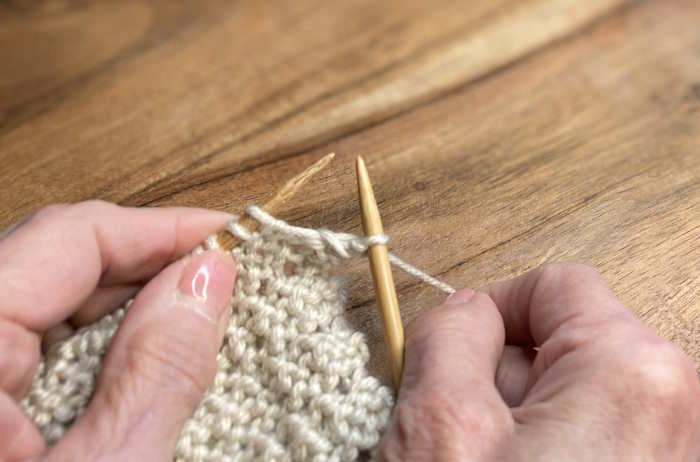 Step Four: Pull through both stitches, so you end up with one stitch from two stitches (one knit decrease).
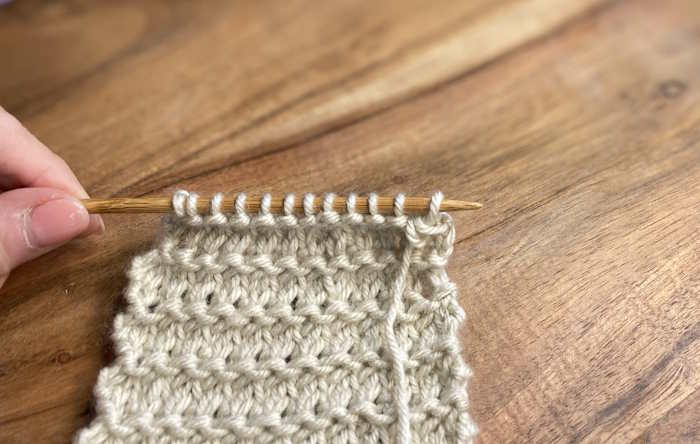 Step Five: For the Granite Lace Stitch, row two reduces by half the number of stitches on the needle.
- KFB: This stands for knit front and back and is a knitting increase. To make the KFB, insert the right needle into the next stitch on the left needle. Wrap the yarn around the needle and pull through but do not slide the stitch off the needle. Now, insert the right needle into the back of the same stitch and wrap yarn around needle. Pull through and slide stitch off of the needle. This creates two stitches were there once was one.
How to Make the KFB (Knit, Front and Back
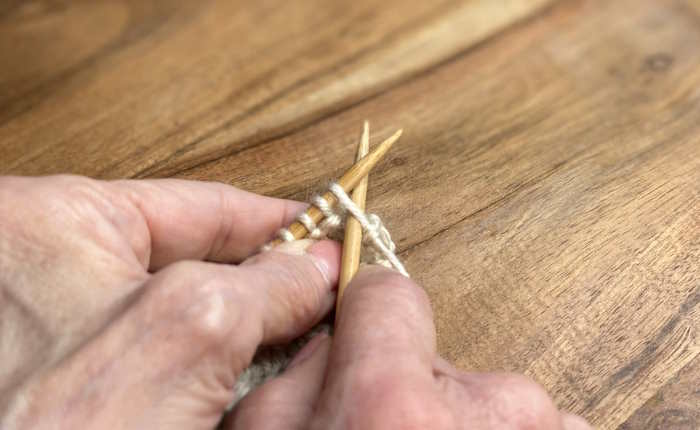 Step One: Insert the right needle into the next stitch on the left needle.
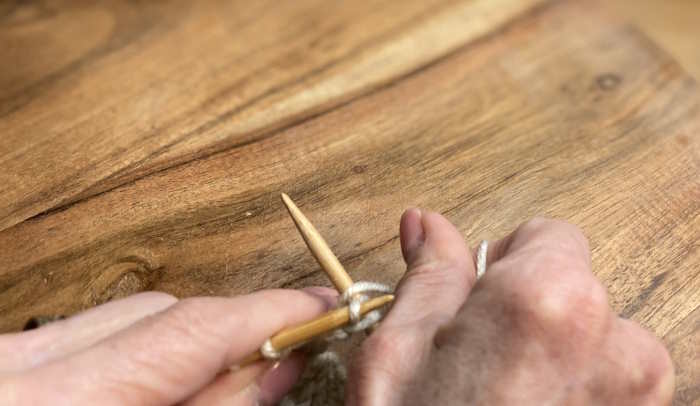 Step Two: Wrap the yarn around the needle to make a knit stitch.
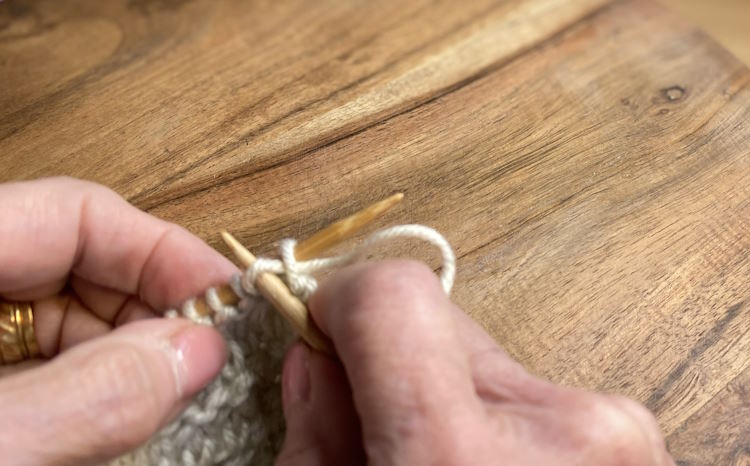 Step Three: Pull through but do not remove the stitch from the left needle.
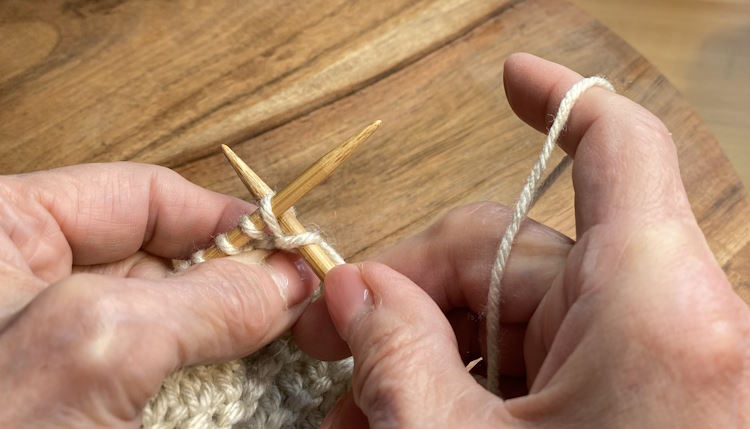 Step Four: Insert the right needle into the back loop of the same stitch.
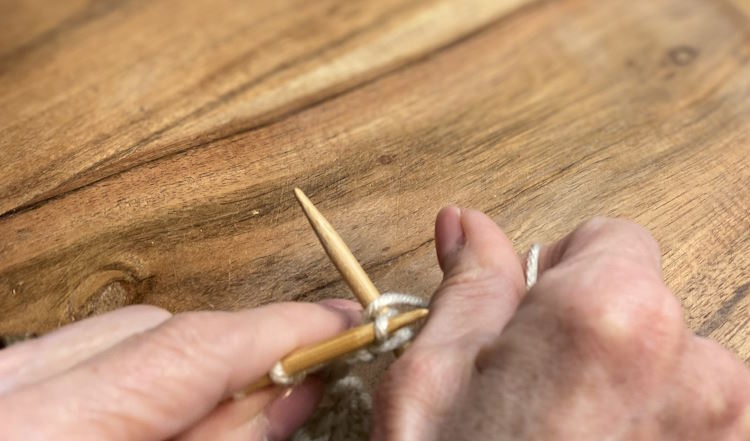 Step Five: Yarn over the needle and pull through.
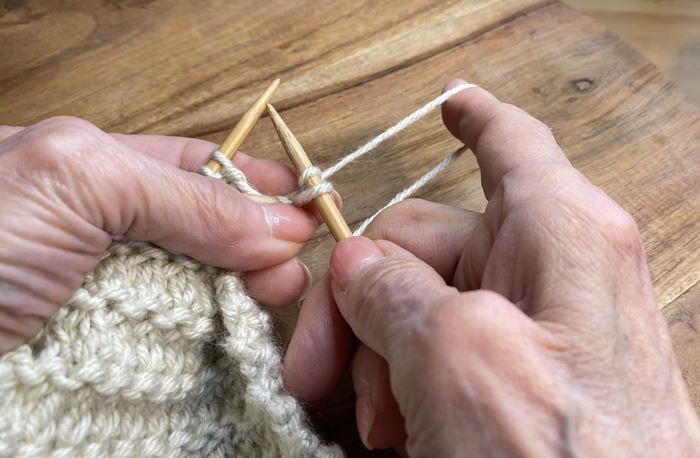 Step Six: Remove stitches from the left needle onto the right needle. You will now have two stitches where there used to be one. (Knitting Increase)
Is This Pattern Reversible?
This pattern is not reversible. The reverse side appears more like the reverse side of a stockinette stitch.
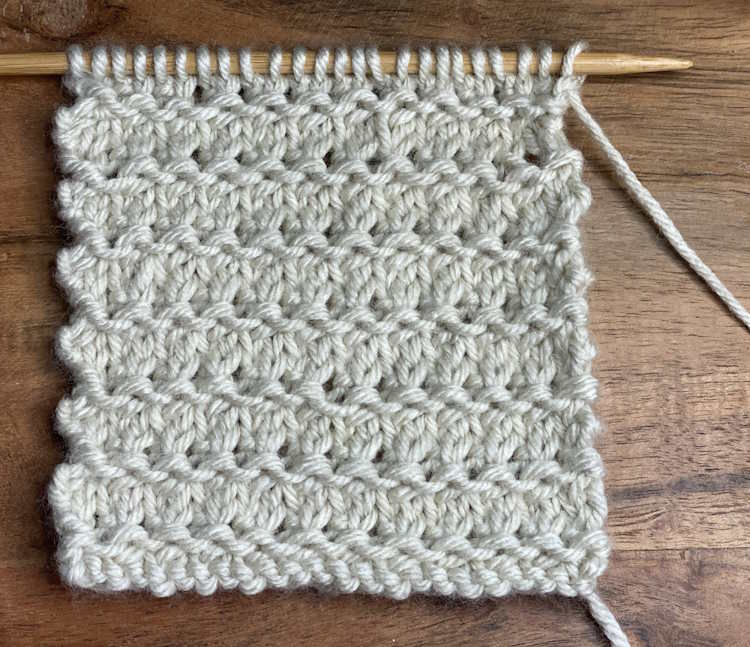 Granite Lace Knitting Stitch Pattern: Right Side
 Granite Lace Knitting Stitch Pattern: Wrong Side
Supplies Needed For This Tutorial
You will need:
- Yarn and appropriated sized needles
- Scissors
- Tapestry needle for weaving in end.
Written Directions
Cast on an Even Number of Stitches.
1. Row 1: (RS). Knit across row.
2. Row 2: (WS). *K2Tog* across row.
3. Row 3: *KFB* across row.
4. Row 4: Purl across row.
Continue these four rows until you reach your desired length. Bind off and weave in ends.
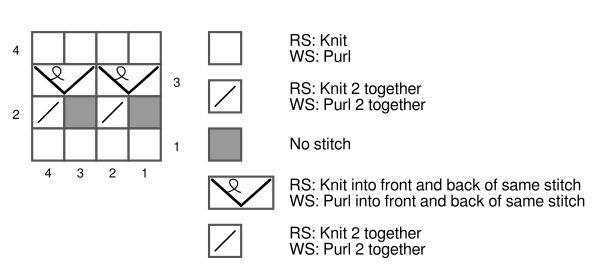
Learn How to Read Knitting Stitch Charts
As you progress in your knitting journey, you will encounter knitting charts to help decipher or enhance written instructions. This stitch pattern is easy and a knitting chart is really not necessary, but it is never too early to learn how to read a knitting charts.
Granite Lace Knitting Stitch
What Can You Make With This Stitch
This stitch pattern works nicely in scarves, shawls and blankets, projects where you want a lot of drape. I think it would make a lovely table runner or individual placemats.
Granite Lace Knitting Stitches: Pin for Future Reference
Conclusion
In conclusion, mastering the granite lace stitch requires eagle-eyed focus and practice. Once you have memorized the four row repeat, it will go quickly.
An exquisite handmade item such as a scarf, shawl, or even a baby blankey can serve as a heartfelt gift, or a stunning addition to your collection. As with any craft, it is a journey of discovery and skill acquisition, and the satisfaction of completing the granite lace stitch pattern makes every stitch worth the effort.
Happy Knitting,
Janice
Hi, I'm Janice, the person behind this website. I learned to knit and crochet at a very young age but didn’t get serious until obtaining this site in 2021.
Since then, I haven’t stopped creating and learning and now I’m a certified knitting and crocheting instructor through the Craft Yarn Council.
